6
EN
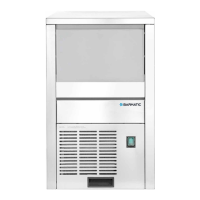
4. Location and Installation
• Remove the appliance from the packaging. Make
sure that all protective plastic film and coatings
are thoroughly removed from all surfaces. To
prevent injury or damage to the unit, we recom-
mend that the appliance should be unpacked
and set up by two people.
• The climatic class can be found on the rating
plate. It specifies the ambient temperatures at
which the appliance may be operated. The rating
plate can be found inside the appliance.
Climate
Class
Max. Ambient
Temperature
Relative
Humidity
3 25 60%
4 30 55%
5 40 40%
• Maintain a distance of 20 cm (7 inches) between
the appliance and walls or other objects for ven-
tilation. Increase this distance if the obstacle is
a heat source.
• The appliance should be placed on a solid flat
and stable floor to reduce noise and vibration.
Level the appliance by adjusting the feet.
• Avoid locating the unit in direct sunlight or near
heat sources such as ovens or radiators.
• Please make sure the appliance is properly
ventilated.
• Check that the power supply and voltage used
comply with the details on the rating plate. The
plug must be accessible after installation.
• Correctly connect and disconnect the plug. When
inserting ensure the plug is fully engaged. While
unplugging hold the body of the plug. Never pull
the supply cord directly.
• If the unit is to be shut down for long period,
switch it off and disconnect the plug from socket
outlet. Clean the appliance and leave the door
open to prevent odour.
• Important! For your personal safety, this ap-
pliance must be properly grounded (earthed).
This appliance is equipped with a cord having a
grounding wire with a grounding plug. The plug
must be inserted into an outlet that is properly
grounded and installed. Consult a qualified elec-
trician or service centre if you do not completely
understand the grounding instructions. If doubt
exits whether the appliance is properly ground-
ed, have a qualified electrician check the circuit
to make sure the outlet is properly grounded.
• If the cable does not reach the nearest socket,
either rearrange your store layout or ask a qual-
ified electrician to fix a new socket.
• If power is cut off, wait for at least 3 minutes be-
fore restarting the appliance to avoid damaging
the compressor.
• Connect one end of the corrugated water out-
let hose to the water outlet on the rear of the
ice maker. Attach the other end of the hose to a
plumbed-in stand waste pipe or container suit-
able for collecting waste water and try to keep
the hose as straight as possible. Ensure the end
of the drainage pipe is situated lower than the
Water Outlet valve for efficient drainage.
• Connect the bended end of the water inlet pipe
with the water inlet valve at the back of the ap-
pliance. Connect the other end of the inlet hose
with the water supply (Standard size: 3/4”). Make
sure that sealing washers are in the correct po-
sition before connecting the inlet water pipe with
water supply and machine inlet valve.
Note: If the unit has not been stored or moved in
an upright position, let it stand upright for approxi-
mately 12 hours before operation.
Note: Before using the appliance for the first time,
clean the interior with soapy water.
 Loading...