8 9
1
3
4
5
2
A
B
D
F
C
I
G
E
H
How To Use The Professional Tripod
1. To adjust height of legs release upper and lower leg locks (2 and 3). Extend
legs to desired height and lock upper and lower leg locks.
2. If spiked feet are needed, unscrew rubber feet (4) to expose spikes.
3. To change angle of leg spread push down variable angle leg spread button (E)
and gently pull leg out for desired angle. Release button. Repeat this step with
other legs.
NOTE: When pushing legs back to original position. It is normal to
hear clicks from the variable angle leg button.
4. To adjust center column height, loosen center column height knob (F), slowly
raise column by holding head (1) to desired position and tighten in place.
5. Make sure locks/knobs are locked/tight (2,3,D,and F), and the tripod is on a
stable surface.
6. To release mounting platform (B) pull down the quick release knob (C) and
slide out of place. Under mounting platform will be a knob. Attach mounting
platform to the bottom of device and tighten into place. Carefully slide entire
assembly back into place on head. Tighten knob on the opposite side of the
leveling bubble (not pictured).
NOTE: Mounting maximum weight is 8.82 lbs.
7. With mounted item securely in place, point the objective lens to the object, look
through the eyepiece and slowly move pan and tilt control handle (A) to
desired position. Tighten the tilt lock knob (G) to secure your viewing angle.
8. The leveling bubble (H) is used to level the head of the tripod allowing for
optimum viewing and picture taking. The head of the tripod is level when the
bubble is centered between the black lines.
9. To release the mounting platform (B), pull down the quick release knob (C) and
slide out of place. Under mounting platform will be a screw. Loosen screw from
viewing object until both pieces are separated. Carefully slide mounting
platform back on to head.
How To Take Care Of The Professional Tripod
1. When not in use, lower tripod legs to minimum height with upper and lower
locks (2 and 3), lower center column to minimum height (F) and secure
in place.
2. Place tripod in carrying case (included) and store your tripod in a cool dry area.
Professional Tripod
This tripod is ideal for the extreme outdoors. The
rubber feet of this tripod can be exposed to reveal
spikes that can be placed in uneven ground, such as
in between rocks. Another useful feature of this tripod
is it’s variable angle leg spread. Each leg can be
angled independently from 45˚ to 175˚. Which is ideal
for leaning the tripod against an angled wall. This
tripod can support camcorders, cameras, spotting
scopes, and large binoculars.
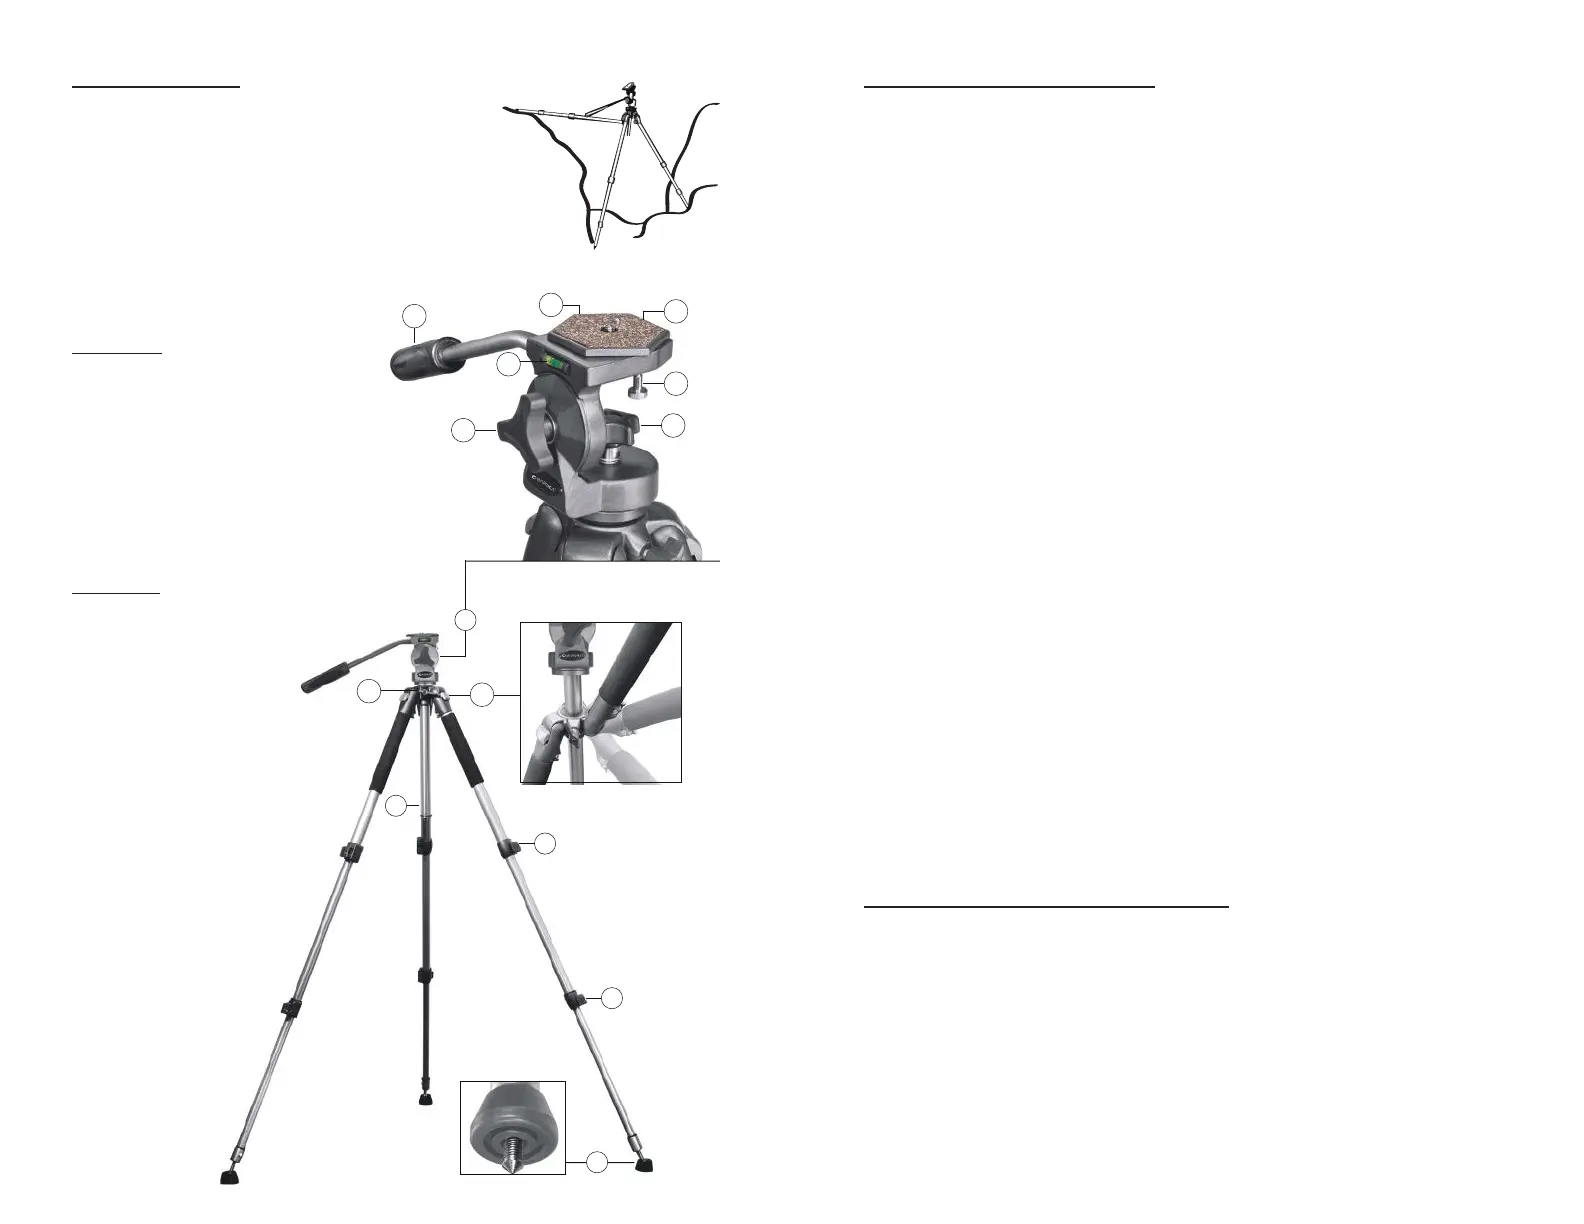
Head Parts
A - Pan and Tilt Control Handle
B - Mounting Platform
C - Quick Release Knob
D - Head Knob
E - Variable Angle Leg Spread
F - Center Column Height Knob
G - Tilt Knob
H - Leveling Bubble
I - Tighten Knob
Body Parts
1 - Head
2 - Upper Leg Locks
3 - Lower Leg Locks
4 - Feet, with Spikes
5 - Center Column
 Loading...