BP161216
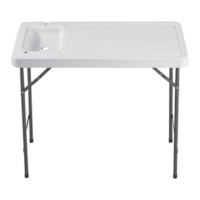
FOLDING PROCESSING TABLE
SETUP INSTRUCTIONS
This assembly consists of 9 parts: drain plug, drain screen, 2 large black rubber washers, 1 smaller black rubber washer, screw, nut,
sink drain fitting, and drain hose.
1) Place one of the large black washers on the lip, inside the drain hole.
2) Then, place the drain screen in the hole on top of the washer.
3) Next, place the second large rubber washer on the lip inside the wide end of the sink drain fitting.
4) Place the nut into the recess in narrow end of the fitting.
5) Use your finger to hold the nut in place. Position the fitting, wide end up, under the sink hole so that the lower portion of the drain
screen rests in the fitting.
6) Use your free hand to insert the screw down through the center hole of the drain screen until it meets the nut.
7) Hand-tighten the screw through the nut as far as possible, then use a regular screwdriver to snug down.
8) Find the female threaded end of the drain hose and insert the smaller black washer so that it rests on the interior lip.
9) Screw the threaded end onto the sink drain fitting and tighten.
10) The hose can then be extended and bent to direct runoff flow in the desired direction.
11) Place the drain plug in the drain screen to hold water in the sink if needed.
1) Remove station from the box and position it sink-side down on the ground so that the support legs are accessible.
2) Find the outermost leg assembly, and pull outward from the rubber foot end. The leg assembly will unfold until it is at a right angle to the station.
3) You will find 2 support struts where the leg assembly meets the table. Make sure that both are locked completely straight to ensure the stability of the station.
4) Repeat this same process with the innermost leg assembly.
5) Once complete, flip the entire station upside down so that both sets of feet are resting on the ground and the sink side is now facing upward.
This assembly consists of 4 parts: faucet, faucet nut, extension hose, and compression fitting.
1) Begin by inserting the threaded male end of the faucet down through the faucet hole in the tabletop.
2) Thread the faucet nut onto the threaded end of the faucet underneath the table. The hexagonal side of the nut should be facing the ground.
3) Tighten the nut until the upper portion of the faucet is snug and flush to the tabletop.
4) Next, thread the female end of the extension hose onto the excess threading at the end of the faucet under the table. Screw on until tight.
5) If you are using a standard garden hose with a brass fitting, insert the fitting into the female end of the extension hose and tighten.
6) If you are using a hose with no fitting, insert the threaded end of the compression fitting into the female end of the extension hose and tighten. Insert the barbed end of
the compression fitting into the unfinished end of the hose. Apply pressure and push in until secure. Standard, plastic cable ties can be applied around the hose to
further secure the connection (not included).
Spray tabletop with water and use a soft bristle brush to whisk away minimal fish or game remains. Disassemble the drain and rinse to ensure that it is clear of debris.
Allow to dry thoroughly before storage. To extend the life of this product, it is recommended that it be stored in a dry location.
Step 1: TableSetup
Step 2: Drain Assembly
Step 3: Faucet Assembly and Hose Attachment
Step 4: Cleaning and Storage
Bass Pro Shops
®
2500 E. Kearney
Springfield, MO 65898
1-800-BASS PRO
Made in China.