Questions? Visit BathRoyale.com or call (704) 589-1009
Installation Instructions
4
Important: Mounting surface of toilet must be at, clean and dry with no chemical residue. To prepare
mounting surface, we recommend using Windex® (or any glass cleaner) around the mounting holes of
the toilet to get the mounting surface squeaky clean.
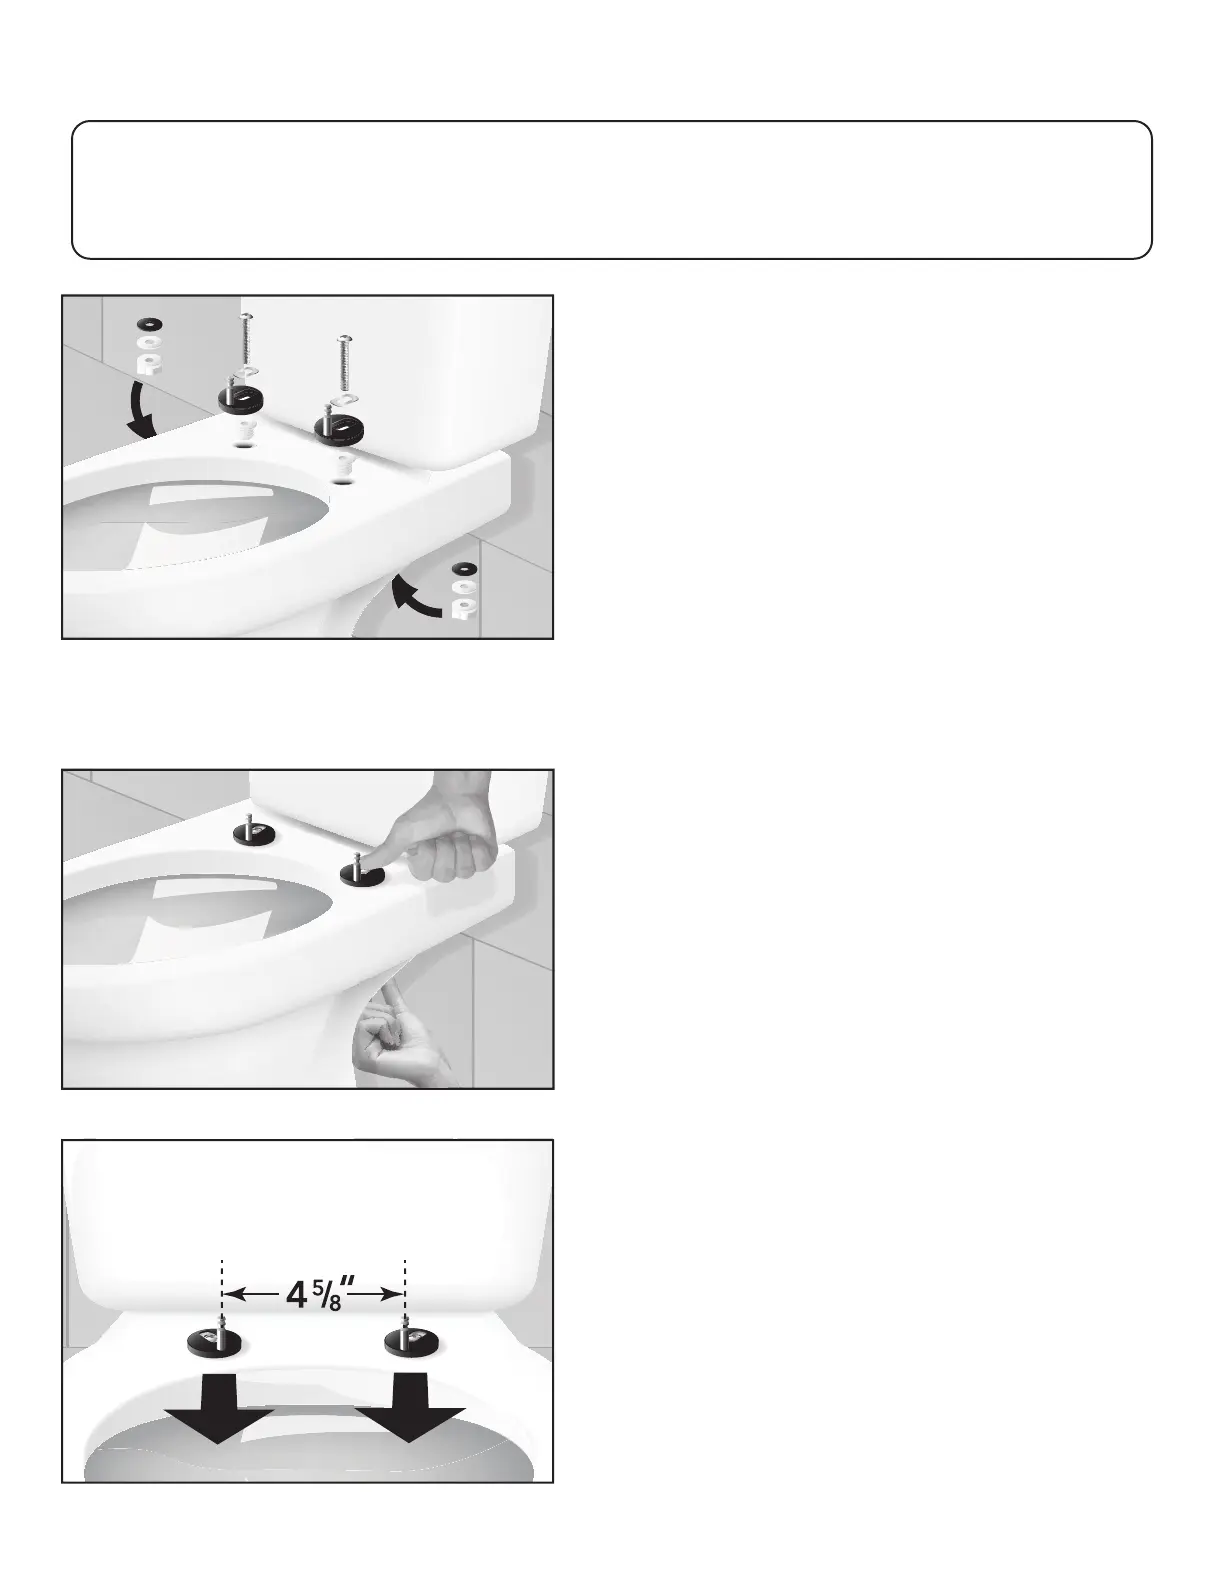
1. Install mounting bases on toilet bowl.
a. Push clear plastic ribbed inserts into the holes in the
toilet and place mounting bases over holes with
posts facing front of bowl.
b. Place stainless steel washers in mounting base slots
and insert screws through the washers, mounting
bases and clear ribbed inserts.
c. Stack washers on wing nuts and thread on to
screws. Note: The black rubber washer goes on
rst, then the white washer and nally, the wing nut.
Tip: Mounting bases rotate 360 degrees allowing
seat to be adjusted and t non-standard hole
spacings (4 ½ to 6 ½ inches).
2. Hand-tighten wing nuts.
Do not completely tighten the wing nuts. The
mounting bases must be able to move so the seat
can be attached and adjusted.
Tip: Place thumb or nger on the screw head to
keep it from turning.
1.
2.
3.
3. Adjust mounting bases.
a. Rotate mounting bases so the posts face forward
(closest to the front of the bowl, not tank).
b. Using a tape measure or ruler, adjust the
mounting bases so the posts are 4
5
/
8
inches apart
(this is the distance between the mounting holes
in the seat).
Do not completely tighten the wing nuts.