EasyManua.ls Logo

Bath Royale Round BR500 User Manual

Bath Royale Round BR500
6 pages
To Next Page IconTo Next Page
Page #1 background imageLoading...
Page #1 background image
Questions? Visit BathRoyale.com or call (704) 589-1009 1
Models: BR500 Round / BR501 Elongated
Executive Toilet Seat with
Slow Close & Quick Release
Tools Required:
Phillips Head Screwdriver
Tape Measure or Ruler
Installation Instructions
Installation is not difcult, but it is VERY DIFFERENT from other seats. Please follow these
instructions step-by-step. (Video available at BathRoyale.com).
MISSING PARTS? Please do not return your seat. Call (704) 589-1009 or email
info@BathRoyale.com for replacement parts.
Parts List
NOTE: Toilet bowls without access to nuts under seat require top mount anchors sold
separately at BathRoyale.com
Toilet seat with lid (1)
Note: Seat must be installed for Slow Close
to work.
Mounting base covers (2)
Note: Stainless steel covers are available
at BathRoyale.com
Stainless steel screws (2)
Stainless steel mounting bases with post
and silicone rubber seal on bottom (2)
Gray split wing nuts (2)
Note: DO NOT turn wing nuts (see page 2)
Question and Answer IconNeed help?

Do you have a question about the Bath Royale Round BR500 and is the answer not in the manual?

Bath Royale Round BR500 Specifications

General IconGeneral
BrandBath Royale
ModelRound BR500
CategoryPlumbing Product
LanguageEnglish

Summary

Installation Instructions

Parts List

List of all included components for the toilet seat installation.

Install Mounting Bases

Place mounting bases over holes and insert screws.

Install Wing Nuts

Thread wing nuts onto screws without turning the nuts directly.

Adjust Mounting Base Position

Adjust mounting bases to align posts for seat attachment.

Attach Seat to Mounting Posts

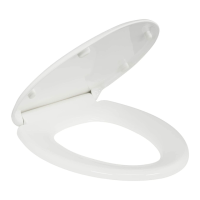
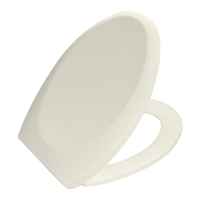
Lower the seat onto the mounting posts, ensuring proper insertion.

Test Slow-Close Function

Gently close the seat and lid to test the slow-close function.

Final Seat Adjustment

Align the seat with the bowl and adjust its overhang.

Tighten Screws and Final Check

Ensure alignment and firmly tighten screws or wing nuts.

Remove Seat for Final Tightening

Lift the seat straight up from the mounting posts to detach it.

Install Mounting Base Covers

Fit the decorative covers over the installed mounting bases.

Re-attach Seat

Align and lower the seat back onto the mounting posts.

Care and Cleaning Advice

Avoid spraying mounting bases directly; spray cloth first.

Installation Troubleshooting

Advice on seat bumpers, staying open, and further resources.

Related product manuals