Questions? Visit BathRoyale.com or call (704) 589-1009
Installation Instructions
4
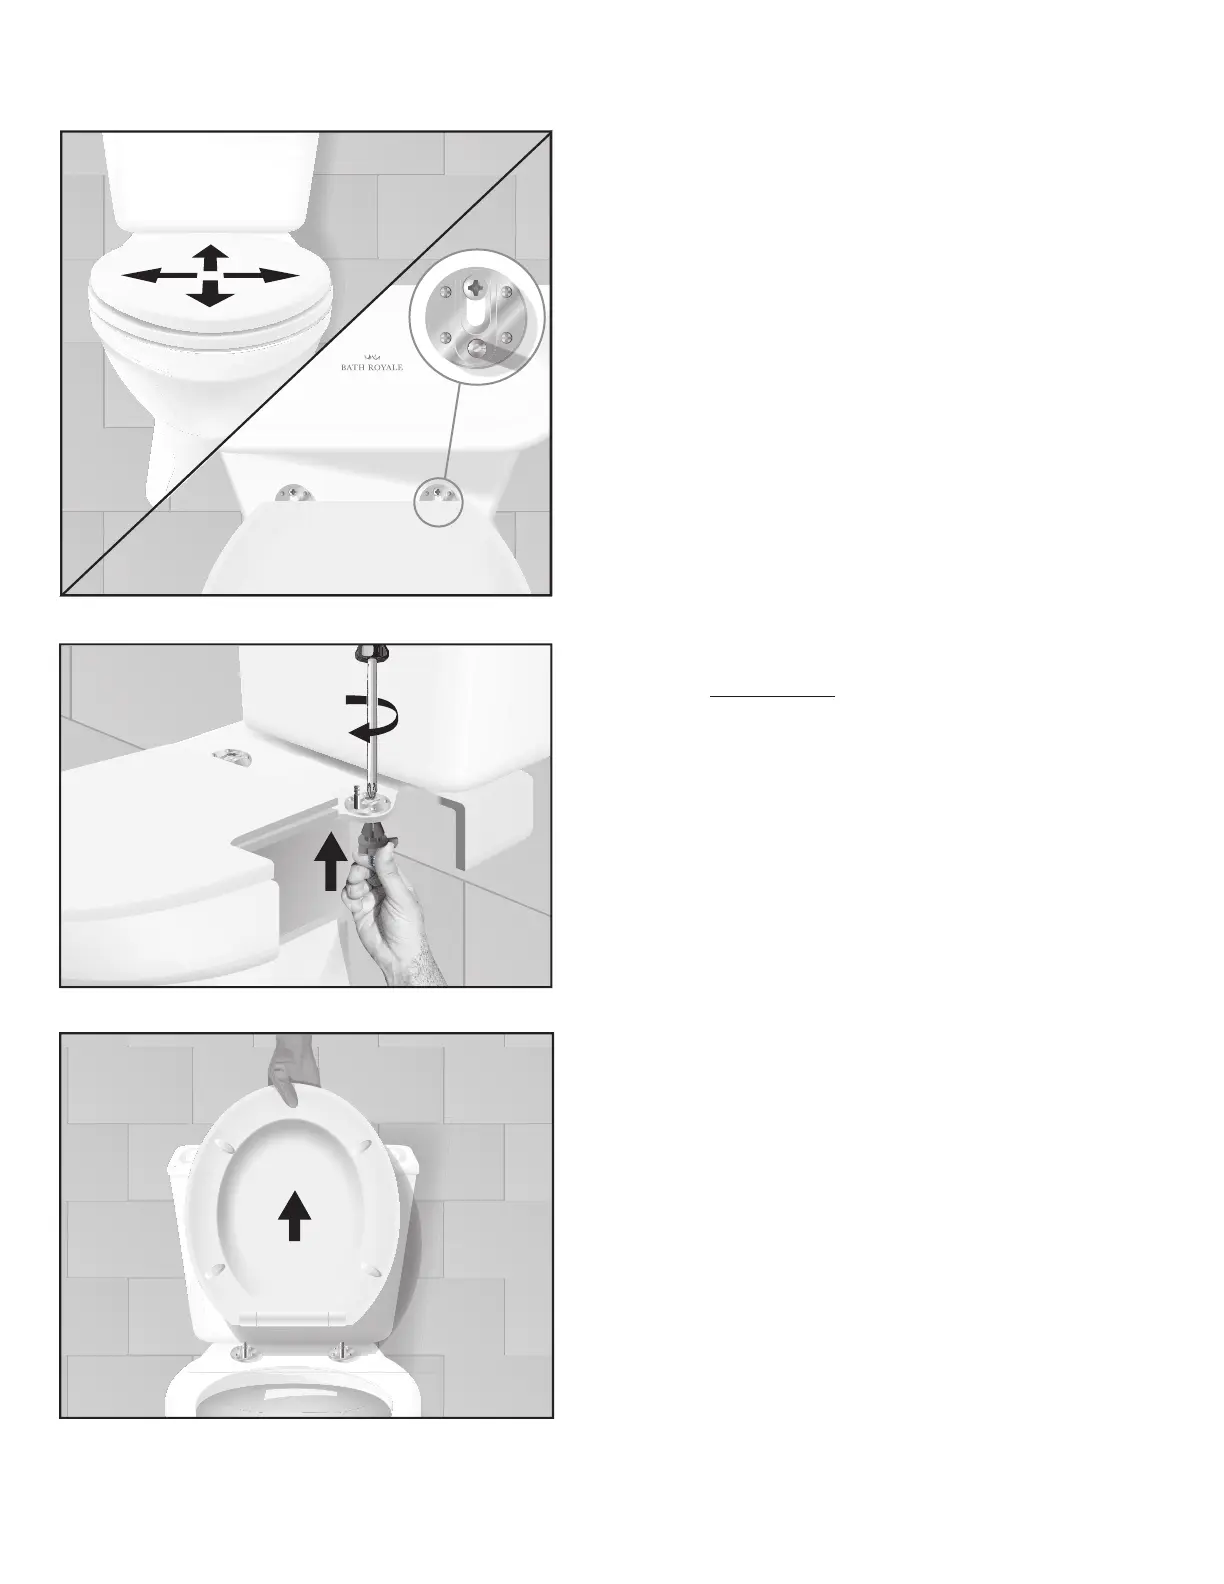
6. Adjust Seat
With the lid closed, align seat with bowl by moving
the seat and mounting bases together.
Tip: Lift mounting bases to unstick from bowl
(loosen screws if necessary). We recommend
installing the seat overhanging the front of the
bowl by ¼ inch, so the seat can be lifted more
easily without touching the toilet bowl.
Tip: In most cases, screw heads will be towards
back of screw slot (see drawing). Don’t worry
if screw positions don’t match on both sides.
Hole positions can vary slightly on all toilets.
7. Double check seat alignment and tighten
screws very rmly.
Tip: If screw heads are obstructed by the seat,
remove seat for nal tightening (see next
step).
Tip: If wing nuts are turning, hold them for nal
tightening. If not tightening, re-visit Step 2 for
proper threading.
8. Remove seat.
Open seat and lid. (Hinges will pivot and you will
feel some resistance. This is normal and the seat
should remain connected to the posts).
With seat open to vertical position (90 degrees
from closed), lift straight up to remove seat.
Tip: If seat does not release, lean it back slightly
further (i.e. 100 degrees), then forward to 85
degrees and lift up.
Tip: Quick Release automatically ‘unlocks’ at 85-90
degrees and ‘locks’ at any other angle (closed
or partially closed).
7.
6.
8.