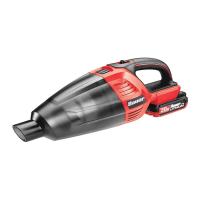
Page 8 ;&(%$*4.8"4,7%<'*#$"&8#=%/7*,#*%4,77%>?@@@?@AA?BCDC1 Item 64148
EF;6GH IJ6KFGLIM NFLMG6MFMO6E6GPJ
O7*,8"83%U'#$%O'/%,89%;"7$*(
% G&%*8#'(*%/(&/*(%&/*(,$"&8=%47*,8%$.*%U'#$%O'/%,89%O7&$.%;"7$*(%(*3'7,(7X1%%U,5,3*9%
;"7$*(#%#.&'79%+*%(*/7,4*91%%U"#4&88*4$%S,$$*(X%J,4V%+*2&(*%47*,8"83%!,4''51
U'#$
O'/
K*7*,#*
S'$$&8
;"7$*(%
F##*5+7X
;"7$*(%
O&Z*(
;"7$*(%
E*,7
;"7$*(%
O&Z*(
O7&$.
;"7$*(
O7&$.
;"7$*(
;"7$*(%
S,#V*$
U'#$
O'/
;"3'(*%O
UPEG%OPJ:
1. Press the Release Button to separate the
Dust Cup from the Motor Housing.
2. Remove the Filter Assembly from the Dust Cup.
3. Shake the Dust Cup over a waste bin and, if
dirty, wipe it with a moist clean cloth. Allow
it to dry before reassembling the Vacuum.
4. Empty the Filter contents into a waste bin.
5. Inspect and, if needed, clean the Filter
by following steps 3-10 in ;LTG6K.
6. Insert the clean Filter Assembly into the
Dust Cup and reattach the Motor Housing
to the Dust Cup by pressing them together
until the Release Button engages.
;LTG6K-
1. Press the Release Button to separate the
Dust Cup from the Motor Housing.
2. Remove the Filter Assembly from the Dust Cup.
3. Remove the Filter Cover from the Filter Seal
by twisting them apart as shown in Figure C.
4. Remove the Cloth Filter along with its Filter Basket
from the Filter Cover and clean with a soft brush.
5. If needed, the Cloth Filter and Filter Basket can be
separated, and washed in mild soap and water.
6. Rinse all soap and dust out thoroughly.
7. F77&)%$.*%O7&$.%;"7$*(%$&%9(X%2&(%,$%
7*,#$%&8*%9,X%+*2&(*%(*"8#$,77"831
QFKMLMRf%%L8#$,77"83%,%)*$%O7&$.%;"7$*(%
)"77%"84(*,#*%$.*%("#V%&2%*7*4$("4%#.&4V%
,89%5,X%9,5,3*%$.*%Z,4''51
8. To reinstall the Filter, insert the Filter Basket
into the Cloth Filter and then both items into
the Filter Cover. Be sure the Cloth Filter
covers the Filter Cover completely.
9. Attach the Filter Seal to the Filter Cover by twisting
them together as shown in Figure C. The Filler
Seal should be on snug but do not over-tighten.
10. Insert the clean Filter Assembly into the
Dust Cup and reattach the Motor Housing
to the Dust Cup by pressing them together
until the Release Button engages.