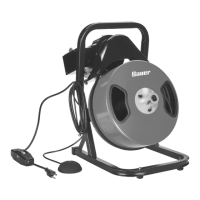
Page 13For technical questions, please call 1-888-866-5797.Item 59533 59534
SAFETYOPERATIONMAINTENANCE SETUP
Work Area Set-Up
1. Verify work area has adequate lighting for job.
2. Confirm work area is free of flammable liquids,
vapors or dust that may ignite. Sparks can be
generated during Drain Cleaner operation.
Do not work in area until sources of ignition
have been identified and corrected.
3. Choose a firm, stable location for machine
and operator that will remain relatively dry.
Do not use machine while standing in water.
If needed, remove water from work area.
4. Verify electrical outlet is properly grounded.
A three-prong or GFCI outlet may not be
properly grounded. If in doubt, have outlet
inspected by a licensed electrician.
5. Make sure a clear, unobstructed path from
Drain Cleaner to electrical outlet exists.
6. Inspect drain to be cleaned. Determine best
access point(s) to drain, size(s) and length(s)
of drain, distance to tanks or mainlines, nature
of blockage, presence of drain cleaning
chemicals or other chemicals, etc.
7. If chemicals are present in drain, read and adhere
to specific safety measures required to work around
those chemicals. Contact chemical manufacturer
for required safety instructions and information.
8. If necessary, remove fixture (toilet, sink, etc.)
to allow access to drain. Do not feed cable
through a fixture. This could damage
Drain Cleaner and fixture.
9. Determine correct drain cleaning cable size for drain
cleaning job. See Cable/Pipe Size chart below.
Cable
Size
Pipe
Size
Typical Applications
1/2″
(included)
2″ to 4″ Roof stacks and small
floor drains (no roots)
3/8″ 1-1/2″ to 3″ Roof stacks, laundry lines
and small drains (no roots)
10. If needed, place protective covers over
work area floor. Cleaning a clogged
drain can be a messy operation.
11. Make sure Drain Cleaner handle is locked in
upright position for transport. If Drain Cleaner
needs lifted, use proper lifting techniques or
seek assistance. Use caution when moving
equipment up and down stairs. Wear appropriate
footwear to prevent slipping on floor.
12. Set Drain Cleaner so drum opening is within 2
feet of drain access. The greater the distance
from drain access, the higher risk
of cable twisting or kinking.
13. If machine cannot be placed with drum opening
within 2′ of drain access, use appropriate-
sized pipes and fittings to extend drain access
back to within 2′ of drum opening. Improper
cable support can allow cable to kink and twist
and damage cable or injure the operator.
14. If needed, set up barriers to keep bystanders away
from Drain Cleaner and work area during operation.
15. Select proper cutting tool.
(See Cutting Tool Accessories on page 9).
16. Install tool to end of cable as described in
Cutting Tool Accessories on page 9.
17. Position Foot Switch for easy accessibility. You
must be able to hold and control cable, control
Foot Switch, and reach Rotation Switch.
18. Confirm Rotation Switch is in OFF position.
19. Run cord along clear path. With dry hands, plug
Drain Cleaner into properly grounded outlet.
20. If power cord is not long enough, use extension
cord in good condition and has a three prong plug
similar to that supplied on Drain Cleaner. Keep
connection off ground to prevent it getting wet.
21. Verify that extension cord is rated for
outdoor use is marked with a suffix letter
W or W-A in cord designation.
22. Verify extension cord has sufficient wire size
for length (see Extension Cords on page
6.) Undersized wires can overheat, melting
insulation or causing a fire or other damage.
23. When using an extension cord, GFCI on
Drain Cleaner does not protect extension cord. If
outlet is not GFCI protected, use plug-in type GFCI
between outlet and extension cord to reduce risk
of shock if there is a fault in the extension cord.
 Loading...