Page 10 ;&(%$*4.8"4,7%<'*#$"&8#=%/7*,#*%4,77%>?@@@?@AA?BCDC1 Item 64995
EF;6GH IJ6KFGLIM NFLMG6MFMO6E6GPJ
I/*(,$"83%L8#$('4$"&8#
%K*,9%$.*%6MGLK6%LNJIKGFMG%EF;6GH%LM;IKNFGLIM%#*4$"&8%,$%$.*%+*3"88"83%&2%$."#%
5,8',7%"847'9"83%,77%$*Z$%'89*(%#'+.*,9"83#%$.*(*"8%+*2&(*%#*$%'/%&(%'#*%&2%$."#%/(&9'4$1
GI%JK6!6MG%E6KLIPE%LMePKH-%
S*2&(*%&/*(,$"83%$.*%$&&7=%/'$%&8%#,2*$V%3&337*#=%47&#*9?$&*%)&(X%+&&$#=%7&83%/,8$#=%
,89%&$.*(%#,2*$V%3*,(1%
GI%JK6!6MG%E6KLIPE%LMePKH%FMU%JKIJ6KGH%UFNFR6-%
L8#/*4$%$.*%,(*,%+*2&(*%'#"83%$.*%E$("83%G("55*(1%%K*5&W*%,77%.,(9%&+[*4$#%2(&5%)&(X%,(*,1%%%
P#*%+&$.%.,89#%).*8%&/*(,$"83%G("55*(1
GI%JK6!6MG%E6KLIPE%LMePKH%;KIN%FOOLU6MGFT%IJ6KFGLIM-%
N,X*%#'(*%$.,$%$.*%G("33*(%"#%"8%$.*%&22?/&#"$"&8%,89%(*5&W*%
S,$$*(V%J,4X%+*2&(*%#*$$"83%'/%$.*%$&&71
O.,(3"83%S,$$*(V%J,4X
Charge Battery Pack according to the instructions included with the
20 V Bauer Battery Charger (both sold separately).
F'$&5,$"4%T"8*%;**9*(
MIGLO6-%%G&%/(*W*8$%9,5,3*%$&%G("55*(=%
UI%MIG%SPNJ%EJIIT%^IPELMR%IM%RKIPMU1%%%
G."#%#$("83%$("55*(%2**9#%T"8*%,'$&5,$"4,77V%
).*8%#$&//"83%,89%(*#$,($"831
1. With Trimmer running, release Trigger and allow
Trimmer to stop fully, then press Trigger Safety
Lock and Trigger to restart. Line will be fed
out and cut to proper length by Line Cutter.
2. If Trimmer is not cutting correctly, Spool may
be tangled. Remove Spool and rewind Line.
3. To advance Line by hand, push Line Outlet Button
on Spool Housing and pull out Line at the
same time. Approximately 1/4" of Line can be
pulled out each time the button is pushed.
G("55*(%I/*(,$"&8
1. Remove Battery Pack.
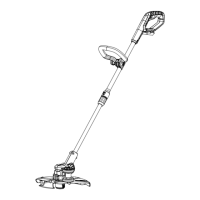
2. Adjust Auxiliary Handle as necessary.
Loosen Auxiliary Handle Lock Knob and
move Handle to desired position. Tighten
Lock Knob securely after adjustment.
3. Adjust length as necessary by turning
Extension Lock clockwise, pulling Extension
Tube out to desired length, then turning
Extension Lock counterclockwise securely.
4. Adjust head angle by rotating the Head Angle
Knob to the unlock position, moving head
until desired angle is achieved, then rotating
Head Angle Knob back to the lock position.
5. Pull Edge Guide out until it locks into place.
6. If using Wheel Assembly for trimming refer to
Installing Wheel Assembly on page 8.
7. Install fully charged Battery Pack.
8. Put on safety goggles.
MIGLO6- G&%/(*W*8$%9,5,3*%$&%$&&7%&(%/(&/*($V=
avoid contact with fences, trees, shrubs and the like.
9. Holding Trimmer with both hands, press
Trigger Safety Lock, then press Trigger.
10. UI%MIG%K6EG%GKLNN6K%IM%RKIPMU1
11. Do not force the Trimmer. Use the
tip of the Line to do the cutting.
12. Release Trigger when done.
13. When finished, to prevent accidents:
• Remove Battery Pack.
• Wipe external surfaces of the tool
with clean cloth. Store in a dry, indoor
area out of reach of children.

 Loading...