J
Jody FreemanJul 26, 2025
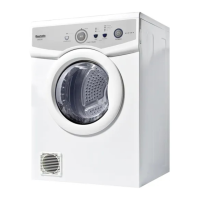
Why is my Baumatic BTD1 Dryer not working at all?
- CCristian JacksonJul 26, 2025
If your Baumatic Dryer isn't working, several factors could be the cause. First, ensure it's properly connected to a power supply and switched on. Check that the door is completely closed. The appliance may have cut-out; in that case, check the red button on the back for a ‘click’ sound after pressing it, ensuring the filter is clean and airflow isn't restricted. If the mains cord is damaged, contact customer support for a replacement.