- BEFORE ASSEMBLY READ ALL INSTRUCTIONS CAREFULLY.
• ASSEMBLE UNIT ON A CLEAN, FLAT SURFACE.
• • TOOLS NEEDED:ADJUSTABLE WRENCH, PHILLIPS HEAD SCREWDRIVER
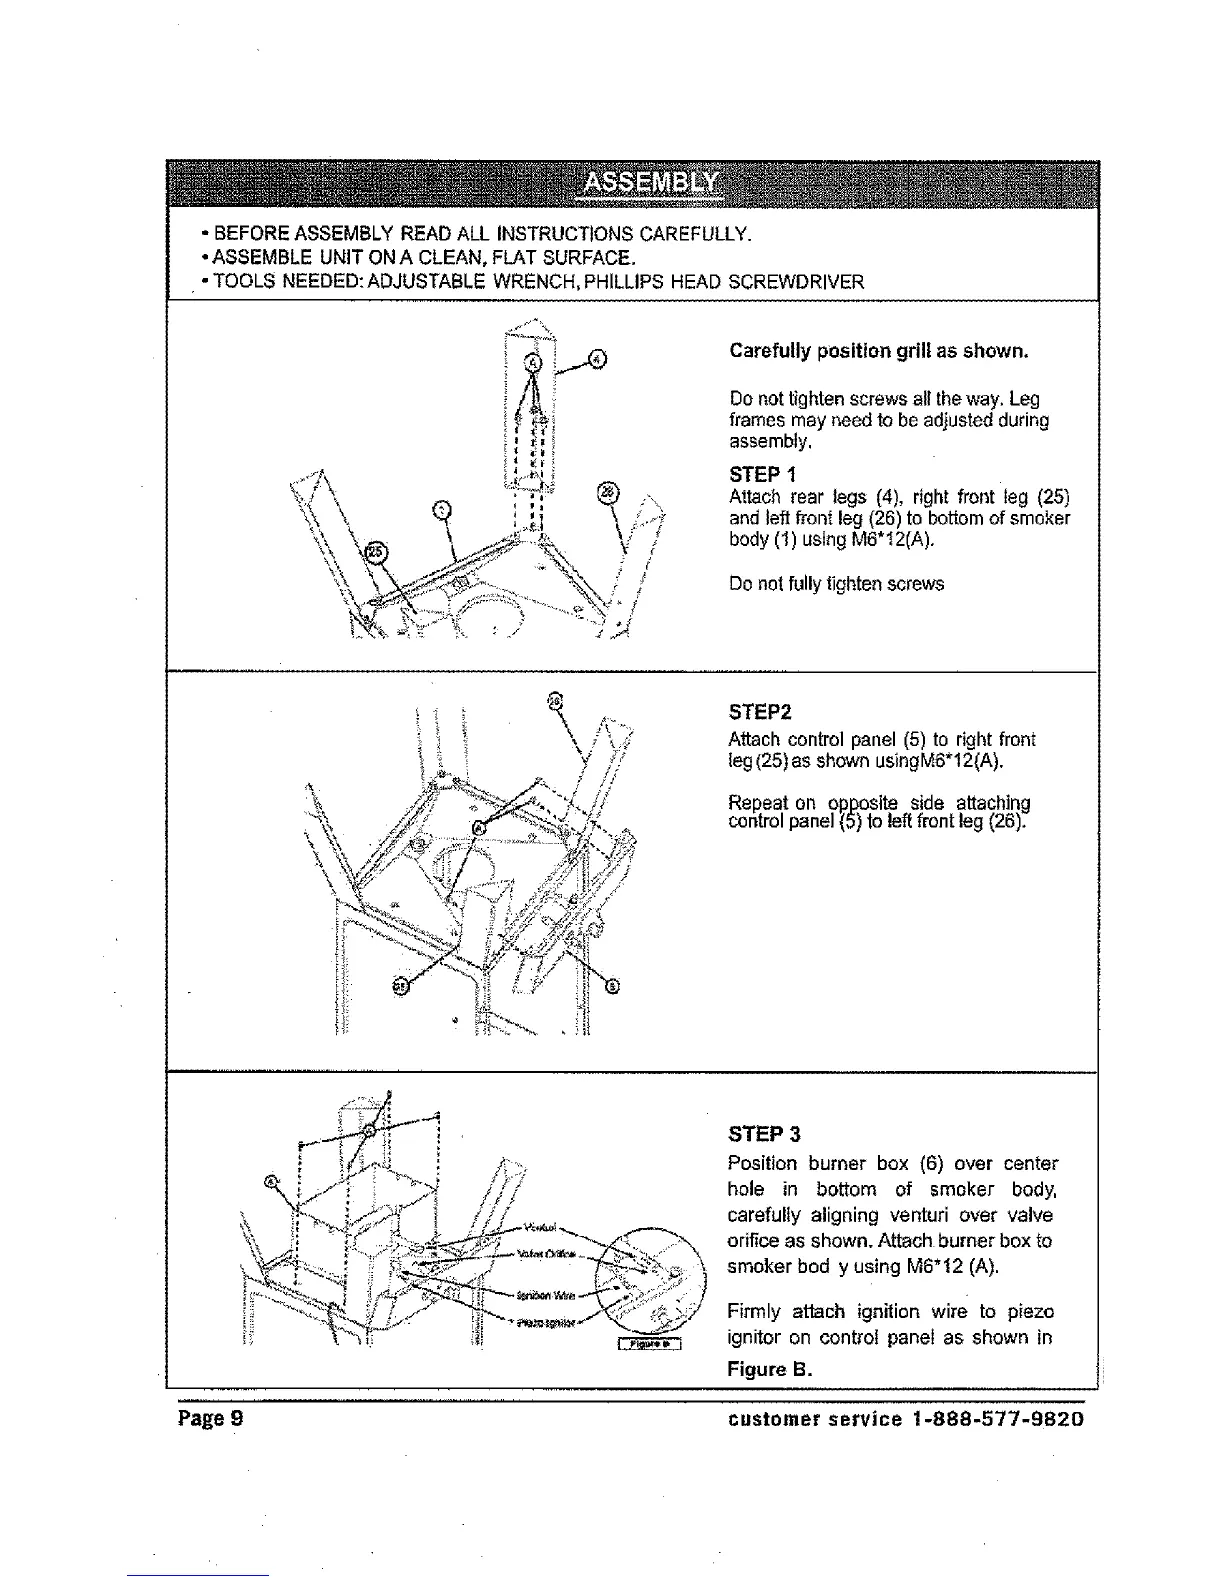
Carefully position grill as shown,
Do not tighten screws all the way. Leg
frames may need to be adjusted during
assembly,
STEP 1
Attach rear legs (4), right front leg (25)
and %1front leg (26) to bottom of smoker
body (1) using M6*12(A).
Do nol fully lighten screws
, ///
,, ........... ', tU
......g'"&
,. " ! ,_i ;:?'2<.=
{!/
STEP2
Alach control panel (5) to right front
leg(25) as shown using M6*12(A).
Repeat on opposite side attaching
control panel {5) to lel front leg (26).
STEP 3
Position burner box (6) over center
hole in bottom of smoker body,
carefully aligning venturi over valve
orifice as shown. Attach burner box to
smoker body using M6"12 (A).
Firmly attach ignition wire to piezo
ignitor on control panel as shown in
Figure B.
Page 9 customer service 1-888-577-9820