5
1.Removepackagingcapsfrompressurizedaircylinder.Toreachthecompressedairsystem,unzip
the main storage compartment and fold back the fabric compressed air system cover.
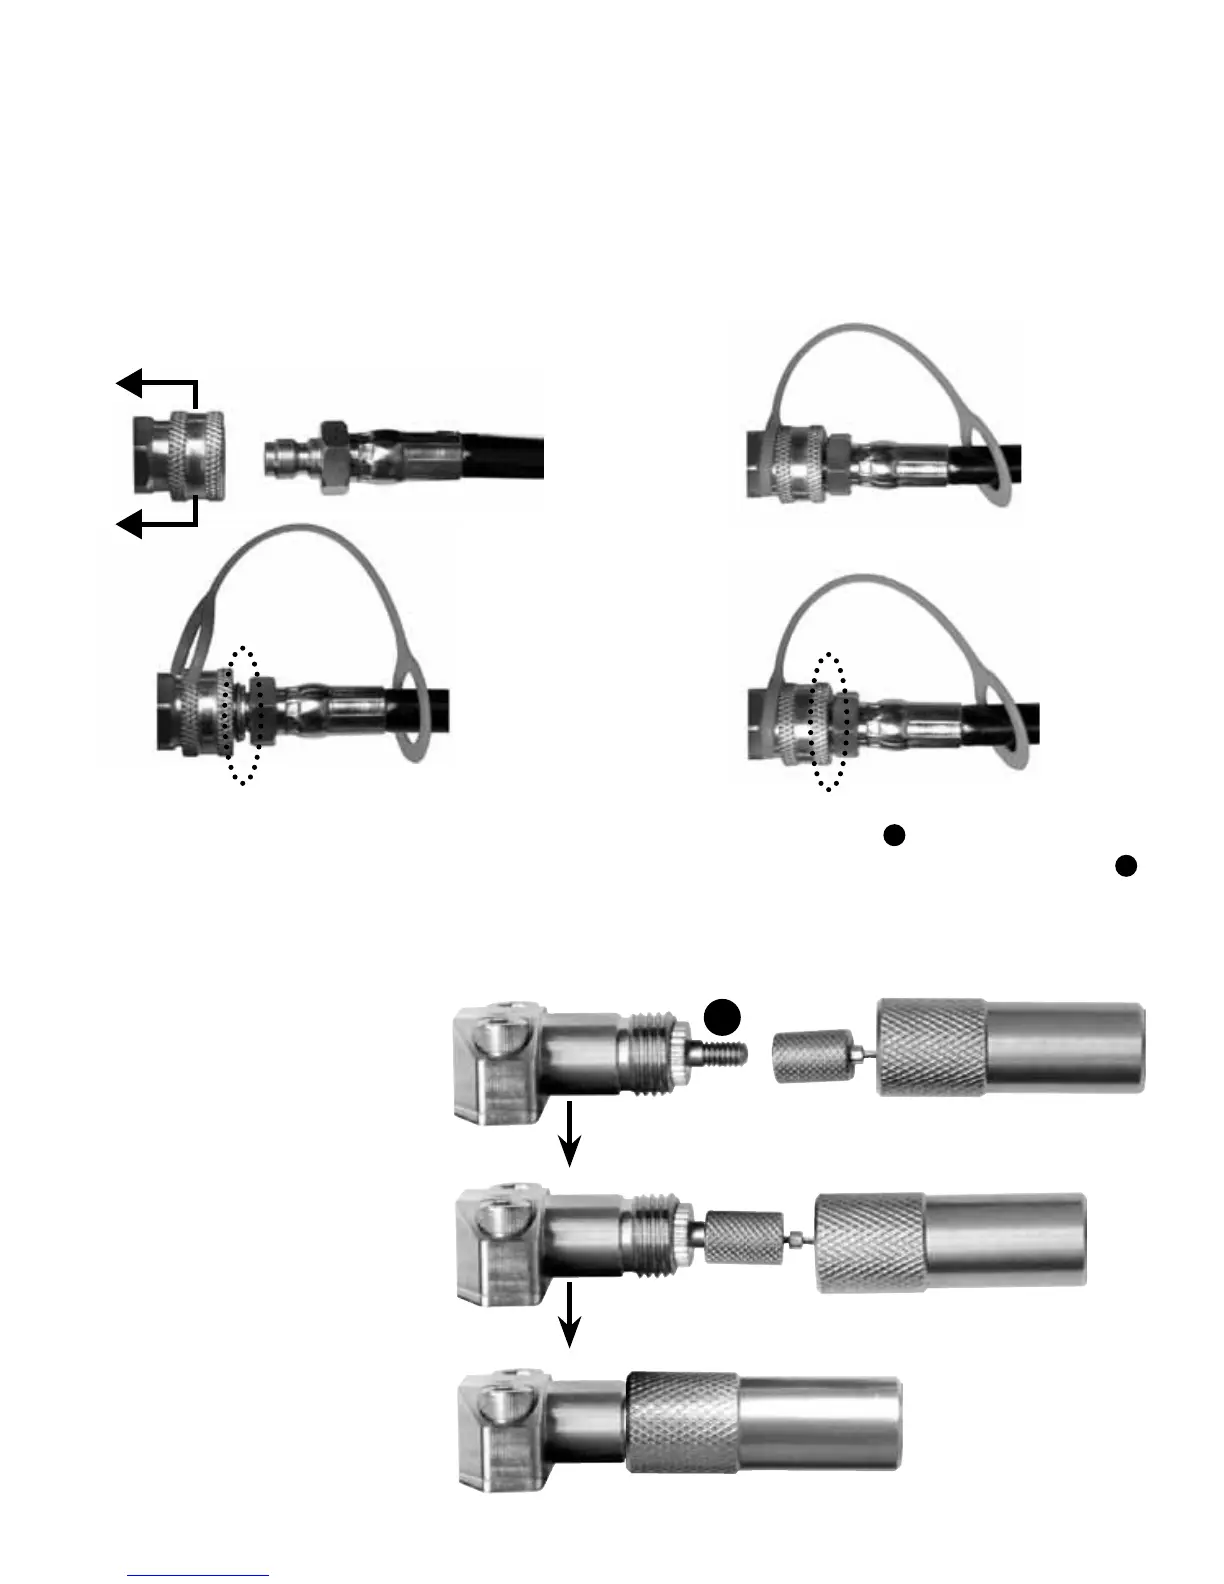
2.Connectthequickconnectfittingontheairhose
u
by pulling the large ring toward the pressure
gauge
. It should click back into place when air hose
w
is properly connected. Coupler gauge
x
should fit in place to ensure air hose is connected properly. WARNING: If the coupler gauge will
not fit in place, the system may not inflate.
X
u
u
x
xx
u
u
3. IMPORTANT! Screw the trigger cable nut
onto the trigger pin
11
. To expose the trigger
cable nut before threading it on the trigger pin, it might be necessary to push the trigger handle
12
back into the shoulder strap. WARNING: Failure to screw the cable nut onto the trigger pin will
prevent the system from inflating.
4. Screw the trigger cover
z over the trigger cable nut
.
5. Once cylinder is placed in
the sleeve, secure the Velcro
closure on the cylinder
compartment.
6. To disconnect an empty
cylinder, follow the above
steps in reverse.
Installing Compressed Air Cylinder
TRIGGER CABLE NUT ATTACHED
TRIGGER COVER ATTACHED
z
z
z
11