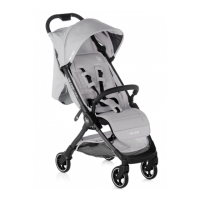
This document is a user manual for the Be Cool Stratos stroller, a baby transport device designed for infants from 0 months up to 22 kg or 4 years old (whichever comes first). The manual provides detailed instructions for assembly, usage, and maintenance in multiple languages, including Spanish, English, French, Portuguese, and Italian.
Function Description:
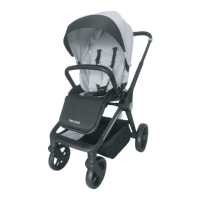
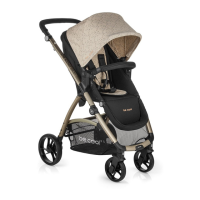
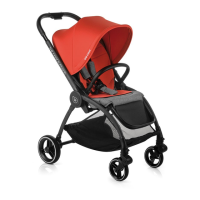
The Be Cool Stratos stroller is designed to safely transport infants and young children. It features a robust chassis, a comfortable hammock, and various adjustable components to adapt to the child's growth and user preferences. The stroller is equipped with a safety harness to secure the child, a protective bumper bar, and a canopy to shield from the elements. It is designed for easy folding and unfolding, making it convenient for storage and transport. The stroller also includes a storage basket for carrying essentials.
Important Technical Specifications:
- Age/Weight Range: Suitable from 0 months up to 22 kg or 4 years old (whichever comes first).
- Maximum Load: The maximum weight permitted for the carry-all basket is 4 kg.
- Safety Compliance: Complies with European Safety Standard EN 1888-2:2018 + A1:2022.
- Dimensions (folded): Not explicitly stated, but implied to be compact for transport.
- Dimensions (unfolded): Not explicitly stated.
- Materials: Not explicitly detailed, but mentions fabric components and metal chassis.
- Wheels: Features front and rear wheels, with instructions for assembly and brake application.
- Brake System: A foot-operated brake pedal for securing the stroller.
- Adjustability:
- Adjustable handle (handlebar).
- Adjustable footrest.
- Adjustable backrest (hammock).
- Adjustable safety harness.
Usage Features:
- Chassis Opening: Instructions detail how to open the chassis by pulling the handle upwards until a "click" sound is heard, indicating it's locked.
- Wheel Assembly:
- Front Wheels: Connect the front wheels with their supports on both sides, ensuring they are oriented correctly. Press the metal buttons on the supports to release the front wheels. Use the swivel-lock button to close the swivel-function and press it again to activate the swivel function.
- Rear Wheels: Connect the rear wheels with their supports on both sides, ensuring correct orientation. Press the metal buttons on the supports on both sides to remove the rear wheels.
- Brake Application: To engage the brake, step down on the brake pedal. To release, kick forwards the brake pedal.
- Hammock Fitting and Removal:
- Rotate the carrying handle as shown until a "click" sound is heard (this operation is only necessary for new chassis from the packaging).
- Open the seat towards both sides until a "click" sound is heard.
- Attach the connectors on the both sides of the hammock at the stands on the both sides of the chassis and press down until a "click" sound (A, show the connection clearly).
- Lift the hammock triggers on both sides and hold the hammock to remove it.
- Connect the bumper bar with the hammock as arrow directions.
- Press down the buttons to take the bumper bar off.
- Press down the buttons on both footrests to adjust the footrest upwards or downwards.
- Pull upwards the backrest trigger to adjust the backrest positions as you want.
- Pull upwards the handlebar button to adjust upwards or downwards the height of the handlebar.
- Note: The hammock is reversible, so it can be facing you or facing forwards.
- Folding the Pushchair:
- Fold the canopy as arrow direction.
- Pull upwards the backrest trigger and push the backrest forwards to fold the hammock first.
- Press down the safety lock with your thumb and then press down the handlebar button with your other fingers and push the whole handlebar downwards to swiftly release the handlebar lock. The handle will drop down (A, will show the safety lock and handlebar button clearly).
- Lift up the carrying handle (when the pushchair will be folded completely as shown in photo e).
- Note: When the hammock is facing you, all the operations for folding are the same as 6a to 6d.
- Unfolding the Pushchair:
- Pull the handlebar until a clear sound "click".
- Hold the handlebar and pull it towards you until a sound "click".
- Lift up the backrest to be vertical.
- Lift up the bumper bar until a sound "click".
- The pushchair is unfolded completely.
- Note: The operation of unfolding is the same as 7a to 7e when the hammock is facing you.
- Buckle:
- Insert the buckle (1) and (2) in the upper part of the central buckle and the straps remain attached.
- Open the central button (3) of the safety buckle to release the straps.
- Safety Strap Adjustment: Hold one end of the safety strap and slide the buckle up and down to adjust the length of the strap.
- Accessories: Only replacement parts supplied or recommended by BE COOL should be used. This product is not suitable for running or skating. Do not use accessories that have not been approved by BE COOL.
Maintenance Features:
- Cleaning:
- Always store in a clean and dry place.
- Clean the frame by wiping with a damp cloth.
- Do not use abrasives, bleach, or strong detergents.
- Spot clean fabrics with warm water and mild soap.
- Ensure fabric is dry before storing.
- Lubrication: Occasionally clean and lubricate wheels and axles with a light lubricating oil.
- Inspection:
- Regularly check for loose parts and tighten when required.
- Damaged or broken parts should be replaced.
- Warranty Information:
- The item is guaranteed against manufacturing defects as stipulated in legal directives and regulations for consumer goods applicable to the European Union and the country where it is marketed.
- It is essential to present the purchase invoice or receipt to process the guarantee through the seller of the item or, failing that, through the manufacturer.
- The guarantee excludes anomalies or failures caused by misuse, non-compliance with safety regulations and instructions for use and maintenance provided, or due wear and tear caused by normal use and regular handling of the item.
- The label containing the serial number of your model must not be torn off under any circumstances as it contains information relevant to the guarantee.