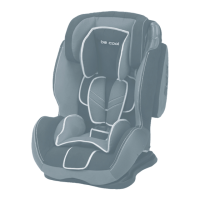
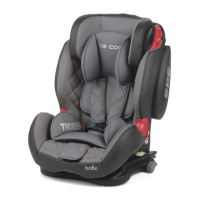
22
Important: Do not pull on the belt pads when doing so. (Fig. 8-9)
Press the red button to open the buckle. (Fig. 10)
Part the belts over the sides of the shell. (Fig. 11)
Place your child into the shell and make sure that there are no
toys or other hard objects in the shell. (Fig. 12)
Match buckle tongue sections together and insert them into the
buckle. (Fig. 13)
f) Make sure the shoulder belts t your child snugly by pulling the
adjuster belt. (Fig. 14)
Note! After you have done the installation, check it by trying to
move it, it shouldn’t move more than an inch side along the belt
path, if it does, tightens the straps or try installing it again. The
belts should never be twisted. If you are unable to click the tongue
sections into the buckle, unlock the buckle by pressing the red
button and try again.
INSTALLING METHOD FOR
GROUP II (15-25 KG) / III (22-36 KG)
The installation method is for child within Group II (15-25 kg) and
Group III (22-36 kg).
a) Remove the harness system, including the belt pads, central
buckle and crotch strap.
b) Adjust the headrest by pulling the lifting handle at your
required position according to your child’s height.
c) Place your child into the car seat.
d) Thread the vehicle’s shoulder belt from the Group II belt guide
slot (Fig. 14-a), or Group III belt guide slot (Fig. 14-b), and thread
the lap belt into the belt guide hole (Fig. 14-c).
So the installation is completed (Fig. 14-d).
e) Joint the belts and buckle up.
ADJUSTING THE HEIGHT OF THE SHOULDER BELTS
a) The correct height of the shoulder belts is attained when the
belt disappears into the shell slightly above the shoulder of
the child. Ensure that the shoulder belts t comfortably over
the child’s shoulder. (Fig. 15)
b) Loosen the shoulder belts by pressing the release button of
the adjuster and pulling the shoulder belts towards you as far
as possible.
Important: Do not pull the belt pads when doing so. (Fig. 9)
c) Place the shell of the seat in the sleeping position.
d) Remove the shoulder belts from the yoke. (Fig. 16-a)
e) Pull the shoulder belts through the belt pads and belting slots
in shell, ensuring that the buckle remains xed to prevent the
belts being twisted. (Fig. 17)
IM 1422.03 THUNDER INST.indd 22 20/6/18 8:52