200671_5
2
Preparation for use
• Check that the supply voltage details on your fuel effect fire are in accordance with your electricity supply. Your fire is fitted with a plug
incorporating a 13amp fuse. In the event of replacing the fuse in the plug supplied, a 13amp fuse approved by ASTA to BS 1362 must be
used.
• Before proceeding on, please read the following installation / operation instructions:
Fire Fitting Instructions
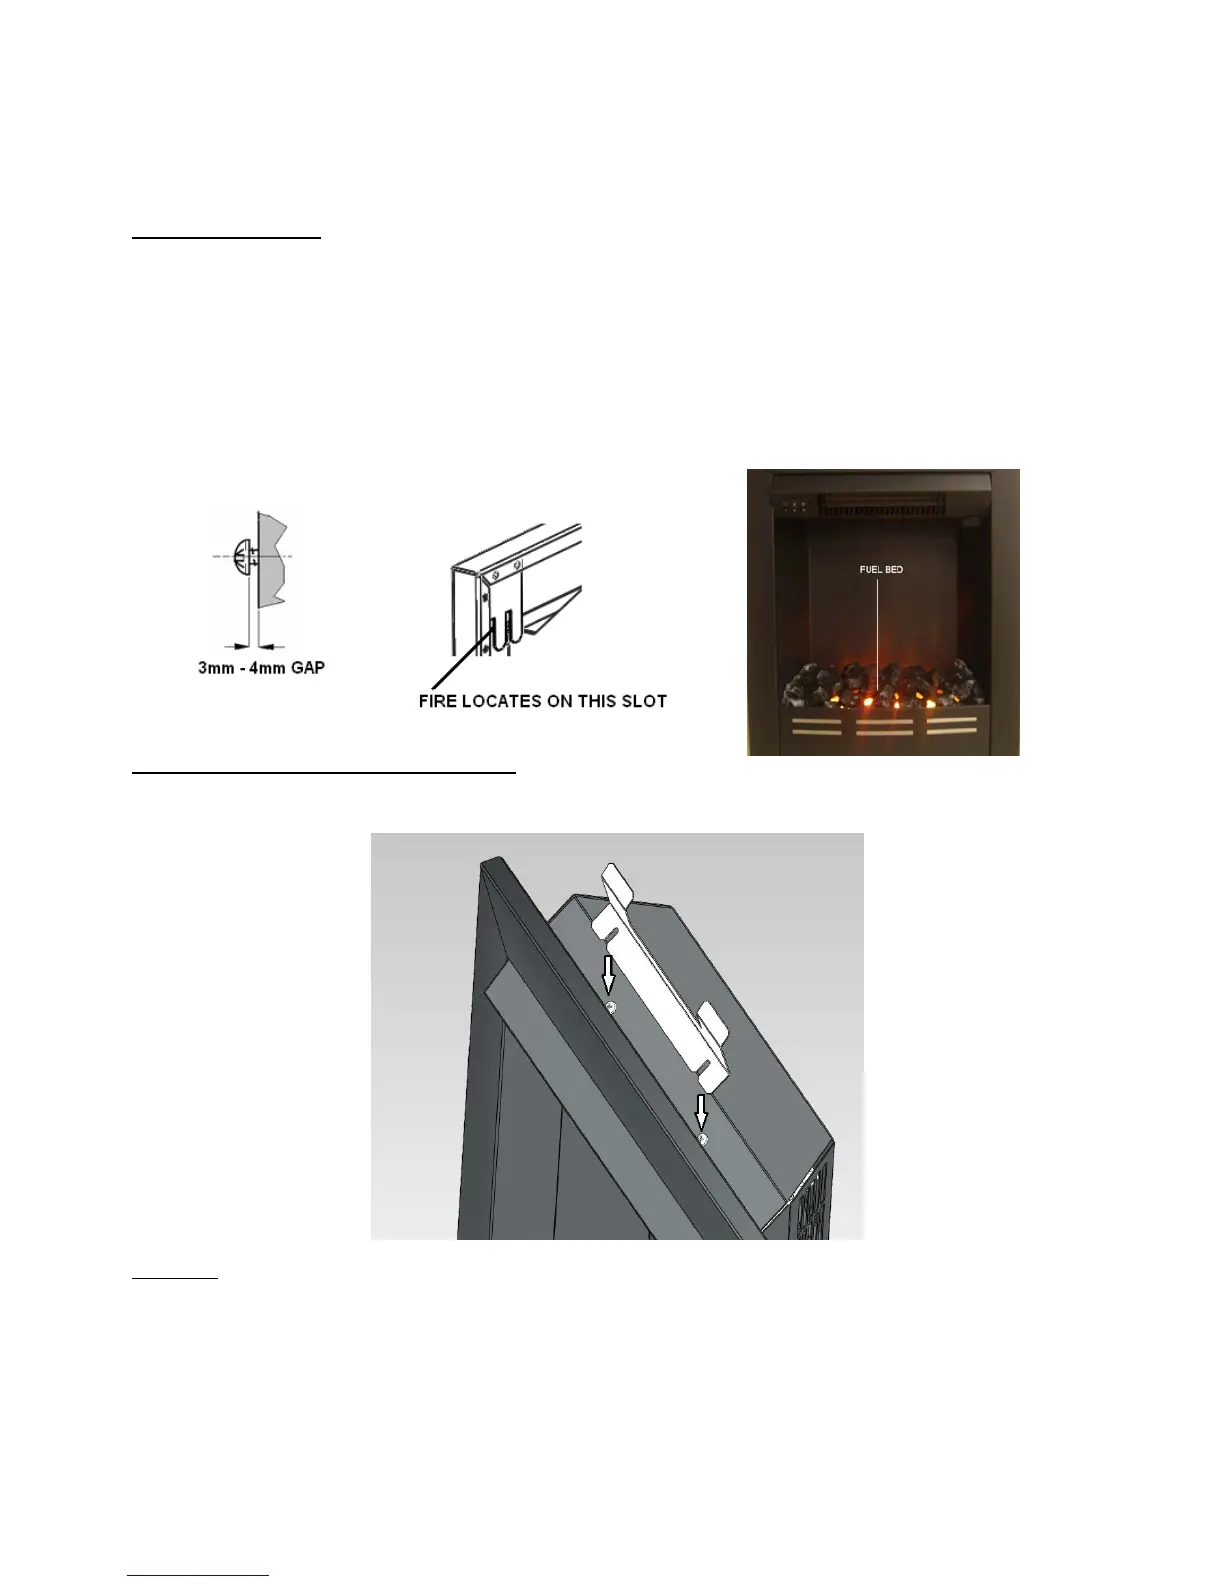
Using the two screws provided (5/8” x No.8), screw two pilot holes into the back panel insert screws leaving approximately 3-4mm gap between
the back panel and the screw head as shown below.
• Ensure all power connections to the fire are secure.
• If the fire is to be installed in front of an existing chimney opening and there is any risk of chimney debris falling down onto the fire it is
recommended that before installation the flue or opening is sealed off with non-combustible non-fibrous insulation materials. Do not install
into an existing fireplace that is prone to dampness. Should it be necessary to cap and seal the chimney to prevent personal injury, a
professional should be hired to do the work.
• The appliance must be positioned so that plug is accessible. Only when you are certain that you have completed the installation should you
plug in and switch on at the wall socket.
• Locate the fire onto the screws in the back panel by lifting the appliance into position and locating the screw heads behind the fixings
provided on the fire as shown, the fire should locate on the outer slots of the fixings on the fire as shown. Please use extra care when the
fire is being located that the appliance does not scratch / damage the back panel.
• Locate the fuel bed as shown below
Fixing Bracket Fitment (Marble Fireplaces Only)
1. As Shown in below fit the spacer bracket using two screws provided by loosening the two screws as shown (not removing) and sliding
the bracket into position, re tighten the screws after fitting.
Fire Fitment
1. Connect the mains cable to the supply
2. Locate the two prongs underneath the back panel opening ensuring that the fire does not scratch the front of the back panel.
3. Swing in the bottom of the fire keeping the prongs located behind the back panel and the fire forward to prevent scratching on the back
panel, ensure that the power cable does not get damaged during the swinging movement. NOTE: CAUTION MUST BE TAKEN NOT
TO SCRATCH THE HEARTH OR BACK PANEL DURING THIS STEP
4. Ensure that the fire is fully seated on the hearth.
 Loading...