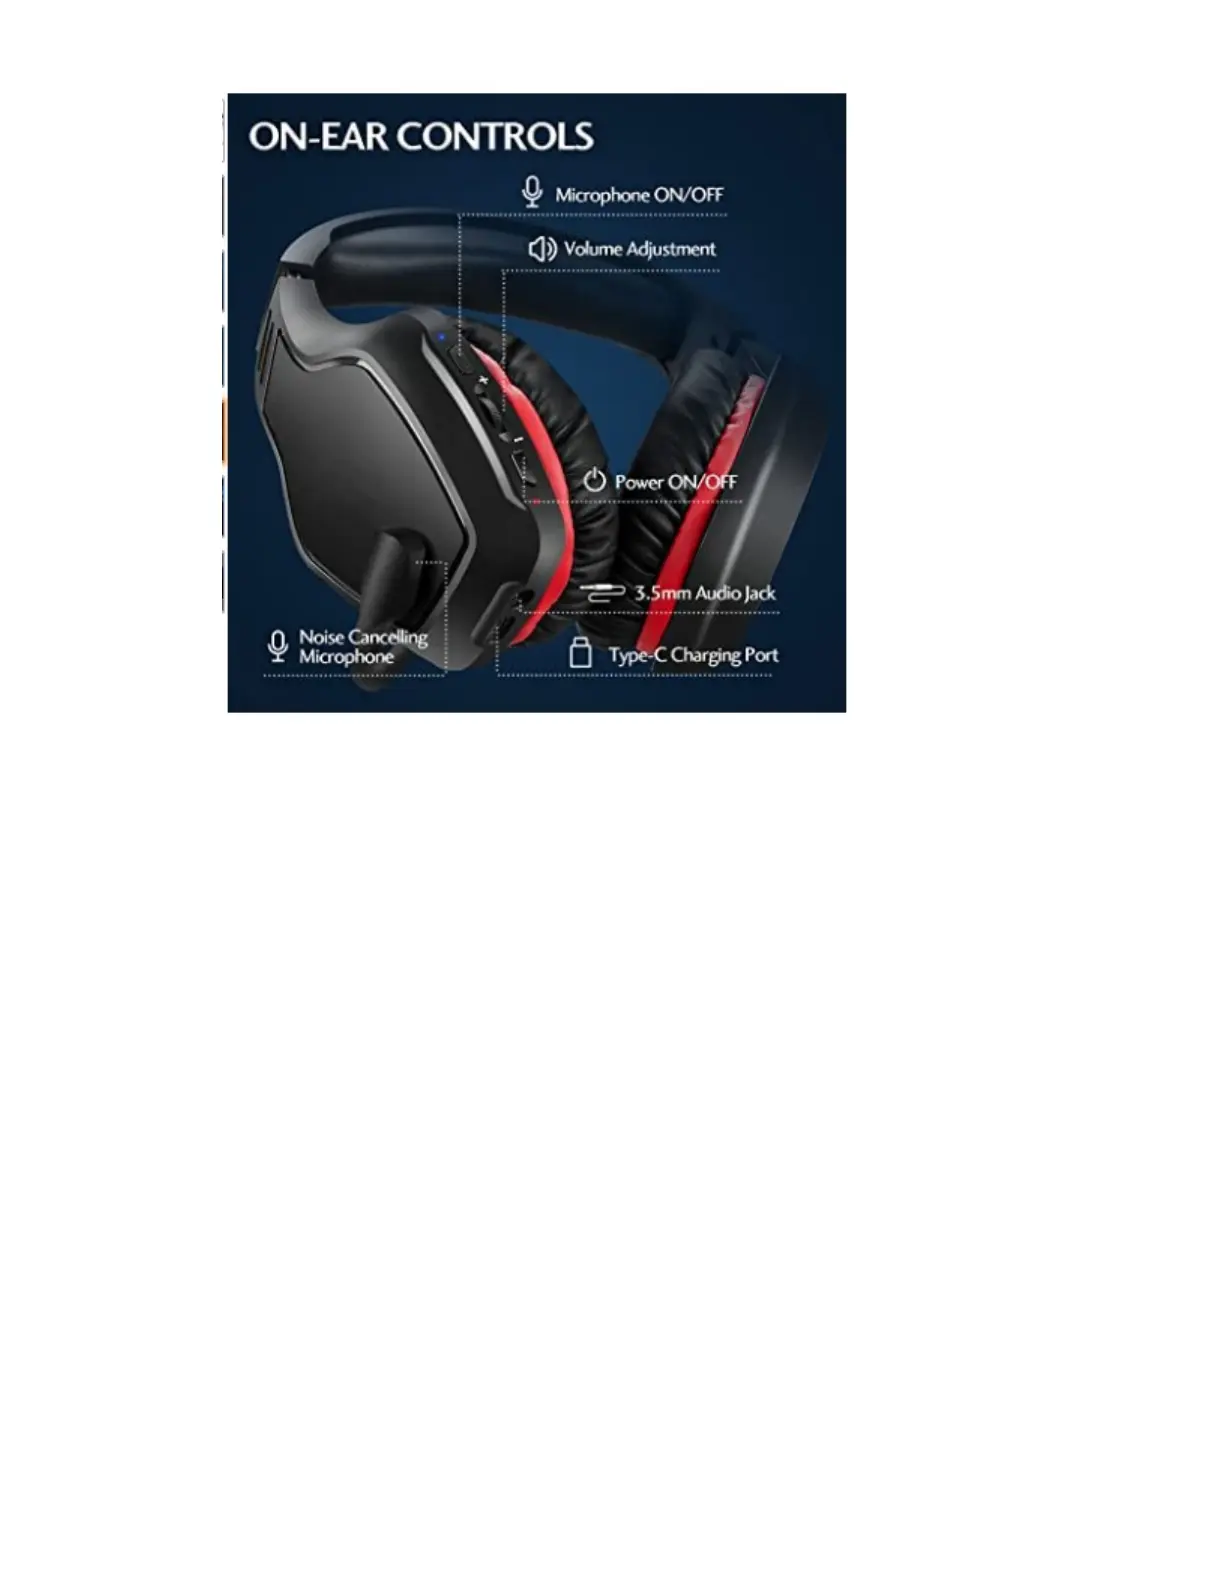
The headset controls are located on the rear side of the left side earcup as shown in the
picture above.
Before putting the headset on your head, turn on the power by holding down the power
ON/OFF button for at least two seconds (listen carefully for the aural message “power on”
coming from the headset speakers).
There is an indicator LED just below the power button to indicate that it has connected with
the USB dongle in the PC. Flashing red and blue indicates attempting to connect. When
connection is established the flashing LED lights will go off and the aural message
“connected” will be heard. The blue LED will blink about once every 10 seconds to indicate
power is on and the headset is connected.
The volume adjustment is an ‘up/down’ style thumb wheel located above the power button.
Position it to full volume to start with and adjust lower (downward) later if necessary.
The top button is the microphone ON/OFF (mute) button. You will hear the aural message
“microphone on” or “microphone off” when pressing the button.
The USB Type-C port at the bottom is for recharging the internal battery using the supplied
USB adapter cord. Do so only when advised by a trainer.
When you are finished using the headset, press and hold the power ON/OFF button for at
least two seconds until you hear the aural message “power off”.
 Loading...