8 9
Assembly Instructions - Cot Mode
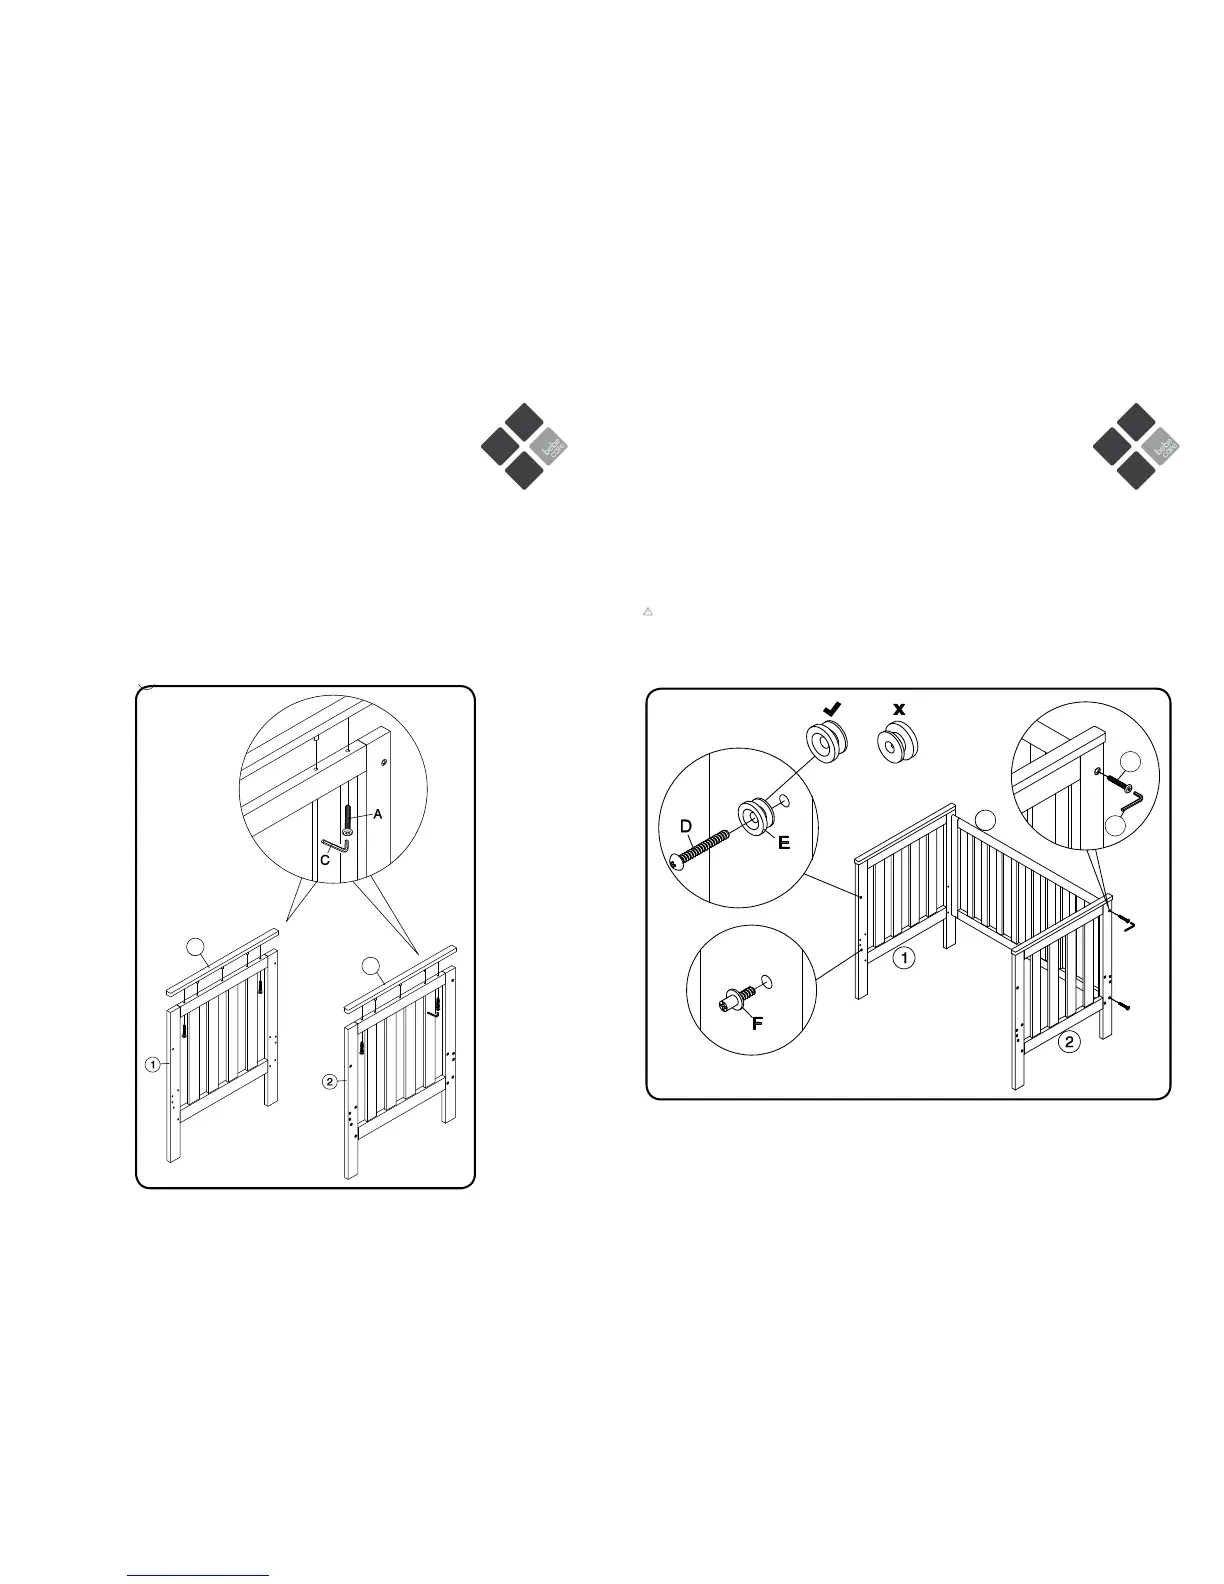
Attaching upper drop-side guide pin
1. Insert the metal guiding pins (F) onto the end panels (1 & 2).
2. Line up the 22mm bolt (D) and plastic ring (E) as shown in image.
Attaching fixed side panel
1. Align the fixed side panel (6) against end panels (1) and (2) and insert 4 x45mm bolts (C) into each hole as shown in
the image. Tighten with supplied allen key.
2
WARNING: Do not over-tighten bolts.
6
I
C
Assembly Instructions - Cot Mode
It is advisable that two people assemble the cot in the room in which the cot is to
be used in.
As small parts are involved in assembly, children should be kept clear of the
assembly area. Dispose of all packaging material immediately after the cot is
assembled. Identify all parts and components. Clear an area on the floor for
assembly and place a sheet on the floor to ensure the cot is not scratched during
assembly.
Attaching top rails
1. Select either the Flat top rails (3) or the Arch top rails (4) to be attached to the end panel (1). Store other top rails.
2. Place selected top rail on top of end panel.
3. Secure with 80mm bolts (A) by inserting them underneath the top end panel as shown. Tighten with supplied allen key
(I)
4. Repeat previous step for the opposite end panel (2).
PLEASE NOTE: Previous steps under ‘Attaching top rails’ apply to both Flat top rail and Arch top rail.