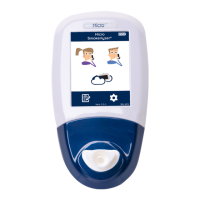
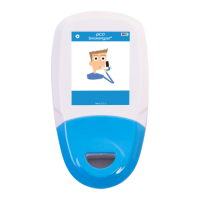
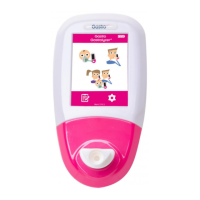
The Smokerlyzer® is a breath carbon monoxide monitor designed for multi-patient use by healthcare professionals in smoking cessation programs and research. It can also be used as an indicator of carbon monoxide poisoning in a healthcare environment. The device is manufactured by Bedfont Scientific Ltd. and is CE marked according to the Medical Device Directive 93/42/EEC as amended by 2007/47/EC.
- WARNING: Always read the manual before use.
- WARNING: Never use alcohol or cleaning agents containing alcohol or other organic solvents as these vapours will damage the electrochemical sensor inside.
- WARNING: Do not immerse or splash the instrument with liquid.
- WARNING: Breath tests must only be carried out with Bedfont® accessories. Failure to do so may cause incorrect readings.
- WARNING: The mouthpieces are single patient use only and can be used for a maximum of 3 tests. Further re-use could cause incorrect readings and could increase the risk of cross infection. The mouthpiece should be disposed of after use, in accordance with local waste disposal guidance.
- WARNING: Patients should exhale for the duration of time indicated by the monitor during a breath test. Failure to do so may cause incorrect readings.
- WARNING: To ensure a breath sample is taken at the correct flow rate, the monitor must be held upright at all times during a breath test.
- WARNING: Do not block the exhaust ports on the device at any time. Blocking the exhaust ports may cause erroneous readings.
- WARNING: Avoid exposure to known sources of EMI (electromagnetic interference) such as Magnetic Resonance Imaging (MRI) systems, diathermy, lithotripsy, electrocautery, RFID (Radio Frequency Identification), and electromagnetic security systems such as metal detectors.
- CAUTION: Ensure the monitor is used within the stated operating temperature and humidity ranges. Operating temperature is 15-40°C. Operating humidity is 15-90% RH (non-condensing).
- CAUTION: Portable and mobile RF communications equipment can affect the Smokerlyzer® monitors.
- NOTE: See Bedfont’s infection control and maintenance guidelines for further information on infection control.
- NOTE: Do not attempt to modify the equipment in any way or use accessories not specified by the manufacturer. Any attempt to do so will invalidate the warranty and may compromise the safety of the device.
- NOTE: Bedfont® will make available on request service training to appropriately qualified personnel.
Technical Specifications:
- Concentration range: 0-500ppm
- Display: Full colour touchscreen
- Detection principle: Electrochemical sensor
- Repeatability: ≤5%
- Accuracy: ≤12ppm/5%*
- Power: 3 x AA (LR6 or equivalent) – up to 1000 minutes, 1 x CR2032 lithium coin cell
- T90 response time: <30 seconds
- Operating temperature: 15-40°C
- Storage/transport temperature: 0-50°C
- Operating/storage/transport pressure: Atmospheric ±10%
- Operating humidity: 15-90% RH (non-condensing)
- Storage/transport humidity: 0-95% (non-condensing)
- Sensor operating life: 5 years
- Sensor sensitivity: 1ppm
- Sensor drift: <5% per annum
- Dimensions: Approx. 37 x 77 x 140 mm
- Weight: Approx. 97g (including batteries)
- Materials: Case: polycarbonate/ABS blend, SteriTouch® anti-microbial additive, D-piece™: polypropylene, SteriBreath™ Eco: paper
- H2 cross interference: <8twi%
Device Layout:
- Power button
- USB port (for use with COdata™ software)
- Display
- D-piece™ aperture
- Battery compartment clip
- Battery compartment
- Exhaust port
- Manufacturer label
- Exhaust port
User Interface and Usage Features:
The device features a full-colour touchscreen display. The home screen displays the following options:
- Battery status
- Maternity breath test
- Normal breath test
- Ambient air test
- Patient profiles
- Settings
Taking a Breath Test:
- Attach a breath sampling D-piece™ and new SteriBreath™ Eco mouthpiece.
- Turn on the monitor by pressing the power button once.
- Press the breath test icon on screen, either the male or female symbol.
- Inhale and hold breath for the pre-set 15 second countdown.
- Press the home button at any time to cancel the breath test.
- A beep will sound during the last three seconds of the countdown.
- Blow slowly into the mouthpiece, aiming to empty lungs completely.
- The ppm and equivalent %COHb and/or %FCOHb levels will rise and hold onscreen.
- When the test is finished, the volume, home and save icons will appear at the bottom of the screen.
- If a high reading has been recorded, the monitor can be muted by pressing the volume icon.
- To repeat a breath test, press the home icon once to return to the home screen and repeat steps 3-8.
- To save the reading, press the save icon and select the relevant patient profile.
- Remove the D-piece™ between tests to purge the sensor with fresh air.
- To switch off, press and hold the power button for 3 seconds; the unit will also power off after 2 minutes of inactivity to save power.
Conducting an Ambient Test:
The environmental air can be tested to check for CO in the environment using the Micro™ Smokerlyzer®. This is particularly useful in the event of a patient reporting a non-smoker status but providing a breath reading that suggests they have inhaled environmental CO. This is carried out by pressing the ambient mode icon on the screen. The Micro™ will then carry out real-time monitoring of the environmental air. To stop the test, press the home icon.
Patient Profiles:
All patient profiles saved on the device will be listed. To view patient information, press the relevant patient profile block.
- If 'start breath test' is selected from this screen, the breath test will be automatically saved to the profile. Once the type of breath test has been assigned to the patient, only one symbol will appear.
- To change the name of the patient, press the text box icon, then press the letters required. Click the save icon to confirm or the home icon to return to the home screen.
- To access the patient's breath test history, press the graph icon. This will then bring up the patient's testing history.
- To delete a patient profile, press the delete icon. To confirm, press the delete icon again.
Reviewing History:
The Micro™ will record every reading taken in its history up to 150 readings. To access this, press the settings icon.
Changing Date and Time:
Press the settings icon. Press the date/time icon. Select either d-m-y or m-d-y for the date format and 12h or 24h for the time format. Dates and times are then adjusted by selecting the number, needing changed and pressing the up or down arrow icons to increase and decrease. Press the save icon to save the new settings.
Changing Breath Holding Time:
Press the settings icon. Press the breath holding time icon. Use the arrows to adjust the breath holding time. Press the save icon to save changes.
Changing Breath Testing Thresholds:
This table shows the pre-set breath testing thresholds:
| Traffic light colour |
Description |
Reading (ppm) |
| Green |
Non-smoker |
0-6 |
| Amber |
Borderline |
7-9 |
| 1 Red |
Smoker – low addicted |
10-15 |
| 2 Red |
Smoker – moderately addicted |
16-25 |
| 3 Red |
Smoker – heavily addicted |
26-35 |
| 3 Red Flashing |
Smoker – very heavy addicted |
36+ |
Press the settings icon. To change the breath test thresholds, press the traffic light icon. Once adjusted, press the save icon.
Maintenance Reminders:
- Change D-piece™ reminder: The D-piece™ requires changing every 30 days. This reminder is displayed at switch on.
- Sensor change reminder: This reminder is displayed at switch on when the sensor is nearing its change date. After 60 days of this reminder being displayed, the 'red date' alarm takes over.
- Sensor change overdue reminder: This reminder is displayed at switch on when the sensor requires replacing. This reminder cannot be bypassed.
Routine Maintenance:
- Mouthpieces should be replaced after every use.
- Hands should be washed regularly in accordance with infection control practice.
- Please do not attempt to modify the equipment in any way or use accessories not specified by the manufacturer. Any attempt to do so will invalidate the warranty and may compromise the safety of the device.
- Bedfont® will make available upon request service training to appropriately qualified persons.
- The Micro™ Smokerlyzer® requires calibrating every 6 months.
- Holding the reset button down for 30 seconds will perform complete device reset, this will clear any saved data and revert all settings to the factory defaults. After performing a reset, the device will need to have the date/time set and be calibrated before it can be used.
- Replace batteries when indicated by the empty symbol.
- Bedfont® recommend removal of the batteries when the device is not used for prolonged periods of time to prevent leakage.
- Replace breath sampling D-piece™ every 30 days or if visibly soiled or contaminated. The Micro™ Smokerlyzer® will give a reminder during start-up when the D-piece™ should be replaced, see 'change D-piece™ symbol'.
- The sensor should be replaced every 5 years, 60 days prior to the sensor change 'countdown to sensor change' symbol will be shown with the date on which the sensor should be changed. This can be ignored by pressing the home icon until the date at which the sensor should be changed arrives. At this point the 'change sensor' symbol will be shown. Change sensor if needed to do so by an approved Bedfont® engineer or send to Bedfont® or the local representative.
Cleaning:
- The Smokerlyzer® products are moulded with SteriTouch® technology for optimum infection control and bacterial efficacy. Bedfont® recommends wiping the instrument and D-piece™ external surfaces between each patient with an alcohol-free wipe specifically designed for this purpose. A list of approved wipes can be found here: https://www.bedfont.com/cleaning-bedfont-monitors. The D-piece™ cannot be sterilised.
- NEVER use alcohol or cleaning agents containing alcohol or other organic solvents as long term exposure to these vapours will damage the CO sensor inside.
- Under no circumstances should the instrument be immersed in liquid or splashed with liquid.
Calibration:
The Smokerlyzer® monitors must be calibrated within 17-25°C. If it is too cold to calibrate (<17°C) a blue thermometer will be shown onscreen. Move the Smokerlyzer® to a warmer area and try again later. If it is too hot to calibrate (>25°C) a red thermometer will be shown onscreen. Move the Smokerlyzer® to a cooler area and try again later.
- Turn on the monitor by pressing the power button once.
- Press the settings icon.
- Press the calibration icon once to enable.
- Once this has been successfully carried out, the device will perform a zero; do not apply gas at this stage.
- The first step of the calibration process will be shown onscreen; follow the onscreen instructions to finish the calibration process.
- Ensure the fine control valve is in the off position.
- Screw the fine control valve and flow indicator assembly to the gas can. This is best done by screwing the gas can into the valve.
- Press 'breath test' symbol on screen to start a breath test.
- When prompted by the 'exhale' symbol, open the fine control valve or regulator.
- Allow the gas to flow at 1 litre per minute.
- Allow the gas to flow through the instrument for the duration of the test, again monitoring the rate of flow.
- If the final displayed value is less than 18ppm or higher than 22ppm, stop the test and perform a calibration or send back to Bedfont® for a free of charge calibration, following the instructions.
- A successful calibration will be indicated by the tick icon, press the home icon to return to the home screen.
- A failed calibration will be indicated by the red cross icon, press the rotating arrow icon to attempt calibration again. If the problem persists see 'Troubleshooting' or call the local supplier of Bedfont® products. Return to the home screen by pressing the home icon.
- Type BF applied part
- Internally powered equipment
- IPXO – not protected against water ingress
- Equipment not suitable for use in the presence of flammable mixtures
- Direct current
- CE mark (2797)
- Type BF applied part
- Dispose of according to WEEE
- Serial Number (SN)
- Unique device identifier (UDI)
- Indicator of Medical Devices (MD)
- Magnetic Resonance (MR) unsafe
- Manufactured by and date
- Bedfont Logo
Environment:
The Micro™ Smokerlyzer® product complies with the Medical Device Directive 93/42/EEC as amended by 2007/47/EC and the Medical Device Electromagnetic Compatibility standard EN 60601-1-2.
- WARNING: Portable RF communications equipment (including peripherals such as antenna cables and external antennas) should be used no closer than 30 cm (12 inches) to any part of the Micro™ Smokerlyzer®, including cables specified by the manufacturer. Otherwise, degradation of the performance of this equipment could result. This equipment should be moved if necessary to avoid interference.
COdata™ software – connecting to the PC:
- Place one end of the connection lead into the USB socket on the top of the Smokerlyzer® product.
- Connect the other end to the USB port on the PC.
- Before starting the software, ensure that the Smokerlyzer® product is connected to the PC and switched on. Double click the COdata™ icon on the PC to start the programme. Refer to the supplied documentation for how to operate COdata™.
- Battery condition: full (Full battery icon)
- Battery condition: low (Low battery icon)
- Battery condition: empty (Empty battery icon)
- Breath test (Male and female icons)
- Environmental test (Cloud icon)
- Settings (Cog icon)
- Patient profiles (List icon)
- View patient results (Bar graph icon)
- Inhale (Male and female icons with arrow pointing in)
- Hold breath (Male and female icons with timer)
- Countdown timer (Clock with '15')
- Exhale (Male and female icons with arrow pointing out)
- ppm reading (20 ppm CO)
- %COHb reading (3.83 %COHb)
- Show %FCOHb reading (Heart with 3.83 %FCOHb)
- Ambient CO reading (20 ppm CO with house icon)
- Home (House icon)
- Change D-piece™ (D-piece icon)
- Change traffic light cut-off levels (Traffic light icon)
- Save (Floppy disk icon)
- Change breath-hold time (Clock with person icon)
- History (Book icon)
- Mute (Mute icon)
- Next step (Arrow icon)
- Low temperature (Blue thermometer)
- High temperature (Red thermometer)
- Countdown to sensor change (SEN01 with date)
- Change sensor (SEN01 with date)
- Calibrate device (Gas canister with tube)
- Attach flow meter to gas canister (Gas canister with flow meter)
- Attach calibration adaptor to D-piece™ (D-piece with adaptor)
- Attached D-piece™ to monitor and turn on gas flow (Monitor with D-piece and gas flow)
- Unit calibrating (Hourglass icon)
- Calibration successful (Green tick)
- Calibration failed (Red cross)
- Retry calibration (Refresh icon)
Troubleshooting:
- The unit fails to turn on: Ensure that the batteries are inserted the correct way around, matching the symbols moulded into the plastic.
- High readings recorded for reported non-smoker:
- A high ambient level of CO (possibly due to a faulty combustion appliance or exhaust fumes).
- The effects of passive smoking.
- The device is contaminated by alcohol or another organic substance.
- The patient may have a very high level of hydrogen on their breath, which can be generated in the human digestive system.
- The sensor may have drifted out of specification (see below).
- The sensor has drifted out of specification: Smokerlyzer® products are calibrated before leaving Bedfont®. However, Bedfont® recommends if the instrument may be reading incorrectly, try the test again with another device if available to get a comparison. Alternatively, check the function using Bedfont® check gas or send back to Bedfont®. The check gas required is Bedfont® 20ppm carbon monoxide in air, procedure below:
- Ensure the fine control valve is in the off position.
- Screw the fine control valve and flow indicator assembly to the gas can. This is best done by screwing the gas can into the valve.
- Screw the fine control valve and flow indicator assembly to the gas can. This is best done by screwing the gas can into the valve.
- Press 'breath test' symbol on screen, or to start a breath test.
- When prompted by the 'exhale' symbol, open the fine control valve or regulator.
- Allow the gas to flow at 1 litre per minute.
- Allow the gas to flow through the instrument for the duration of the test, again monitoring the rate of flow.
- If the final displayed value is less than 18ppm or higher than 22ppm, stop the test and perform a calibration or send back to Bedfont® for a free of charge calibration, following the instructions.
Warranty:
Bedfont® Scientific Limited warrants the Micro™ Smokerlyzer® product (excluding batteries) to be free of defects in materials and workmanship for a period of five years from the date of shipment. Bedfont’s sole obligation under this warranty is limited to repairing or replacing, at its choice, any item covered under this warranty when such an item is returned, intact and prepaid, to Bedfont® or the local representative. These warranties are automatically invalidated if the products are repaired; altered, void labels removed or otherwise tampered with by unauthorised personnel, or have been subject to misuse, neglect or accident. Never dispose of any electronic instrument or batteries in domestic waste. At the end of the product’s life, contact Bedfont® or its distributor for disposal instructions.
Returns:
If the equipment requires servicing, please contact the local Bedfont® customer service department, distributor or supplier before returning any goods.
- Supply the customer repairs department with the monitor serial number and description of the fault. A returns/ticket number will then be assigned. Please state the returns/ticket number on the outside of the box when returning the monitor, ensure that a telephone number, fax number, and full return address are clearly stated.
- The product must also be decontaminated before it is returned according to the local regulations. Bedfont® can provide a decontamination certificate to complete, which also needs to be attached to the outside of the box. Failure to do so will result in the product being subject to Bedfont’s decontamination procedure and will delay the service/repair.
- Bedfont® advises that a courier service is used when returning monitors. This enables insurance for goods against loss or damage in transit. When the goods are received, an email will be sent stating so.
- If the device has been returned for repair it will then be examined and an engineer’s report will be sent with a quotation for the repair, which will include an authorisation form. Complete the authorisation form, and ensure that the 'official purchase order number' is included. Please contact the customer repairs department if an 'official purchase order number' cannot be supplied.
- If the monitor is still in warranty and the fault is covered by warranty, see 'warranty' section of this manual, Bedfont® will repair it and return it with an 'engineer’s report', free of charge.
- If the decision is made not to proceed with the repair, a handling fee will be charged. Ensure the completed authorisation form is returned with an 'official purchase order number'.
- The equipment will be returned as soon as Bedfont® has received all relevant paperwork. A carriage fee will be charged if the monitor is no longer in warranty.
Bedfont Scientific Ltd.
Station Yard, Station Road,
Harrietsham,
Maidstone, Kent,
ME17 1JA
United Kingdom
www.bedfont.com
ask@bedfont.com
0044 1622 851122