10
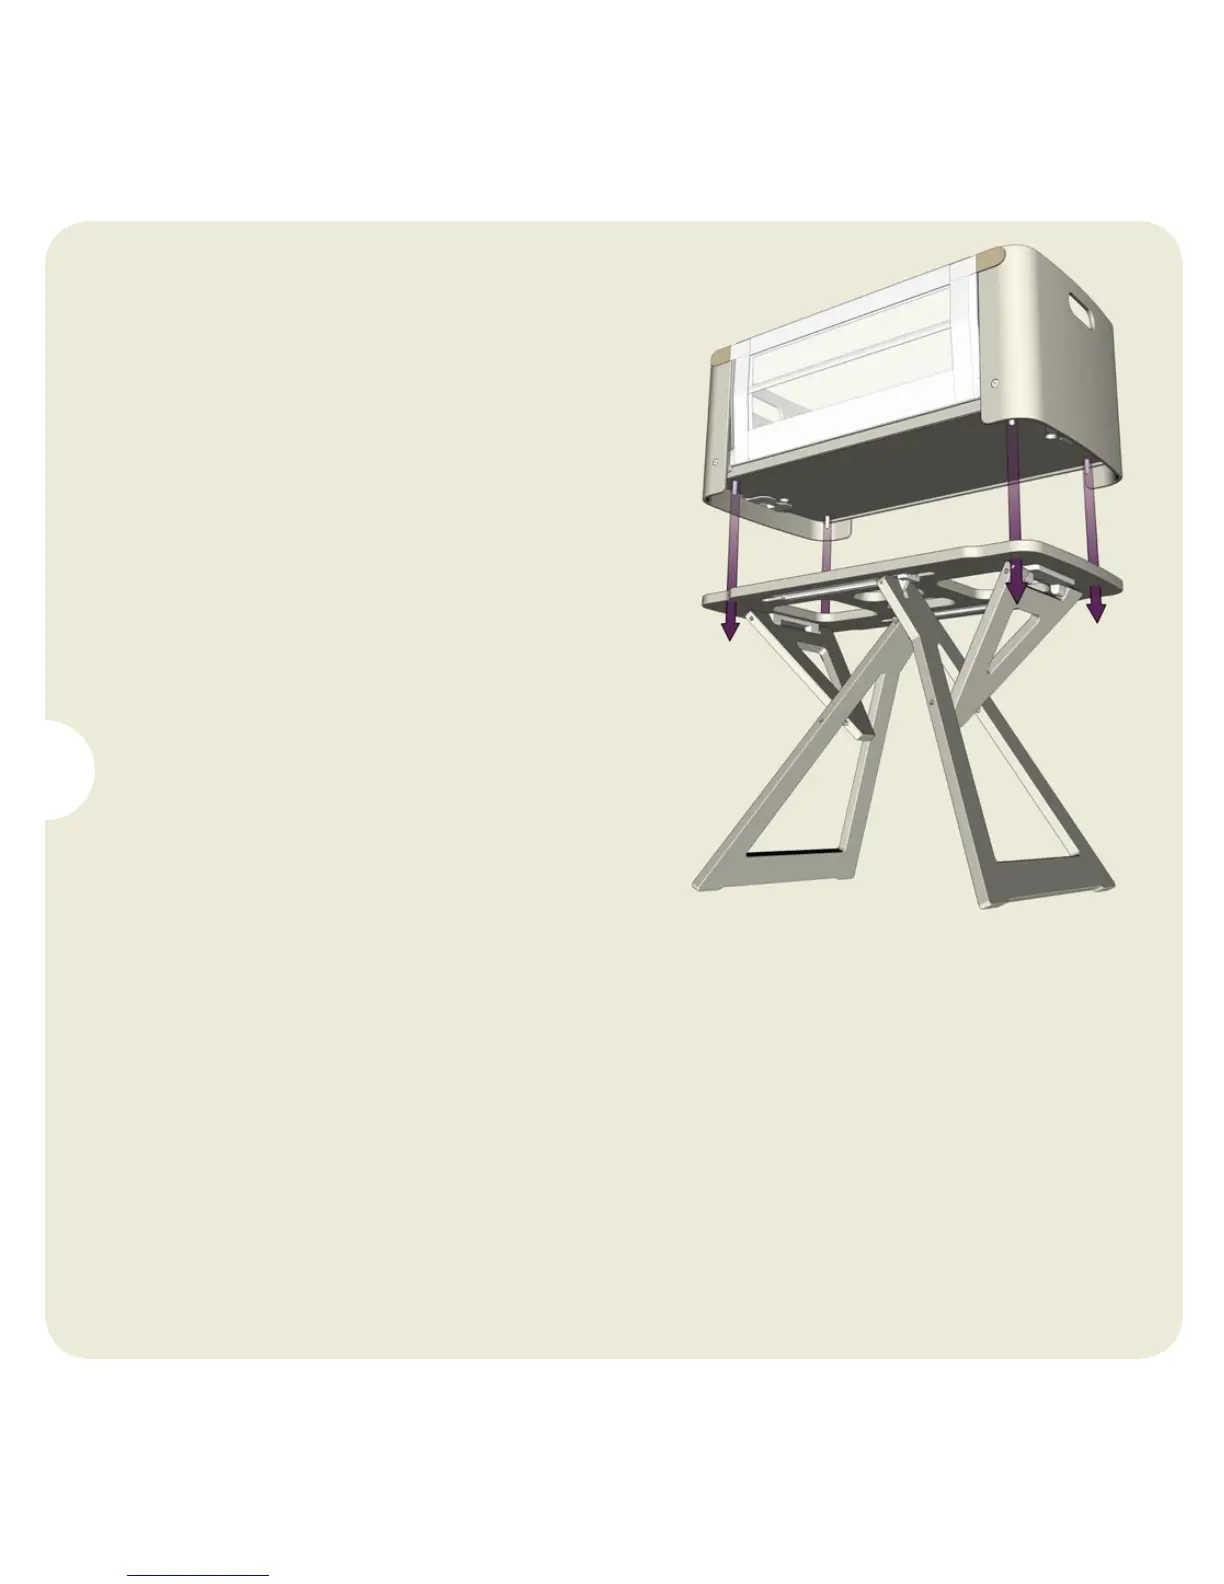
Lift the bednest crib onto
the stand so that the
metal pins underneath the
corners of the bednest
crib fit securely in the
corresponding holes of the
stand. You should not be
able to slide the bednest
crib from side to side when
this has been achieved.
6
step
Remove the plastic cover from the mattress. Please note: to ensure the safety of you
and your family, and in order to comply with fire safety regulations, we have taken
great care to treat your bednest mattress with a safe, non-toxic fire retardant. It
is normal to notice a smell that remains from this process when first removing the
plastic wrapping from the mattress. Although not essential, you may wish to air your
bednest mattress for a couple of days before use, to dissipate any remaining odour.
Cover the mattress with a fitted sheet. Fitted sheets may be ordered direct from
bednest to fit the mattress provided.
Congratulations! Your bednest is now ready for use.
7
step