WARNING: Do not substitute blades or the blade retaining bolt with non original
parts. Company blades and blade retaining bolts are specially made for this
application. Using non original parts can effect the quality of cut and may also
cause damage to the rotary cutter.
DANGER: Proper torque must be used when tightening the blade retaining bolt. If
these safety precautions are not followed, the blade could come off during
operation and be thrown hundreds of feet from the rotary cutter.
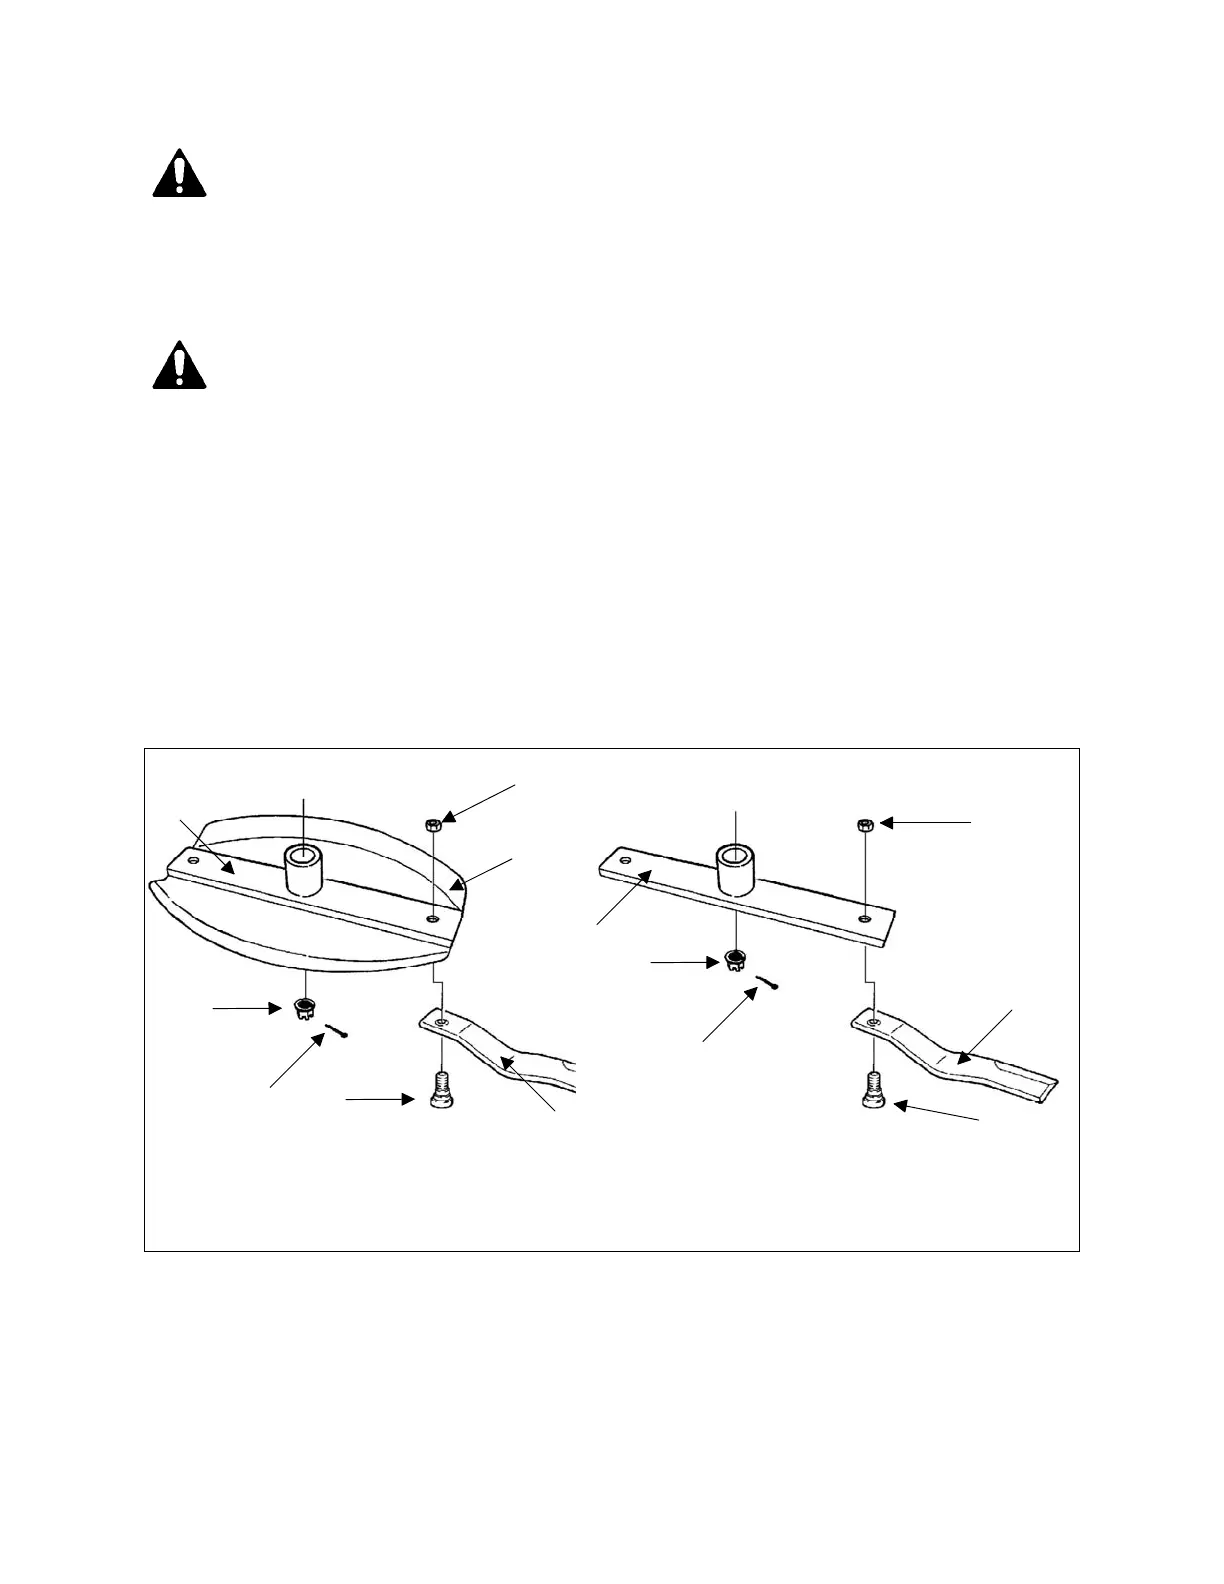
4.04 - Rotor & Stump Jumper Assembly
To assemble the stump jumper to the rotor do the following (see fig. 10):
1. Position the rotor bar on the stump jumper so the holes line up.
2. Attach the blades making sure the cutting edge is towards the direction of rotation
(see fig. 9).
3. Torque blade nut (see #1, fig. 10) to 265 lb.ft.
To assemble the rotor/stump jumper assembly on the rotary cutter do the following:
1. Insert the rotor/stump jumper assembly on the pinion shaft.
2. Bolt on the castle nut (see #6, fig. 10) and torque to 350 lb.ft.
3. Insert the castle nut cotter pin (see #7, fig. 10) and ensure it is seated into the rotor
properly.
MAINTENANCE 25 BEFCO
T
ORNADO RSD & RRB OPERATOR’S MANUAL
1
2
3
1
4
4
3
48", 60" & 72" models 42" model only
5
5
1. nut
2. stump jumper
3. blade carrier rotor
4. blade bolt
5. blade
Fig. 10 - Blade and stump jumper assembly.
6
6
7
7
6. castle nut
7. cotter pin
 Loading...