18
EUROLIVE B215D/B215D-WH/B212D/B212D-WH/B210D/B210D-WH/B208D/B208D-WH
EUROLIVE B215D/B215D-WH/B212D/B212D-WH/B210D/B210
(EN)
Step 3: Getting
started
(ES)
Paso 3: Puesta en
marcha
(FR)
Etape 3 : Mise en
oeuvre
(DE)
Schritt 3: Erste
Schritte
(PT)
Passo 3: Primeiros
Passos
(IT)
Passo 3: Iniziare
(NL)
Stap 3: Aan de slag
(SE)
Steg 3: Komma
igång
(PL)
Krok 3: Pierwsze
kroki
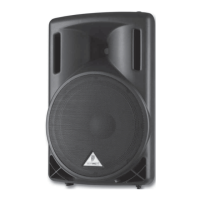
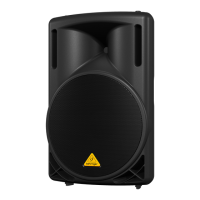
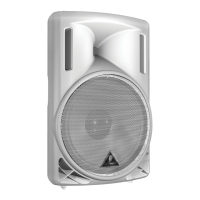
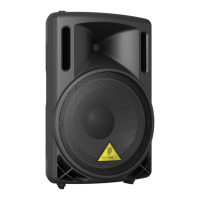
(EN) Place the speaker(s) in desired
locations, either on stands or as wedge
monitors on the oor.
(ES) Coloque el recinto(s) acústico en la ubicación
que quiera, sobre un soporte o como monitor de
escenario (tipo cuña).
(FR) Placez les enceintes où vous le souhaitez —
surdes pieds ou en position inclinée en retours
descène.
(DE) Stellen Sie den/die Lautsprecher an die
gewünschte Position, entweder auf Ständer oder als
Bühnenmonitor auf den Boden.
(PT) Coloque o(s) alto-falante(s) no(s) lugar(es)
desejado(s), tanto em suportes quanto como retorno
no chão.
(IT) Collocate l'altoparlante (o gli altoparlanti)
nelle posizioni desiderate, su supporti o come spia
da pavimento.
(NL) Plaats de luidspreker (s) op de gewenste
locaties, hetzij op standaards of als wigmonitors
op de vloer.
(SE) Placera högtalarna på önskade platser,
antingen på stativ eller som kilmonitorer på golvet.
(PL) Umieść głośnik (i) w żądanych miejscach,
na stojakach lub jako monitory klinowe na podłodze.
(EN) Make all necessary connections.
DONOT turn on the power yet.
(ES) Realice todas las conexiones
necesarias. NO encienda todavía esta unidad.
(FR) Faites les connexions nécessaires.
ATTENDEZavant de placer les enceintes sous tension.
(DE) Stellen Sie alle notwendigen Kabelverbindungen
her. Schalten Sie das Gerät noch NICHT ein.
(PT) Faça todas as conexões necessárias. NÃOligue
a força ainda.
(IT) Eettuate tutti i collegamenti necessari.
NON accendete ancora l'alimentazione.
(NL) Maak alle noodzakelijke verbindingen.
Schakel de stroom nog NIET in.
(SE) Gör alla nödvändiga anslutningar. Slå INTE på
strömmen ännu.
(PL) Wykonaj wszystkie niezbędne połączenia.
NIE WŁĄCZAJ jeszcze zasilania.
(EN) Turn on your audio source
(mixer,microphone).
(ES) Active su fuente audio
(mesa de mezclas,micrófono).
(FR) Placez la source sonore (console de mixage,
micro) sous tension.
(DE) Schalten Sie Ihre Audioquelle
(Mischer,Mikrofon)ein.
(PT) Ligue sua fonte de áudio (mixer,microfone).
(IT) Accendete la sorgente audio (mixer, microfono).
(NL) Schakel uw audiobron in (mixer, microfoon).
(SE) Slå på din ljudkälla (mixer, mikrofon).
(PL) Włącz źródło dźwięku (mikser, mikrofon).
(EN) Turn on your speaker(s) by pressing
the POWER SWITCH. The POWER LED will
lightup.
(ES) Encienda el recinto(s) acústico por medio del
interruptor POWER. El piloto POWER se iluminará
cuando lo haga.
(FR) PLacez les enceintes sous tension par
l’interrupteur POWER. La Led POWER s’allume alors.
(DE) Schalten Sie Ihre Lautsprecher ein, indem Sie die
POWER-TASTE drücken. Die POWER LED leuchtet.
(PT) Ligue seu(s) alto-falante(s) pressionando o
interruptor POWER SWITCH. O indicador de luz
POWER LEDacenderá.
(IT) Accendete gli altoparlanti premendo
l'interruttore POWER. Il led POWER si illuminerà.
(NL) Schakel uw luidspreker (s) in door op de
AAN/UIT-SCHAKELAAR te drukken. De POWER-LED
gaat branden.
(SE) Slå på högtalarna genom att trycka på
POWER SWITCH. POWER-lampan tänds.
(PL) Włącz głośnik (i), naciskając PRZEŁĄCZNIK
ZASILANIA. Dioda POWER zaświeci się.
 Loading...