(EN) Step 2: Controls
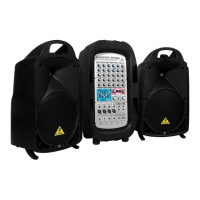
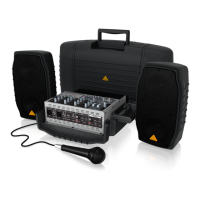
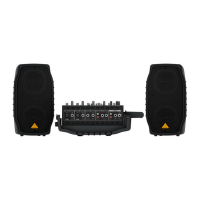
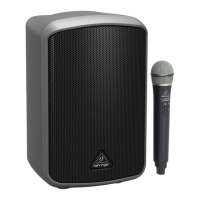
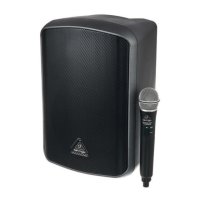
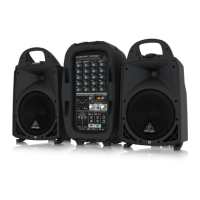
EUROPORT EPA40 Controls
8 EUROPORT EPA40 9 Quick Start Guide
(ES) Paso 2: Controles
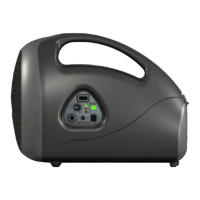
DC IN 18V 3A
(8)(1)
(3) (2) (3)
(5)(4) (9) (7) (6)(10)
(11)
(1) LOUDSPEAKER.
(2) CARRY HANDLE.
(3) HOLES FOR SHOULDER STRAP.
(4) The rotary MIC LEVEL control allows
you to adjust the volume level.
(5) The POWER switch turns the device
on and o. When turned on, the LED
of the POWER switch lights up.
(6) The CHARGE LED ashes yellow as
long as the rechargeable battery
is charging. It goes out when the
battery is fully charged.
(7) The LOW BAT LED indicates that
the rechargeable battery needs to
becharged.
(8) Connect the supplied BEHRINGER
XM1800S microphone to the
MICIN input.
◊ Never hold the microphone
directly in front of the
loudspeaker. Feedback hazard!
When operating the device,
keep the microphone behind the
loudspeaker to avoid feedback.
(9) You can connect an external sound
source (CD player, MP3 player, etc.)
to the LINE IN input.
(10) Connect to the power supply via the
polarized DC IN connector. Atting
power adapter is supplied. Usethe
device only with the included
powersupply.
(11) COMPARTMENT FOR BATTERY
AND SHOULDER STRAP.
Toinsert the battery, open the
compartment’scover. The bottom
half of the compartment is used for
the battery. Open the latch to access
the battery compartment. Insert the
battery as follows: Theterminals
must face the device with the
positive terminal (red) on the side
of the EPA control panel (to theleft,
asseen from the rear panel).
Insertthe battery and close the latch.
Close the battery compartment.
The device’s SERIAL NUMBER is
found on the bottom side of the unit.
Check Out behringer.com for
Full Manual
(1) ALTAVOZ.
(2) ASA.
(3) OJALES PARA CORREA.
(4) Use el control MIC LEVEL para regular
el volumen.
(5) Con el interruptor POWER se
enciende el aparato. Al estar
encendido se ilumina el LED del
interruptor.
(6) El LED amarillo CHARGE parpadea
mientras se carga la batería y se
apaga cuando la batería se ha
cargado en su totalidad.
(7) El LED LOW BAT indica que la batería
debe volver a cargarse.
(8) Conecte en la entrada MIC IN el
micrófono XM1800S de BEHRINGER
suministrado con el aparato.
◊ Nunca se coloque con el micrófono
delante del altavoz, pues existe
¡peligro de realimentación!
Para evitar realimentaciones al
utilizar el aparato, permanezca
detrás del altavoz siempre que use
el micrófono.
(9) En la entrada LINE IN puede conectar
una fuente de sonido externa
(reproductor de CDs, MP3, etc.).
(10) La conexión a la red eléctrica se
realiza mediante el conector bipolar
DC IN. En el suministro se incluye un
adaptador de corriente adecuado.
Utiliceexclusivamente el adaptador
de corriente suministrado.
(11) COMPARTIMIENTO PARA BATAERÍA
Y CORREA: Para colocar la batería
abra la tapa del compartimiento.
La batería debe colocarse en la
parte inferior del compartimiento.
Desbloquee el seguro del
compartimiento de la batería.
Coloque la batería de la siguiente
manera: los polos de la batería deben
estar orientados hacia el aparato.
Elpolo positivo (rojo) debe quedar del
lado del panel de control del EPA40
(el lado izquierdo, vistodesdeatrás).
Meta la batería y cierre el seguro.
Cierre el compartimiento de
labatería.
El NÚMERO DE SERIE se encuentra
en la parte inferior del aparato.
Si quiere acceder al manual de
instrucciones completo, vaya a la
página web behringer.com
 Loading...