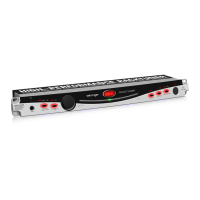
RACKTUNER BTR2000 Controls
(EN) Controls
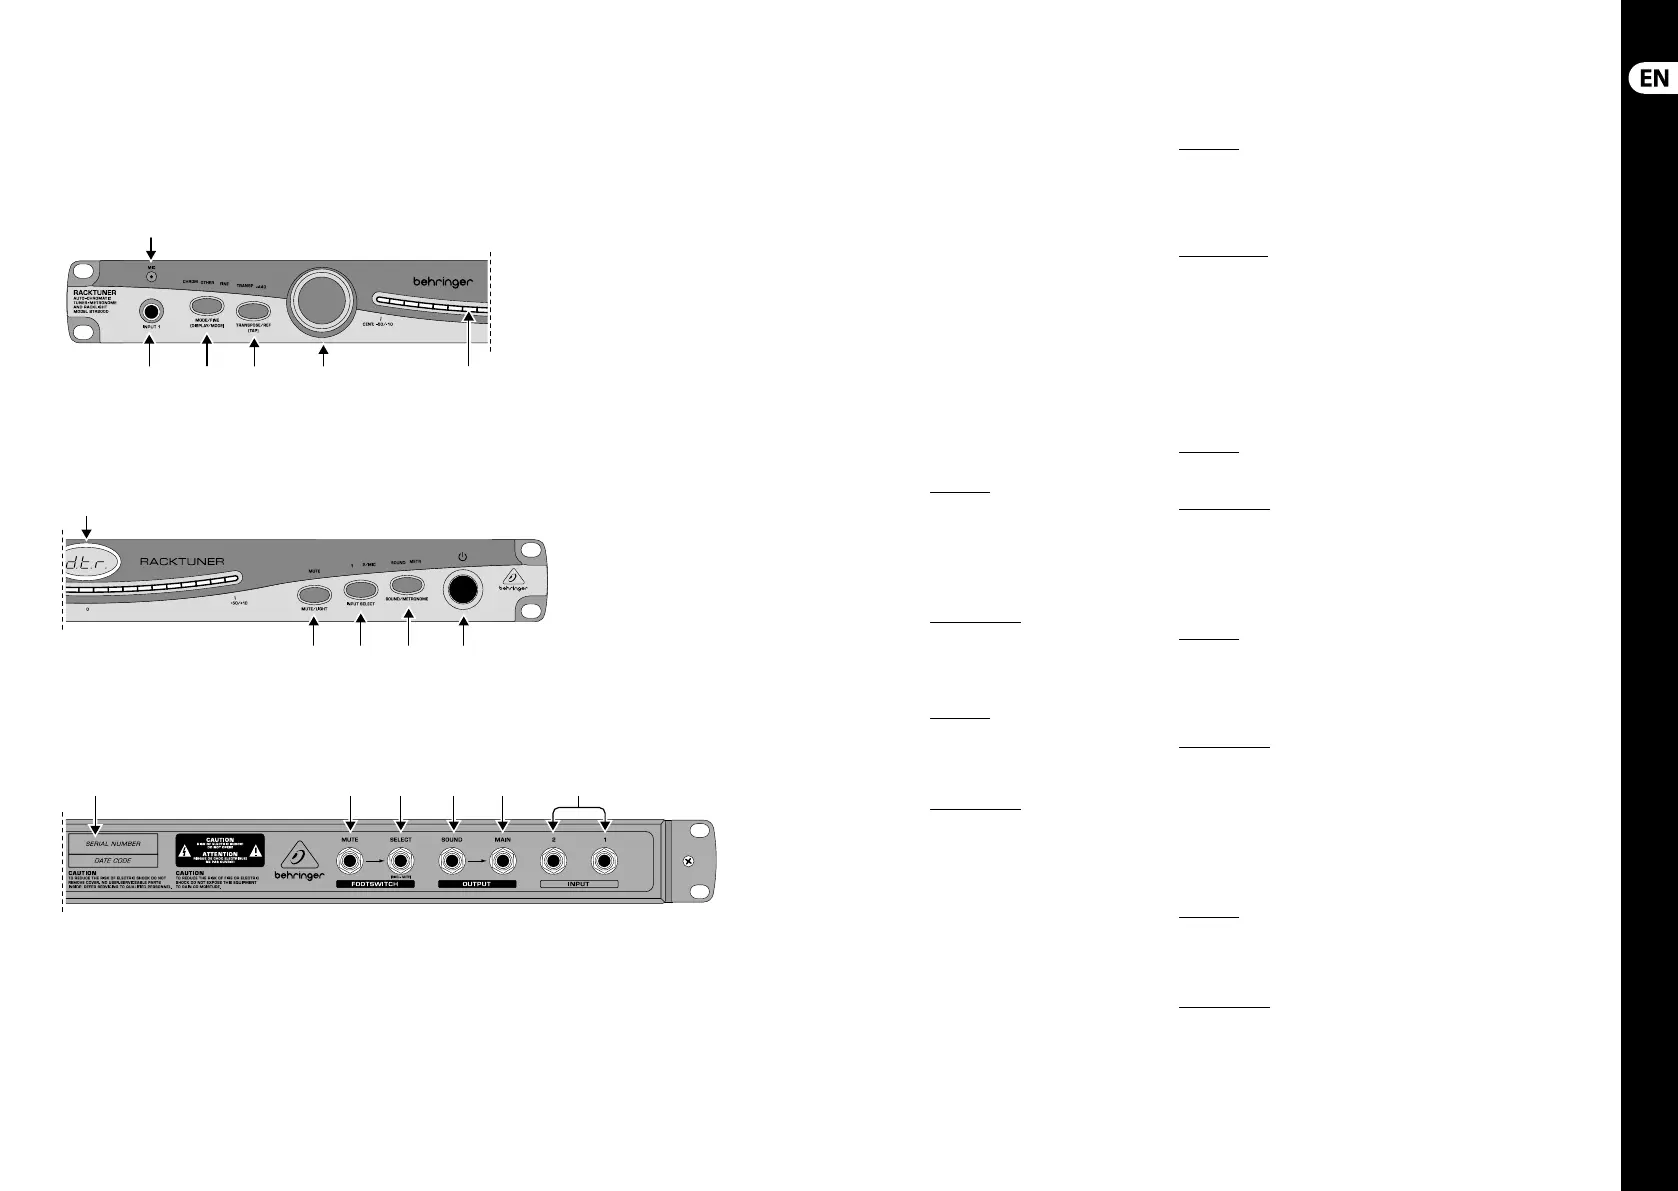
Operating elements on the left side of the BTR2000
(1)
(2) (3) (4) (5) (6)
Control elements on the right side of the BTR2000
(7)
(8) (9) (10) (11)
Serial number and sockets on the rear of the BTR2000
(12) (13) (14) (15) (16) (17)
(6) LED bar
Tuner mode: The LED bar indicates
how far the note played deviates
from the ideal during instrument
tuning. Thescaleof the display can
be toggled between ±50 cents and
±10cents.
Metronome mode: The graphical
metronome display uses the LEDbar.
(7) DISPLAY
Various values–tuner mode, pitch,
BPM–are shown in thisdisplay.
(8) MUTE/LIGHT button.
The BTR2000 comes with a
rack light. It is switched on
and o witha long tap on the
MUTE/LIGHT button.
Tuner mode: Pressing the
MUTE/LIGHT button brie y mutes
the entire MAIN output.
Metronome mode: Unlike in
tuner mode, brie y pressing the
MUTE/LIGHT button only mutes
the metronome click and not the
entire MAIN output; the instrument
remains audible.
(9) INPUT SELECT button.
Tuner mode: Depending on your
application, you must use and/
or select di erent inputs on the
BTR2000. You can toggle between
the two channels by pressing the
INPUT SELECT button.
Metronome mode: Pressing
this button starts or stops
the metronome (acoustic and
opticalindicator).
(10) SOUND/METRONOME button.
To switch between tuner and
metronome mode you must
press and hold the SOUND/
METRONOMEbutton.
Tuner mode: Brie y pressing this
button switches the reference
tone on or o . The volume of the
reference tone can be set with
thewheel.
Metronome mode: When the
SOUND/METRONOME button is
pressed brie y, you can adjust
the volume of the metronome click
using the wheel.
(11) The POWER button switches on
theBTR2000.
To disconnect the power from
the unit, unplug the power cord.
When you start up the unit,
ensure that the plug is easily
accessible. If the unit is mounted
in a rack, pleaseensure easy power
disconnection with a plug or
all-pole switch.
(12) SERIAL NUMBER
(13) MUTE
You can connect a single footswitch
(such as the BEHRINGERDUAL
A/B SWITCH AB200) to the
¼ " TS MUTE connector.
(14) SELECT
You can connect a double
footswitch (such as the
BEHRINGERFS112) to the
¼ " stereo SELECT connector.
(15) SOUND
The SOUND connector can output
the sounds generated by the unit
(reference tone, metronome click).
(16) MAIN
Depending on the cable
connections on the BTR2000 the
MAIN connector can either output
the sounds generated by the unit
and the instrument signal or the
instrument signal alone.
(17) INPUT 1 and INPUT 2
You can connect one or two
instruments to the unit via the
INPUT 1 and INPUT 2 connectors.
The built-in microphone is available
only when INPUT 2 is selected.
(1) The built-in microphone MIC can
be used to tune the instrument and
calibrate the standard “A”pitch To
do this, you must select INPUT 2 and
press the MUTE button.
(2) You can plug your instrument into
the INPUT 1 connector on the front
of the BTR2000. This connector takes
priority over the INPUT 1 connector
on the rear panel. Ifthere are
instruments plugged into both the
front and back INPUT1 connectors
at the same time, theunit only
evaluates the signal of the
instrument plugged into the front.
(3) MODE/FINE
[DISPLAY/MODE] button.
Tuner mode: Afterpressing this
button brie y you can select a tuner
mode (e.g. guitar or bass) using the
control (5).
A long press of the button toggles
the scaling of the LED bar between
1cent/LED and 5 cents/LED.
Metronome mode: Press this button
to toggle the metronome display
between a ashing light and a
needlesimulation.
(4) TRANSPOSE/REF [TAP] button.
Tuner mode: A short tap on this
button lets you use the wheel for
transposition. Keepingthe button
pressed longer lets you calibrate the
standard “A” pitch.
Metronome mode: The BTR2000 can
recognize and save a tempo that is
entered by pressing the [TAP] button
at least 4 times in rhythm.
(5) The wheel is used to change the
parameters of the various functions.
For example, it is used to set the BPM
of the metronome or the frequency
of standard “A.” A ashing light
indicates which function can be set
using this control.
8 RACKTUNER BTR2000 9 Quick Start Guide
 Loading...