9
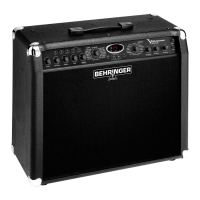
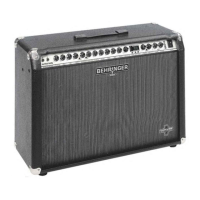
ULTRATWIN GX212
8
The MID BOOST button allows you to raise the midrange frequencies in the OVERDRIVE channel.
When the button is on, the associated control LED lights up.
9
Use the MORPHING control to crossfade between the various distortion characteristics available.
10
The PRESENCE control allows you to boost/cut the high midrange frequencies of the OVERDRIVE
channel.
11
The VOLUME control adjusts the volume of the OVERDRIVE channel.
+ Use both VOLUME controls to optimize the volume ratio of the two channels, so that no volume
differences can be heard when switching from one channel to the other. This setting is also
effective on the level-dependent digital effects!
12
The BASS control in the EQ section allows you to boost/cut the bass frequencies in the OVERDRIVE
channel.
13
With the MID control you can boost/cut the midrange frequencies in the OVERDRIVE channel.
14
The TREBLE control adjusts the OVERDRIVE channels upper frequency range.
+ Please note that with all three EQ controls in the OVERDRIVE channel set fully to the left, there
will be no signal sent to the speaker, which is due to the classical and extremely efficient EQ
circuit used in the ULTRATWIN.
15
The PARAMETER control allows you to edit one effect-specific parameter. Once selected with the
PARAMETER control, its value is displayed and the associated LED lights up (see ).
16
The STATUS LEDs inform you about the type of parameter you can edit with the PARAMETER control
(an exception being the MIDI LED).
s MIDI: This LED lights up when you press both UP and DOWN buttons for about two seconds. Subsequently,
you can use these buttons to set up a MIDI channel for MIDI data reception (1 through 16, ON = Omni and
OF = off, or ON = Omni and 1 through 16 plus one decimal point each = Store Enable mode, see chapter
3.2.1). Press the ENTER button to confirm your selection. The MIDI LED flashes as soon as MIDI data is
being received.
+ The Store Enable mode (see chapter 3.2.1) allows you to store presets directly via MIDI. Please
note that by sending MIDI control #18 values, any changes made to the currently active preset
will be permanently stored.
+ Whenever the multi-functional MIDI LED flashes and the unit is not in edit mode, this indicates
that the DSP modules output level is close to distortion. In this case, you should turn down the
VOLUME control a bit.
s TIME: This LED lights up when you select a time-domain effect parameter (e.g. reverb or delay time).
s SPEED: This LED lights up for all modulation effects and indicates the LFO speed (low-frequency oscillator)
or the speed parameter of compress/expander.
s SENS: This LED informs you that you can adjust the sensitivity of effects such as Auto-Wah, Expander,
Compressor.
s PITCH: This LED lights up when you edit the pitch shifter, and shows the detune factor, either in semi-tones
or cents.
s EQ: This LED lights up when you edit the parameters of a filter-based effect.
The built-in effects module features 31 different effect groups and includes a total of 99 effect variations.
17
The DISPLAY reads either the program number of the selected preset or the value of the parameter
selected with the PARAMETER, EFFECT A or EFFECT B controls.
18
Use the ENTER button to confirm your program selection.
+ When the MIDI functions are inactive, one effect can be stored for each of the two channels on
your ULTRATWIN, which allows for instance, to select a DELAY effect for the OVERDRIVE
channel and assign a REVERB/CHORUS effect to the CLEAN channel. The corresponding program
1. INTRODUCTION