3 ULTRAVOICE XM1800S User Manual
1. Introduction
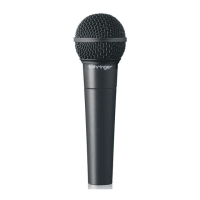
Thank you for expressing your condence in us by purchasing
the BEHRINGER XM1800S dynamic microphone. The XM1800S
combines highest quality standards at an aordable price and best
results in audio perfomances for both vocal and instrument miking
applications. The features of the XM1800S will make it a valuable
tool for your recording and live performance.
2. Audio Connection
Use a standard microphone cable to connect your XM1800S to
any mixer, power mixer, amp, or mic preamp. Connect the female
XLR end to the XM1800S’ male XLR input connector and the other
end of the cable, normally a male XLR connector, to the mixer,
power mixer, amp, or mic preamp.
output
For unbalanced use, pin 1 and pin 3
have to be bridged
1 = ground/shield
2 = hot (+ve)
3 = cold (-ve)
input
12
3
1
2
3
Balanced use with XLR connectors
Fig. 2.1: Balanced XLR conector
3. How to Use your XM1800s
Most Eectively
Adjust the gain control in the microphone channel of your mixing
console so that the peak LED lights up only occasionally or never
at all. The EQ controls in the microphone channel should be
set to mid-travel position to start with; low-cut lter and level
attenuator should be turned o. Try to achieve the desired sound by
experimenting with the microphone position. Place the microphone
as close to the sound source as possible. The closer your mic gets
to the sound source, the greater the bass response will be. On the
other hand, as you move the sound source further away from the
microphone, the bass response will gradually roll o (please see
frequency response chart on next page).
Only when the desired basic sound has been achieved,
should you start to use equalizers and signal processors, if any at all.
(Remember: less is often more!)
All microphones have characteristic polar patterns that determine
how well signals from around the area of the microphone are
accepted or rejected.
The super cardioid pattern is used by the XM1800S.
Thus, the XM1800S excels in environments where a lot of
undesired ambient noise exists. The XM1800S excellently
reproduces those sound signals originated directly in front of the
microphone while rejecting or minimizing sound signals originated
in the area behind the microphone (please refer to the polar pattern
on next page for detailed information).
0˚
30˚
60˚
90˚
120˚
150˚
180˚
210˚
240˚
270˚
300˚
330˚
250 Hz
500 Hz
1000 Hz
2000 Hz
4000 Hz
8000 Hz
0 db
-5 db
-10 db
-15 db
-20 db
-25 db
-30 db
Polar diagram

 Loading...