dynamic bass select TWE(E)D. For aggressive mids and incredible sustain select BRIT(ISH). Rounder and more evened-out (yet still sophisticated) sounds can be dialed up if you
select CALIF(ORNIAN); it’s perfect for leads.
6. Use the MODE switch to dial up one of three gain settings (HOT, HI G(AIN), CL(EA)N) that you want to combine with the amp setting.
7. The MIC switch simulates the microphone placement (orientation and distance) in relation to the cabinet. Select CL(AS)SIC (distant mic placement without ambience) to achieve high
mid-range content and a greater definition of notes like with classic early tube amps. In C(E)NT(E)R (close miking at the center of a cone) you get greater high mid-range content and
increased low-end for mega crunchy results. OFF (A)X(IS) (close miking at the edge of a cone) is very similar to CENTER, but produces a smoother, softer sound with less upper mid-
range content; perfect in combination with MODE position HOT.
8. When activated, the GND LIFT disconnects the ground connection between input and output. Depending on the grounding of the connected equipment, this can eliminate hum or
ground loops.
9. Use the footswitch to activate/deactivate all the tone functions (EQ, DRIVE, modeling). When deactivated, the GDI21 functions solely as a standard transparent DI box.
10. This LED illuminates when the effect is activated (see 8).
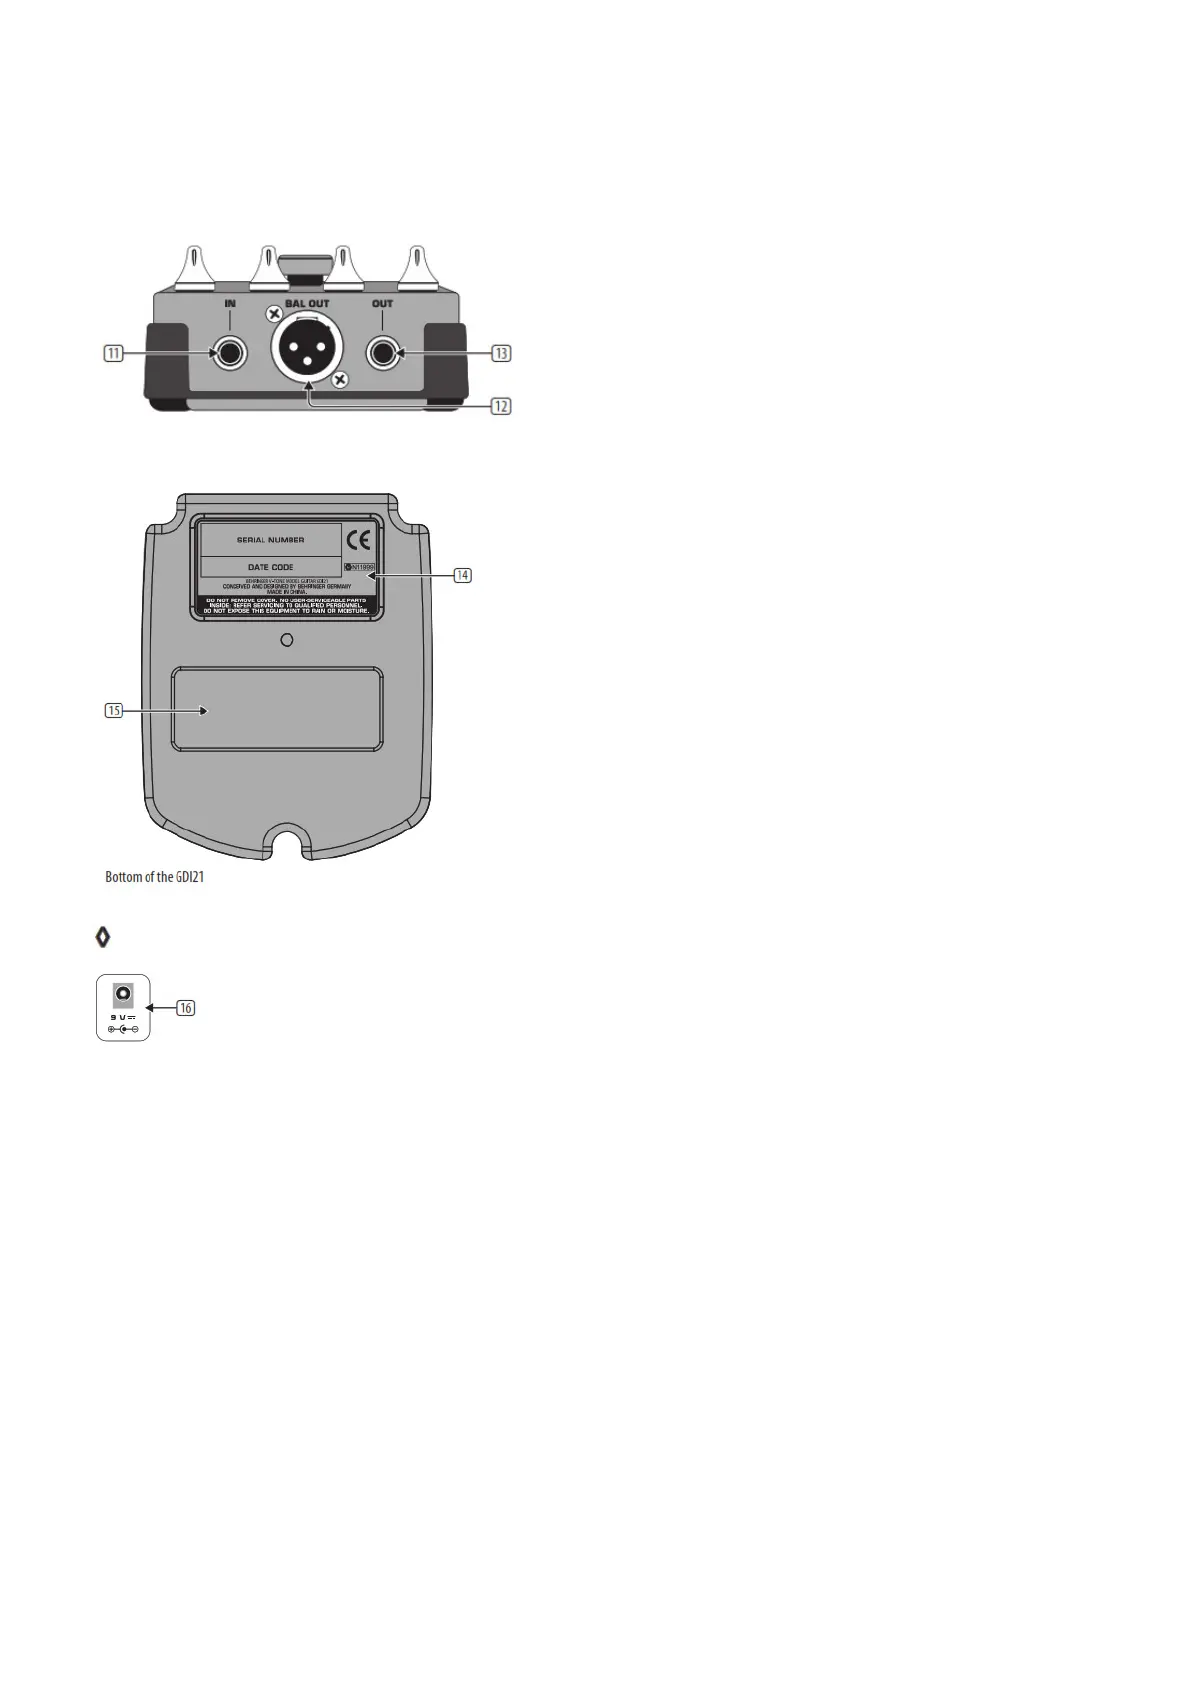
11. Use this ¼” TS INPUT connector to plug in the instrument cable of your guitar or other instruments.
12. BAL OUT is the GDI21’s balanced mic level output. Use a high-quality, balanced XLR (microphone) cable to connect the driver to a mixing console.
13. The unbalanced ¼” TS OUT connector sends the signal to your guitar amp.
14. SERIAL NUMBER. The serial number of the GDI21 is located at the bottom.
15. BATTERY COMPARTMENT. Open the lid to install or replace the 9 V battery.
The GDI21 is powered as soon you insert a plug into the INPUT. The battery is “disconnected” when the plug is removed. For this reason, the GDI21 has no on/off switch. To
prolong battery life, always disconnect the input when the driver is not in use.
Power supply connector
16. Use the DC IN connection to plug in a 9 V power supply (not included).
Safety Instructions
Do not use near water, or install near heat sources. Use only authorized attachments/accessories. Do not service product yourself. Contact our qualified servicing personnel for servicing or
repairs, especially when power supply cord or plug is damaged.
Warranty
Please register your new BEHRINGER equipment right after your purchase by visiting http://behringer.com and read the terms and conditions of our warranty carefully.
Specifications