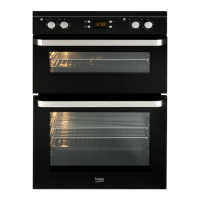
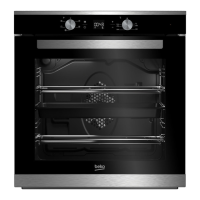
This document is an instruction manual for Beko built-in ovens, specifically models 4401, 4701 E, and CIM302000TX. It provides comprehensive information on the appliance's functions, technical specifications, usage, and maintenance.
Function Description
The ovens offer various cooking functions, which can be selected using a "function selection knob" in conjunction with an "oven heating control knob."
Conventional Oven (Model 4401, 4701 E, CIM302000TX):
This mode utilizes both the upper and lower heating elements, ensuring even cooking on both sides of the food. It is suitable for general baking and can be used for sterilizing food in preserved positions. For cooking, one tray is recommended. This position also supports grilling.
Fan Assisted Oven (Model 4701 E, CIM302000TX):
This multi-functional mode combines the bottom heating element, top heating element, and a turbo fan for efficient cooking. It ensures food is cooked optimally. Users can operate the bottom resistance and turbo fan based on the meal's characteristics. This mode is suitable for cooking with one tray and can be used to brown the top of a meal.
Defrost (Model 4701 E, CIM302000TX):
A dedicated function for defrosting food.
Turbo Oven (Model 4701 E, CIM302000TX):
This mode operates the turbo-heating element and turbo-fan. In timer-equipped models, the timer and heater are serially connected, requiring timer adjustment for the heater to run. It allows for cooking multiple foods simultaneously at the same temperature without mixing odors, promoting energy conservation. When cooking pastries with three trays in this mode, it's advised to pierce the dough to prevent swelling from blocking the space between trays.
3D Function (Model 4701 E, CIM302000TX - if available):
This function engages the circular heating element, fan, top, and bottom heating elements. It allows for cooking up to three trays of food simultaneously with high quality. It serves as an alternative to the turbo oven when better browning of both top and bottom is desired without odor mixing.
Booster Function (Model 4701 E, CIM302000TX - if available):
This mode is solely for preheating. To activate, adjust the heating control knob to the desired temperature and turn the function selection knob to the booster stage. The oven will immediately start operating, and the thermostat light will turn on. Once the selected temperature is reached, the thermostat light will turn off. After preheating, the function selection knob should be reset to the desired cooking mode. It is explicitly stated not to use this mode for cooking purposes.
Grill Function (All models):
The grill function uses the grill heater. For models 4401 and 4701 E, there are "Grill 1 with fan" and "Grill 2" options. For CIM302000TX, there are "Grill 1 with fan" and "Grill 2" options. When grilling, the oven door must always be kept closed. The grill should be preheated for approximately 5 minutes at the maximum heat control setting. Oil should be applied to the grill shelf to prevent meat from sticking. If using a large grill shelf, a tray should be placed on one of the bottom shelves with some water to collect oil and facilitate cleaning. Shelf positions 4 or 5 are recommended for grilling. Children should not be allowed to sit or stand on the open oven door.
Timer/Programmer (CIM302000TX):
The electronic timer allows for setting cooking durations between 00:00 and 24:00 hours, functioning as a chiming alarm, and running fully-automatic, semi-automatic, or non-programmed (manual) cooking programs. The heating elements are connected to and controlled by the electronic timer. The timer displays the current time in 24-hour format and can be used as a minute minder. The oven will not operate unless the timer is set. If the electricity is cut off, the timer will reset.
- Manual Cooking: To cancel a program, press the timer button, then the "-" button until 0:00 is displayed, then press the timer button again. Set the oven and function knobs to the desired positions. The oven will switch on, and the amber indicator light will illuminate. To switch off, reset the oven thermostat knob to "0".
- Automatic Programming: The programmer switches the oven on and off at required times. Ensure the oven thermostat is in "off" position and the correct time is set. Programs can be cancelled. Stop time and cooking period can be set. The oven will switch on, cook, and switch off at the predetermined time. An alarm will sound and "Auto" will flash at the end of cooking.
- Semi-automatic Programming: Allows a manual start time but an automatic switch-off time. Set the cooking period, oven thermostat, and function selection knobs. The oven will switch on and cook, then switch off at the end of the preset time.
- Timer Alarm: Can be set for 0 to 23 hours and 59 minutes to remind users to switch off a hob heating zone.
Key Lock (for models equipped with it):
The demo mode acts as a key lock, keeping relays open so the appliance remains unaffected even if a cooking program is selected.
- Activation: Ensure the clock is in manual mode and no active programs. Hold the manual adjustment button and the cooking period adjustment button simultaneously for ~8 seconds. The display will show "On". Press the "+" button. The display will show "OFF" and the "i" symbol. After ~5 seconds, the time reappears with the "i" symbol.
- Deactivation: Ensure the clock is in manual mode and no active programs. Hold the manual adjustment button and the cooking period adjustment button simultaneously for ~8 seconds. The display will show "OFF". Press the "+" button. The display will show "ON" and the "i" symbol disappears. After ~5 seconds, the time reappears.
Important Technical Specifications
| Feature |
4401 |
4701 E |
CIM 302000 TX |
| Outer width |
594 mm |
594 mm |
594 mm |
| Outer depth |
550 mm |
550 mm |
550 mm |
| Outer height |
595 mm |
595 mm |
595 mm |
| Installing Width |
600 mm |
600 mm |
600 mm |
| Installing Depth |
560 mm |
560 mm |
560 mm |
| Installing Height |
600 mm |
600 mm |
600 mm |
| Oven output |
2500 W |
2500 W |
2400 W |
| Grill output |
1100/2300 W |
1100/2300 W |
1100/2300 W |
| Ring heater |
- |
1800 W |
1800 W |
| Fan motor |
+ |
+ |
+ |
| Supply voltage |
220-230 V ~ 50 Hz |
220-230 V ~ 50 Hz |
220-230 V ~ 50 Hz |
| Lamp |
15/25 W |
15/25 W |
15/25 W |
| Cooking |
Electrical timer |
Electrical timer |
Electrical timer |
Components:
- Upper heating element
- Shelf positions
- Ring heater (behind steel plate)
- Front door
- Handle
- Tray
- Grill shelf
- Control panel
- Bottom heater (behind steel plate)
- Air exit holes
- Fan motor (behind steel plate)
- Lamp
Electrical Connection:
The appliance must be earthed. The voltage and frequency on the rating plate must match the power supply. A cable (H05 VV-F 3G 1.5) without a plug is provided. Connection details: Brown = L (Live), Blue = N (Neutral), Green/Yellow = E (Earth). Installation must be done by a qualified electrician using a suitable double pole control unit with a minimum contact clearance of 3 mm in all poles. The cable length should be a maximum of 2m for isolation safety.
Installation Cavity:
The furniture cavity materials must withstand 100°C, especially for wooden materials, coverings, plastic surfaces, adhesives, paints, and polishes. Furniture in the immediate vicinity must withstand at least 70°C. For pyrolytic cleaning ovens, a minimum distance of 30 mm must be left between the oven's front panel and furniture/wall.
Usage Features
General Safety:
- Not intended for use by persons with reduced physical, sensory, or mental capabilities unless supervised or instructed.
- Children should be supervised to ensure they do not play with the appliance.
- Ensure voltage and frequency match the indicator plate.
- Electrical wiring should be ready before connecting.
- A 16 A fuse is recommended if current is less than 16 Amperes.
- Ground cable must be installed by the manufacturer or a qualified person.
- Do not squeeze the supply cord under the oven body or inside the oven door.
- Damaged supply cords must be replaced by the manufacturer or a qualified person.
- Do not modify the equipment.
- Check for transportation damages.
- For models with a timer, adjust it during the first operation or after power interruptions.
- Do not move the appliance by pulling the door or handles.
- Remove all packaging materials, including polystyrene from the front door glass.
- Avoid touching hot heating elements during use.
- The cooling fan will continue after switching off the oven.
- Switch off the appliance from the mains before cleaning or in case of product failure.
- Switch off the appliance before replacing the lamp to avoid electric shock.
- Use oven gloves when removing grill racks and dishes.
- Condensation on cool surfaces during cooking is normal; wipe with a dry cloth.
Preparation and Burning Off:
Protective coatings need to be burnt off before first use, which will emit fumes. Ensure the room is well-aired during this process and avoid direct inhalation of fumes. Do not connect the cooker to electricity until all packing and transit protectors are removed. Do not place heavy objects on the open front door or allow children to sit on it. The exterior surface of the oven may heat up during grilling, so keep children away.
Cooking Table:
Provides recommended thermostat positions, shelf positions, and cooking times for various foods (e.g., shortbread, cake, pizza, roast beef, fish). Values are laboratory tested and may vary based on individual cooking habits. Preheating the oven for 10 minutes with the door closed is recommended before placing food inside.
Sterilizing (Canned):
- Place a tray on the first shelf with 0.5 liters of water at approximately 80°C.
- Ensure jars do not touch each other.
- Close the oven lid.
- Bring the "function selector" knob to the " " position.
- For fruits: Turn the "Oven heating remote-control device" knob to 150-200°C (approx. 180°C). After 45 minutes, bring the "function selector" knob to "O" position. Remove from oven after 30 minutes.
- For vegetables: Turn the "Oven heating remote-control device" knob to 100-150°C. After 80-90 minutes, bring the "function selector" knob to "O" position. Remove from oven after 30 minutes.
Accessories:
- Grill: For grilling or placing saucepans.
- Oven tray (grand): For cooking pastries.
- Grill in tray: For grilling.
- Deep tray: For cooking watery foods.
- Glass tray: For cooking watery foods.
Warning about Glass Tray:
- Do not place a hot glass tray on wet or cold surfaces.
- Do not put a cold glass tray from the refrigerator into a hot oven.
- Do not cut materials in the glass tray with a knife.
- Do not clean glass trays with hard brushes, dish fiber, or knives. Use special glass cleaning materials.
Maintenance Features
Cleaning:
- Turn off the main switch before cleaning.
- Ensure all controls are in the OFF position before switching on again.
- Wipe the control panel and knobs with a damp cloth and polish with a dry cloth. Do not use oven cleaners, aerosols, scouring pads, or abrasive powder on plastic knobs. Do not remove control knobs.
- Oven Interior: Remove all trays and the grill. Clean with a moist, soapy cloth, then with a wet cloth, and let dry. Do not use dry powder agents. Immediately clean acidic substances like oil and lemon. Avoid sharp instruments, abrasive household cleaners, or detergents. For hard stains, use suitable washing liquid. Soft cloth with soapy water or commercial surface cleaners are recommended. Use liquid paste or cream type cleaners.
- Warning: Never clean the inside of the oven and trays with hard brushes, steel pads, or knives.
- Commercially available special cleaners can be used after reading warning labels. Do not use cleaning agents containing acid or chlorine.
- Catalytic-enamelled models (if available): The oven interior has catalytic enamel, which is self-cleaning, so no extra cleaning is needed after cooking.
- Steel Rack (if applicable): To clean, unscrew the 4 screws, clean, and reassemble.
- Do not use steel wool, cleaning powders, or hard abrasive sponges on ceramic glass and stainless steel surfaces.
- Color change is due to burnt residue accumulation and abrasion, not material properties.
Lowering the Heating Element:
- Ensure the heating element is cool.
- Unlock the heating element by loosening the screw at the ceiling of the oven cavity.
- Warning: Never switch on the heating element or place weight on it when lowered.
- After cleaning, move the heating element upwards and screw it back.
Replacing the Oven Lamp:
- For models with lamp:
- Unplug the power cable.
- Remove the protective glass cover by turning it counter-clockwise.
- Remove the bulb by turning it counter-clockwise.
- Install the correct bulb (15/25W E14, T300°C) from an Authorized Service, then reinstall the protective glass.
- For square-shaped lamp models: There are two square-shaped lamps (right and left side of the oven).
- Disconnect the appliance from the supply.
- Remove screws on the side shelf.
- Remove the lens of the oven lamp using a flat screwdriver.
- Replace the defective lamp with a new one.
- Reinstall the lens and side shelf.
Future Transportation:
- Store the original box and transport the oven in its original carton, following printed guidance marks.
- To protect the oven door from internal wire grill and tray damage, place a 1-1.5 cm strip of cardboard or paper inside the oven door, aligned with the trays. Tape the oven door to the sidewalls.
- If the original carton is unavailable, pack the oven in bubble wrap or thick cardboard and tape securely.
- Transport the oven in an upright position. Do not place other items on top.
Troubleshooting Before Calling Service:
- If the oven is not heating: Check if the product's plug is connected to a grounded socket, if the fuse is off, or if the clock (in models with a clock) is not set up.
- If the oven is not working: In multi-system ovens, check if the function selector knob is set to the necessary functions. Check if the temperature device mode is set with the oven heating remote-control device knob.
- If the internal illumination lamp is off: Check for electricity, and if the lamp is out of order, change it as per the guide.
- If cooking is uneven (top and bottom parts): Control the temperature value, cooking time, and shelf positions according to the guide.
- If problems persist: Call authorized service.