THE SCIENCE
BEHIND CLEAN
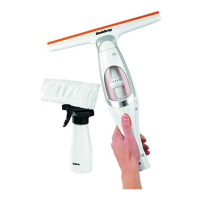
BEL0537 – Window Cleaning Vacuum
7
Instructions for Use
Before First Use
Before using the window vacuum for the first time, wipe it with a soft, damp cloth and dry thoroughly.
Do not immerse the window vacuum in water or any other liquid.
Ensure that the squeegee head is free from any debris (e.g. hair), as this could ruin the streak-free
finish or damage the surface of the glass.
Charging the Window Cleaning Vacuum
Before first use, the window vacuum must be charged for approx. 3–4 hours. Subsequent
charging times will take approx. 2–3 hours.
STEP 1: Connect the lead from the mains power adaptor to the charging port on the
window vacuum.
STEP 2: Plug the mains power adaptor into the mains power supply; the indicator light will flash
to confirm that the battery is charging. Once the battery is fully charged, the indicator light will
illuminate fully.
Note: Whilst charging, the window vacuum may become warm.
Caution: Exercise caution when charging the window vacuum; ensure
that it is on a dry, stable surface away from other appliances.
Warning: Do not use any mains power adaptor other than that
supplied, as this could cause a hazard.
Assembling the Window Cleaning Vacuum
Attach the squeegee head by inserting it onto the top of the window vacuum main body; the
arrow indicators must be aligned. Twist the squeegee head in a clockwise direction to secure it
into position.
Assembling the Spray Bottle
STEP 1: Attach the wiper attachment to the top of the spray nozzle head.
STEP 2: Feed the suction hose through the nozzle clip; the spray nozzle head should face away
from the lip.
STEP 3: Gently press in the lugs on the bottom of the wiper attachment and insert the
assembled wiper attachment/spray nozzle head into the nozzle clip, until it locks into position.
STEP 4: Add the spray head to the top of the spray bottle and twist it in a clockwise direction
to secure it into position.
STEP 5: Pull the microfibre wipe pad over the wiper attachment, allowing the elastic edges to
hold it into position. Secure it using the hook and loop tape.