5. Check the t
a. With the helmet on and the straps fastened and pulled tight, try to
remove the helmet from your head. Grasp it securely and make a
serious effort to roll it off your head by moving it forwards and
backwards.
b. If you can remove the helmet by rolling it backwards far enough to
expose your forehead or forward enough to block your vision,
DO NOT USE THIS HELMET. Replace the helmet with a smaller size.
c. If you cannot remove this helmet, it does not roll backward far
enough to expose your forehead or forward enough to block your
vision, you have a proper t.
6. Removing the helmet
a. Un-thread chin strap from Double D-Ring.
b. Remove the helmet.
ADJUSTING THE VISOR
1. The visor is held in place by 2 screws
2. Loosen both screws, adjust the visor to the desired location and then
retighten the screws. Can use Allen key, athead screwdriver or coins.
REMOVING THE VISOR
1. Take out the screws.
2. Carefully pull the visor away from the helmet.
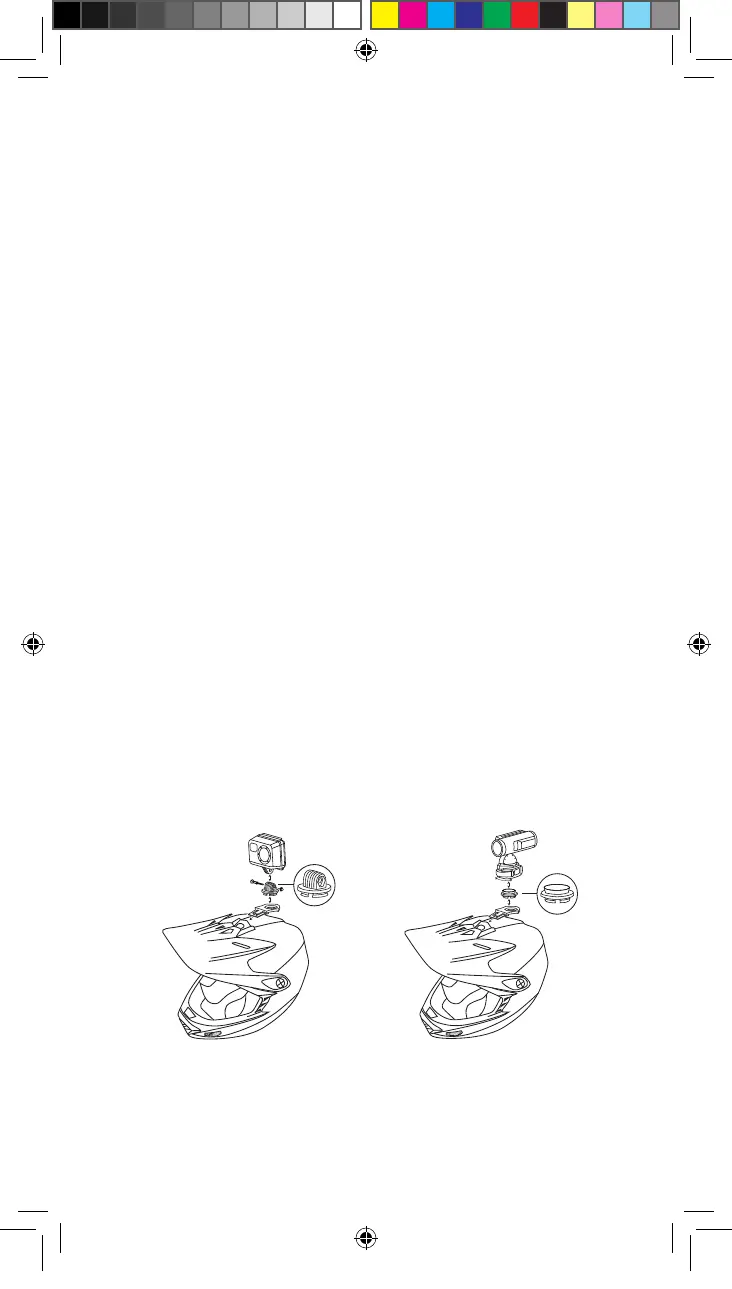
CAMERA MOUNT
The top vent is designed to receive the camera mounting bracket
included with helmet. Camera mounting bracket comes with a GoPro
®
breakaway insert attached (Figure D). The GoPro breakaway insert can
be replaced with a Contour
®
breakaway insert (Figure E). To replace
GoPro breakaway insert apply rm pressure to center of insert and
unsnap it from bracket. Firmly snap Contour breakaway insert into
center of bracket.
ATTACH AND REMOVE CAMERA MOUNT
1. Snap bracket into the top vent as shown.
2. To remove bracket, press button and slide out of top vent.
Figure D Figure E
FFManualEngMods2.5.indd 4 6/11/12 5:16 PM
 Loading...