www.beltalignmenttool.com
800-997-4467 sales@beltalignmenttool.com
www.beltalignmenttool.com 800-997-4467 sales@beltalignmenttool.com
Section 1
Digi-Belt™ Basic Single & Multi Belt Tensioning Procedure
1. Look up the recommended measurements and tension values from the belt manufacture and or
the machine provider
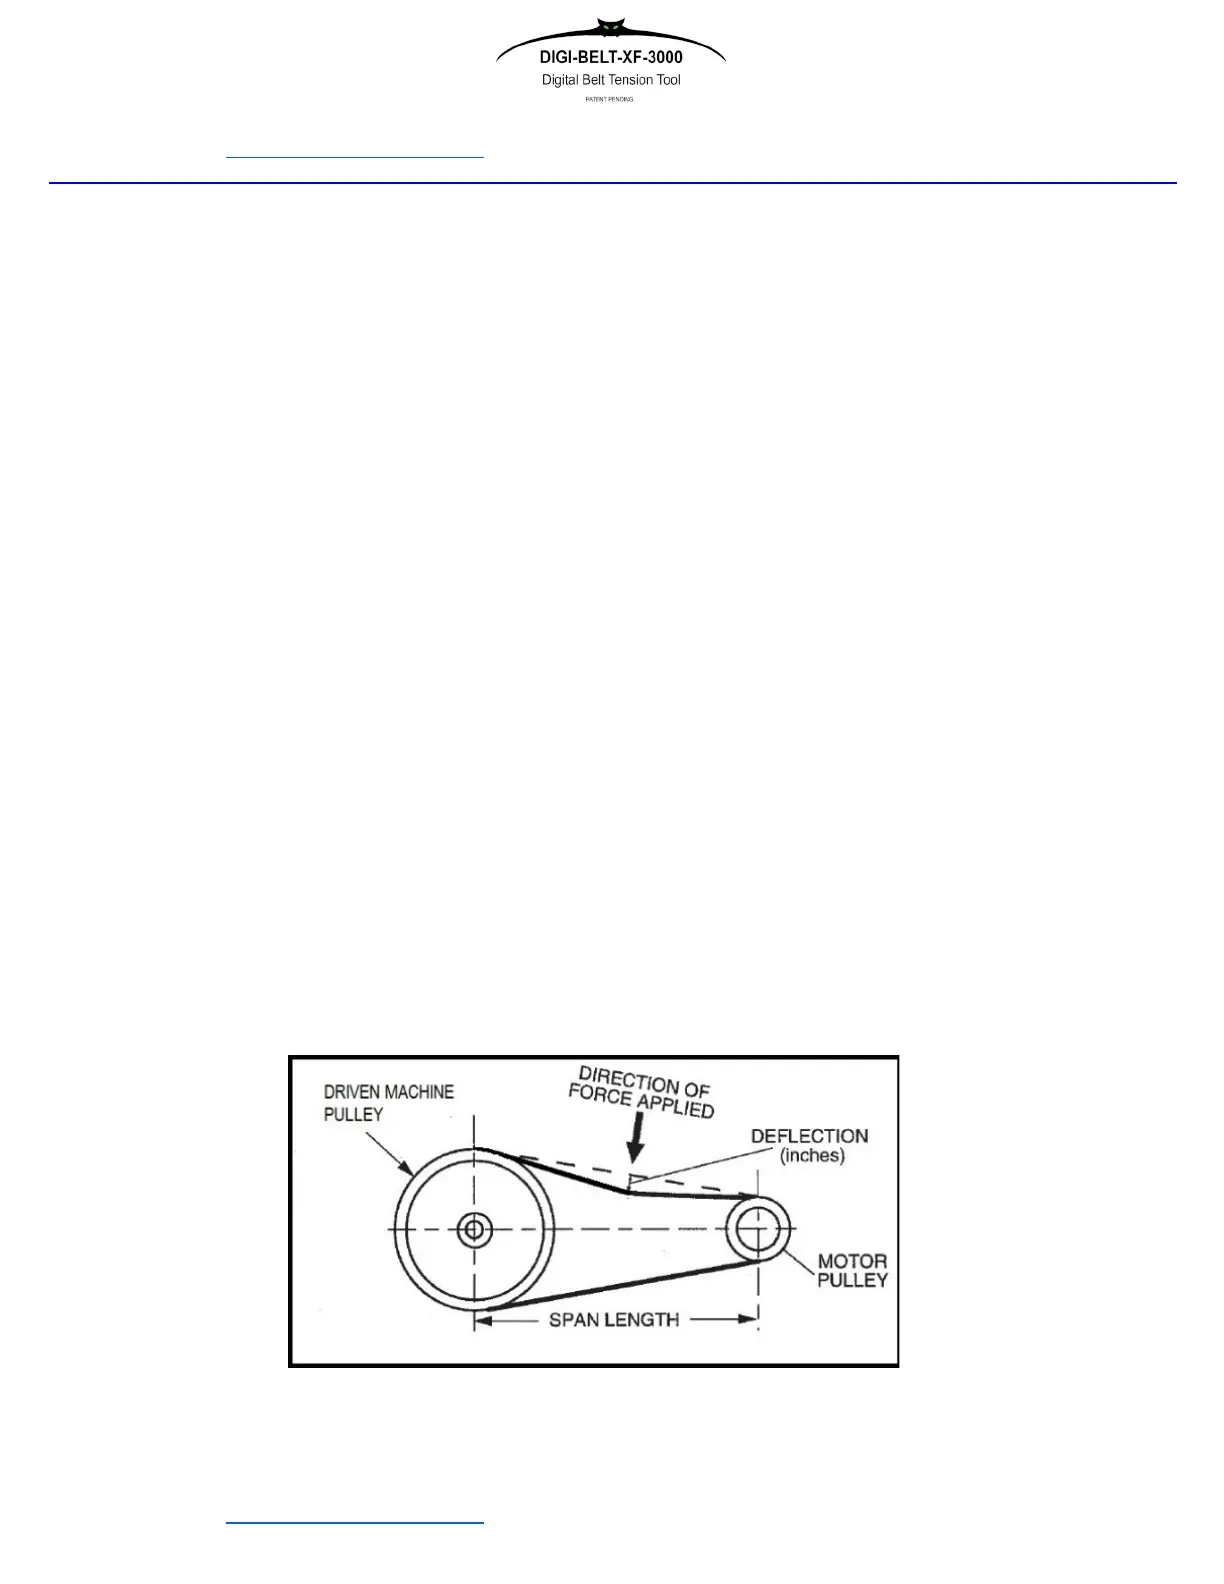
2. Measure belt span. (See Drawing 1)
3. Position O-ring on the tester scale at this measured length. The scale is 10” per increment. 150”
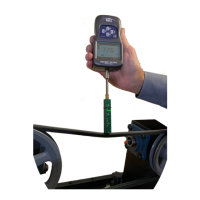
Maximum Span. (Picture 2)
4. The BT 357D Tension Tester is already configured to test and measure belts. To begin simply
press the power on/off button.
5.
Zero the BT-357D by pressing the ZERO button
6. Place the tip of the Deflection Span Scale on one belt, at the center of the span.
7. Loosen the brass lock nut, then adjust the position of the Deflection Span Scale up or down on
the adjustment rod until the ZERO line (see picture 2) is even with the adjacent belt or even with
the lasers. (B.A.T. Belt Alignment Tool Method as described in section 2)
8. IF needed again Zero the BT-357D by pressing the ZERO button
9.
Apply a sufficient force to BT-357D to deflect the belt such that the O-ring is in-line with the
other belts. Maximum force of Model 3000-110 is 110lbs.
10.
For increased accuracy or if this is a single-belt drive, use the angle brackets and the B.A.T. Belt
Alignment Tool Method as described in section 2.
11.
Read the deflection force on the BT-357D display
12.
Compare this force with the value given on the chart or table supplied by your belt manufacture.
13.
Zero the reading in the BT-357D and remeasure to verify results.
14.
If the force is below the recommended value, increase the drive center distance to provide
greater belt tension.
15.
Reduce the center distance if there is too much force.
Diagram 1: Belt Span Measurement
 Loading...