SpA F 170
5
PACKING AND TRANSPORT
◊ WIDTH: 100 cm. ◊ DEPTH: 47 cm. ◊ HEIGHT: 63 cm.
-Fig.n.4-
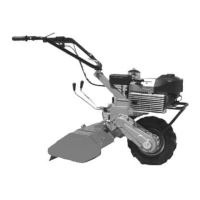
• Remove the power mower from its packing.
• Fix the handles to the handlebar support using the two screws and
two knobs pre-mounted on the handle. Make sure to position the
control cables correctly.
• Fix the bar to the machine, remov ing the hooked spring (Fig.4
Ref.A) located on the pin of the bar support (Ref .B). Insert the pin
of the bar support into the f rame (Ref .C) and reinsert the spring
(Ref.A) in the direction of the hole. Take the plastic cy linder (Fig.4
ref.D), insert it into the grass div ider (Ref . E) and insert all into the
pin of the bar (Ref .F) correspondingly to the hole on the grass
divider and on the cy linder. Fix the grass div ider (Ref . E) to the bar,
inserting two screws (Ref .G) into the threaded holes on the bar
corresponding to the grass divider.
• If the machine is to be transported, empty out the petrol tank and alway s apply the plastic protectiv e strip to the
E.S.M. cutting bar blade. Read the E.S.M. sheet attached.
IMPORTANT: THE PACKED MACHINE IS SUPPLIED WITH THE MOTOR WITHOUT OIL OR PETROL.
SAFETY RULES
• Read carefully the operation and maintenance manual enclosed with the machine.
• The use of the machine is prohibited to persons under 16 years of age.
• The operator is liable f or damages since the machine is under his control.
• Those unf amiliar with the machine or who have nev er used it are obliged to read the operation and maintenance
manual before operation.
• In case of transport, disassemble the bar and empty the petrol out of the tank.
• If the machine is lef t unattended, ensure that it cannot start up again.
• Before running the machine, the operator must hav e a 5 meter radius of f ree space around him.
• Dry any petrol leaks.
• Fill up the tank with the motor of f . Filling the tank or transf erring fuel must alway s be perf ormed outdoors, away f rom
flames or heat sources. Do not smoke during this operation.
• When mowing in mountainous areas or on slopes, mow horizontally and use non-skid equipment on shoes and wheels.
• If the blade needs replacement, observ e E.S.M. operation and maintenance procedures.
• If the bar suf fers impact, check the condition of the bar bef ore resuming work.
• Keep feet and hands f ar away f rom the cutting bar and all rotating parts.
• Do not run the motor where exhaust containing carbon monoxide may accumulate.
• Never use the mower incomplete or without its saf ety device.
• Do not assemble/disassemble or clean the cutting bar or other equipment with the motor running.
• Caution! When the clutch is engaged the cutting bar is alway s in motion.
• Caution! Do not mow areas with slopes exceeding 30%.
• We will not be held liable for accidents caused by the failure to observe these rules.
STARTING AND STOPPING THE POWER MOWER
Every time you get ready to start the motor, make a caref ul check of the f ollowing:
• Make sure that f uel is in the tank.
• Check the motor oil level: CAUTION: MACHINES OUT OF THE FACTORY DO NOT
CONTAIN OIL IN THE MOTOR. Make sure to add oil up to the lev el on the dipstick.
• CONSULT THE OPERATION AND MAINTENANCE MANUAL OF THE MOTOR UNDER
"BEFORE START-UP"
• Check that all safety sy stems are released and functioning.
• Start the machine alway s in the open air and stay at its side.
• Bring the accelerator hand lever (Fig. 5) to the "MAX" position, grasp the cord handle
(Fig. 6) and pull it slightly until y ou feel some resistance, then pull harder. Make sure
that the cord does not return by itself -- accompany it with y our hand.
• With the motor running, bring the accelerator lever (Fig. 5) to the middle position To make the machine go f orward
squeeze the clutch lev er (Fig. 7 Ref . B) ; if you leav e the lever, the machine stops.
• To mov e the mower freely forward or back, squeeze the wheel release lev er (neutral position) after squeezing the
clutch lever.
-Fig. n°5-
 Loading...