12
5049-744
Become familiar with each piece before assembling the pressure washer. Check all
contents against the illustration. If any parts are missing or damaged, call the pressure
washer helpline at 1-833-818-4111.
ASSEMBLING YOUR PRESSURE WASHER
Your high pressure washer was mostly assembled at the factory. However, you will
need to perform these tasks before you can operate your pressure washer:
1. Handle position adjustment. 5. Lubricate O-rings.
2. Connect hand crank onto hose reel. 6. Connect hose and water supply to pump.
3. Add oil to engine crankcase. 7. Connect spray wand and quick-connect nozzles.
4. Add fuel to fuel tank. 8. Connect hose to the spray gun.
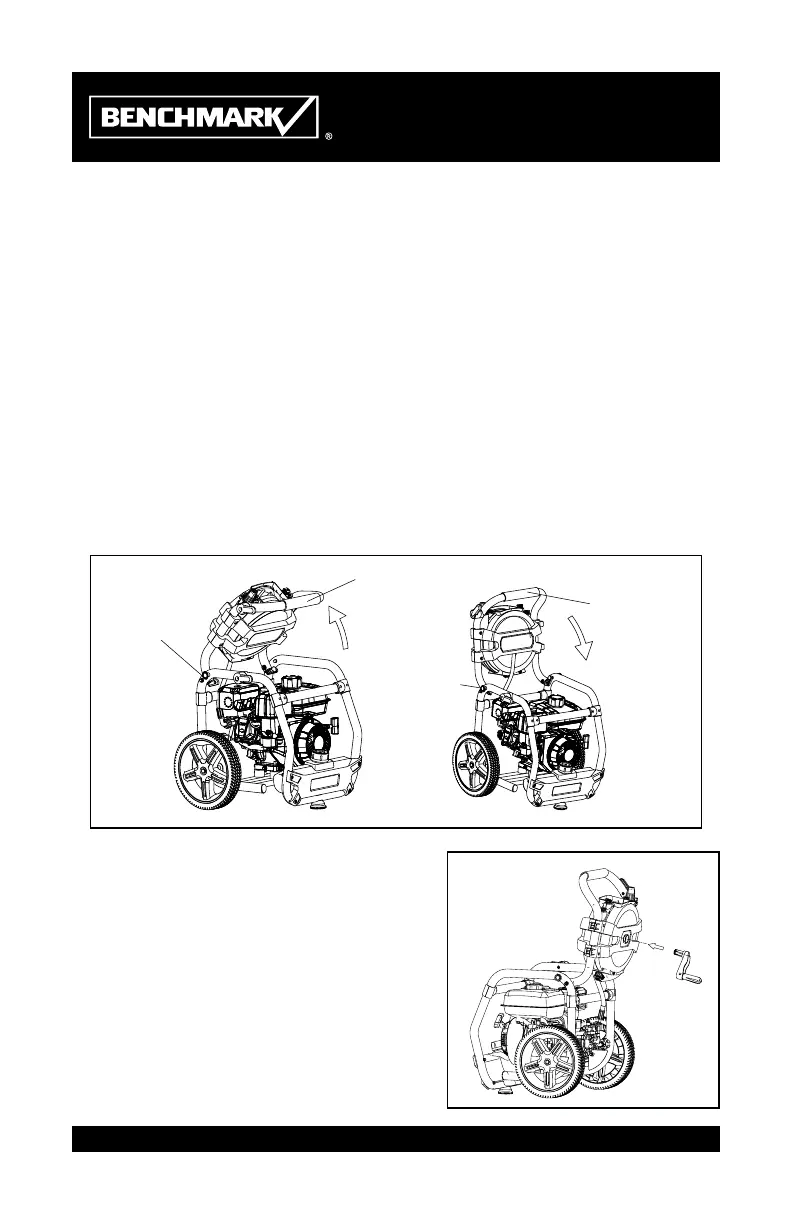
1. HANDLE POSITION ADJUSTMENT
Turn the handle 2 upward around 100°, until the locking/releasing pin 1 engages into
the corresponding hole on the frame. Make sure the handle was fixed securely before
each use.
To fold the handle, pull the locking/releasing
pin 1 outward on the right side of the pressure
washer, and turn the handle 2 downward to
fold the handle.
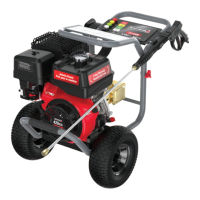
2. CONNECT HAND CRANK ONTO
HOSE REEL
Attach hand crank onto the hose reel. Insert in
the hole and snap into place by hand. No tools
required.
1
2
Pull
Unfold
Fold
Pull