62
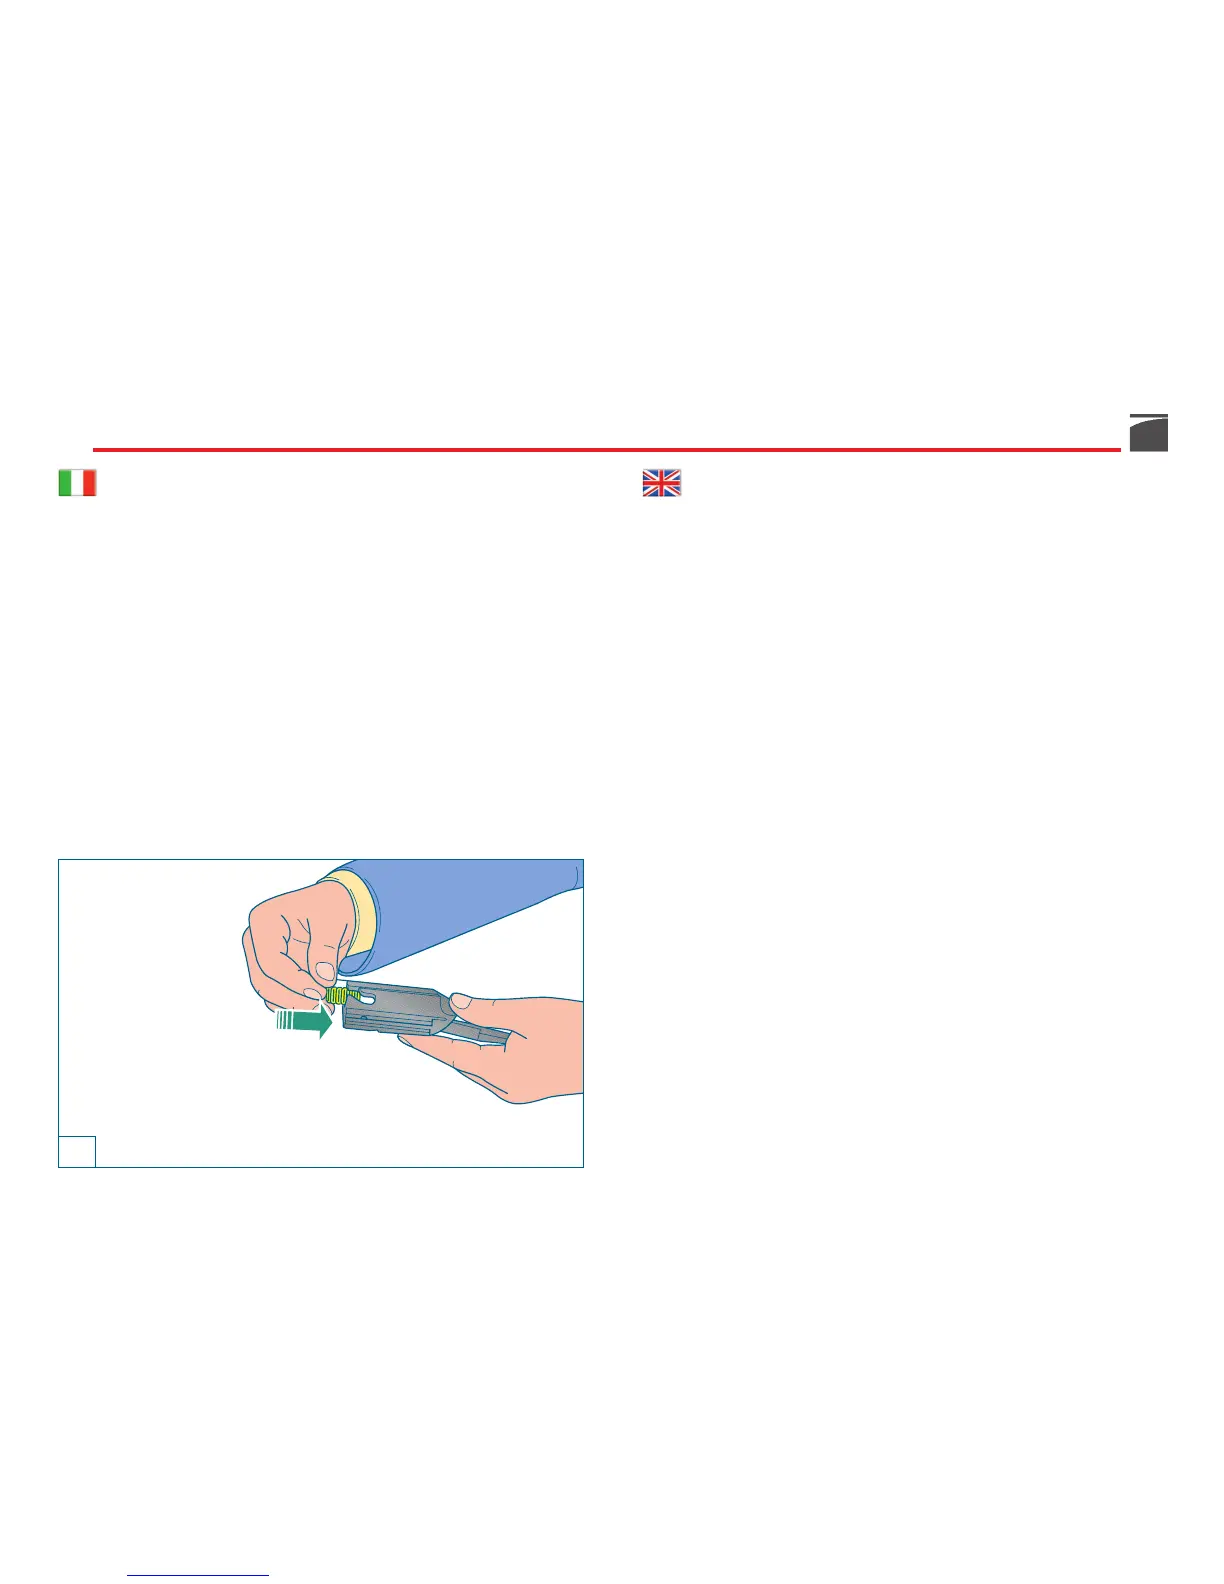
3) Prendere l’otturatore ed infilare nel suo foro la molla rinculo ottu-
ratore (fig. 47).
ATTENZIONE: accertarsi di collocare sempre la molla di rinculo del-
l'otturatore tra testa di chiusura ed otturatore stesso, per evitare che
- nella fase di chiusura - possa partire il colpo.
4) Prendere la testa di chiusura ed infilarla nell’otturatore avendo
cura che il foro sul suo gambo collimi con l’asola dell’otturatore
stesso (fig. 48).
AVVERTENZA: i piani inclinati ricavati sul gambo della testa di chiu-
sura non devono essere visibili a pezzo montato.
5) Infilare il perno rotazione testa di chiusura nel foro ricavato sul
gambo della testa di chiusura, facendolo passare attraverso l’aso-
la dell’otturatore (fig. 48).
3) Place the bolt recoil spring in its seat on the bolt (fig. 47).
NOTE: always make sure that the bolt recoil spring is positioned
between the locking head and the bolt itself, in order to avoid a shot
being fired when the bolt is closed.
4) Slide the locking head into the bolt, making sure that the hole on
its stem coincides with the slot on the bolt (fig. 48).
WARNING: the slanted surfaces on the locking head’s stem should
not be visible once the bolt locking head is mounted.
5) Insert the locking head pin in its hole on the locking head’s stem,
through the slot on the bolt (fig. 48).
47
 Loading...