13
INTRODUCTION
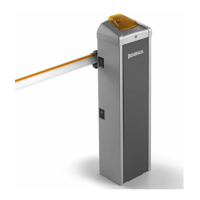
Thank you for choosing our EVA 5 road gate.
All items included in Benincà’s wide product range stem
from twenty year of our experience in the sector of automatic
systems, always striving to nd new materials and advanced
technologies.
For this reason, nowadays we are able to offer you extremely
reliable products that, thanks to their power, efciency and
long-lasting features, entirely meet the end user’s require-
ments.
All our products are covered by a guarantee.
Furthermore, an R.C. insurance policy signed with a primary
insurance company, covers any injuries or damages caused
by manufacturing faults.
GENERAL INFORMATION
Of rugged construction, with an innovative and pleasant
design, the road barriers EVA are suited for intensive use
thanks to their 24VDC motor. This system is very easy to
install and adjust.
Equipped with an easy-to-use manual release, the barrier is
preset to assemble buffer batteries to allow its operation in
the event of power failure.
The arm in paint aluminium allows for the housing of any
accessories, as well as forewarning and safety devices. In
the event the arm hits an obstacle, an amperometric sensor
causes the movement reversion immediately.
The control unit is placed on the upper side of the barrier to
facilitate wire connections.
SPECIFICATION EVA 5
Power supply
Motor power supply
Power drawn
Current absorption
Torque
Jogging
Protection class
Operating temperature
Noise
Lubrication
Weight
230Vac 50Hz
24Vdc
120 W
4,6 A
130 Nm
Intensive use
IP54
-20°C / +70°C
<70 dB
Agip GR MU EP/2
55kg
OPENING SPEED
Motor power
supply
Opening time
(s)
Closing time
(s)
26 Vdc 3 4
23 Vdc 4 5
18 Vdc 5 6
The opening time of the road barrier changes according to the supply
voltage selected on the transformer of the control unit.
Times shown include braking.
DIMENSIONS
FIG.1
Overall dimensions are expressed in mm.
The road barrier length ranges from 3m minimum to 5m
maximum.
As about 25cm are required to x a road barrier, a useful
opening of passage, ranging from 2.75m to 4.75, will be
available, as shown in Fig.1
Optional accessories can be tted onto be barrier (photo-
cells, selector, etc.). For assembly, apply the special covers
supplied (Rif. A).
RIGHT/LEFT-HAND OPENING OF THE BARRIER
FIG.2
The EVA 5 road barrier is available in both right (EVA5-DX)
and left (EVA5-SX) models.
With reference to Fig.2, a right-hand opening road barrier is
a system which, seen from the door side, closes the right-
hand side of the passage. The left-hand opening is in the
opposite way.
As the opening side can be changed at any moment, it is
advisable to buy a type of road barrier which allows the ea-
siest and rapid installation.
OPENING
FIG.3
The access to the electric and mechanical components of
the road barrier is protected by a lock with customized key.
Proceed as follows:
1 loosen the two nuts D
2 introduce the key in the lock on the side of the door and
turn it anti-clockwise
3 lift the front cover
4 remove the cover
By removing the front door it is now possible to reach both
the control unit, that is placed under the cover, and the
mechanical parts of the road barrier.
INSTALLATION OF THE FOUNDATION PLATE
FIG.4
After preparing the cable laying (mains power supply, acces-
sories, etc.), place the foundation plate keeping to dimensions
indicated.
Brackets to be cemented are supplied with the system (ref.
S). The brackets must be tted to the foundation plate by
means of 4 screws M12x50 (ref. V).
Check that the foundation plate is perfectly at (ref. L), then
x the road barrier by means of nuts D and corresponding
washers R.
POSITIONING OF THE SPRING
AND ACCESSORIES
FIG.5
According to the length of the beam and the type of accesso-
ries installed, before tensioning the spring, the correct point
to hook the spring to the lever must be selected.
The correct hooking point (“A”, “B” and “C”), must be se-
lected by taking account of table 1, according to the beam
length and the type of accessories to be installed.
HOW TO FIX THE BEAM
FIG.6
Any accessories for the beam (protection edges, lights, pneu-
matic safety edges, rack, etc. ) are installed before tting the
beam. See relevant instructions.
Fit the beam to plate P by using bracket S and both the 6
screws with the corresponding washers, and plate T.
Apply the removable plastic cover C.

 Loading...