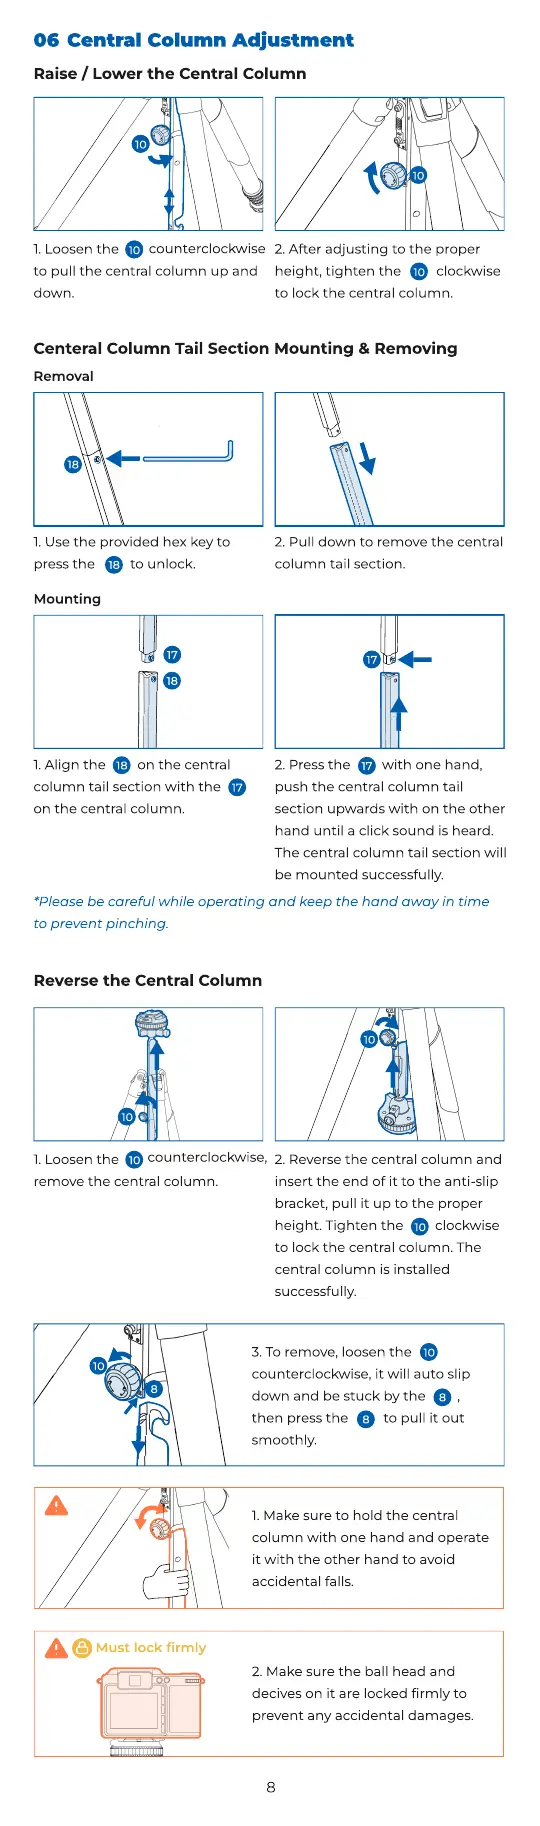
Central Column Adjustment06
1. Loosen the
to pull the central column up and
down.
counterclockwise
17
10
2. After adjusting to the proper
height, tighten the clockwise
to lock the central column.
10
Raise / Lower the Central Column
17
10
10
17
18
17
2. Press the with one hand,
push the central column tail
section upwards with on the other
hand until a click sound is heard.
The central column tail section will
be mounted successfully.
Mounting
1. Align the on the central
column tail section with the
on the central column.
18
17
17
Centeral Column Tail Section Mounting & Removing
2. Pull down to remove the central
column tail section.
18
1. Use the provided hex key to
press the to unlock.
Removal
18
*Please be careful while operating and keep the hand away in time
to prevent pinching.
10
8
3
. To remove, loosen the
counterclockwise, it will auto slip
down and be stuck by the ,
then press the to pull it out
smoothly.
10
8
8
1.
M
ake sure to hold the central
column with one hand and operate
it with the other hand to avoid
accidental falls.
Mu
s
t
lo
ck r
ml
y
2.
M
ake sure the ball head and
decives on it are locked
rmly to
prevent any accidental damages.
Reverse the Central Column
10
1.
L
oosen the
remove the central column.
counterclockwise,
10
10
2.
R
everse the central column and
insert the
end
of
it
to
the
anti
-
slip
bracket,
pull
it
up
to
the
proper
height. Tighten the clockwise
to lock the central column. The
central column is installed
successfully.
10
8
 Loading...