Do you have a question about the Berkeley OCTOPUS and is the answer not in the manual?
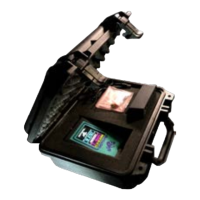
Initial setup and charging instructions for the Octopus device, including dock seating and antenna connection.
Powering on the Octopus, connecting the antenna, and the initial scanning process for nearby base stations.
Sorting base station signals by carrier, frequency, or signal strength (RSRQ/RSRP) and using screen freeze functionality.
Selecting a base station of interest and viewing active signal carrier measurement screens like RSRP and RSSI.
Steps for aligning external antennas to a specific base station for maximum signal strength.
Options to choose specific carriers, all 4G, or all 3G UMTS base stations for scanning.
Displaying firmware version, serial number, and configuring audible/vibrating alerts.
Freezing measurement screens, storing data, and downloading to PC for analysis.
The Octopus is a portable signal meter designed to assist with the installation and alignment of cellular boosters by identifying and measuring 4G LTE signals from nearby base stations. It provides real-time data on signal strength, carrier information, and frequency, making it an essential tool for optimizing cellular connectivity.
The primary function of the Octopus is to scan for and display information about nearby 4G LTE base stations. It measures signal strength using RSRQ (Reference Signal Received Quality) in dB and RSRP (Reference Signal Received Power) in dBm, which are key metrics for evaluating cellular signal quality. The device can identify signals from major U.S. regional carriers, including AT&T, Verizon, and T-Mobile, and allows users to sort detected base stations by carrier, frequency, or signal strength. This sorting capability helps users quickly pinpoint the most suitable base station for their needs.
Once a base station of interest is identified, the Octopus can display detailed information about that specific signal, including channel number, real-time signal strength, and additional CID (Cell ID) information. This detailed view is crucial for precise antenna alignment. The device also supports toggling between RSRP and RSSI (Received Signal Strength Indicator) measurements, providing comprehensive signal analysis. A unique feature is the thin watermark line above the vertical signal strength bar, which indicates the peak measurement observed during the entire session, helping users track the best signal achieved during adjustments.
Beyond real-time measurement, the Octopus includes a data logging feature. Users can "freeze" the screen to capture and store measurement data into the device's internal memory. This stored data can then be downloaded to a PC for further analysis, which is particularly useful for documenting installations or troubleshooting. The internal data buffer is overwritten each time the freeze button is pressed, so users should ensure they save or analyze data before capturing new measurements.
The Octopus is designed for ease of use with a touchscreen interface and a single physical button. To start, users connect the antenna and power on the device by pressing the white button below the touchscreen. This button also serves to power down the unit when held for a few seconds. Upon startup, the device immediately begins scanning for nearby base stations. After a brief startup screen, it displays a list of available carriers, allowing users to select their carrier of choice or view all 4G signals. The device continues to scan in the background, indicated by three small dots in the lower right corner of the screen.
The touchscreen interface allows for intuitive navigation. Users can tap on CARRIER, FREQ, or RSRQ/RSRP buttons to sort the list of detected base stations. If more than six unique base stations are found, PAGE up and PAGE down buttons appear, enabling users to scroll through additional pages of results. Tapping on a specific base station in the list takes the user to the active signal carrier measurement screen, where real-time signal strength and other details are displayed.
A key usage feature is antenna alignment. For precise alignment, users disconnect the included omnidirectional SMA antenna and connect their mounted (or soon-to-be-mounted) antenna fixture directly to the Octopus. While viewing the single carrier screen, users can perform broad sweeps with their antenna, then slow down to fine-tune its adjustment to point directly at the desired base station. The real-time signal strength display helps in maximizing the signal. Once the signal strength is at its maximum, the permanent antenna can be installed and tightened, then connected directly to the cell booster.
The device also includes a settings menu, accessible via a gear icon, where users can adjust vibrating and audible alerts. This allows for customization based on user preference or environmental conditions. The settings menu also provides information on the current firmware version and unit serial number.
Maintenance of the Octopus primarily involves ensuring it is properly charged and updated. Before initial use, the device should be fully charged using the supplied power transformer and charging dock. It's important to ensure the unit is seated firmly in the charging dock so that the charging LED atop the unit is lit, indicating a proper connection.
The mini-USB port located on the side of the unit serves a dual purpose: it can be used for trickle charging and for firmware updates. Users are advised to check with BVS support for the latest firmware and updating instructions to ensure the device operates with optimal performance and accuracy. Keeping the firmware up-to-date ensures access to the latest features and improvements in signal detection and analysis.
Regarding antennas, it is crucial to only use the provided multiband antenna or other antennas authorized by BVS support. This ensures that the unit properly scans all bands, carriers, and frequencies at maximum sensitivity, which is vital for accurate measurements and effective booster installation. Using unauthorized antennas could compromise the device's performance and accuracy.
The data logging feature, while primarily for usage, also contributes to maintenance by allowing users to document and analyze performance over time, which can help in troubleshooting or verifying the effectiveness of installations. Regular review of logged data can provide insights into signal stability and potential issues.
| Category | Measuring Instruments |
|---|---|
| Model | OCTOPUS |
| Manufacturer | Berkeley |
| Measurement Principle | Automated Perimetry |
| Stimulus Size | Goldmann Size III, V |
| Background Illumination | 10 cd/m² |
| Test Patterns | Custom |
| Power Supply | 50/60 Hz |