®
®
®
®
To ensure that contamination of the com-
ponents does not take place during assembly, wash hands and components (but
not the elements) before proceeding.
A. Remove the knob washer (3) and knob screw (4) from inside
the lid knob (1).
B. Fit the knob onto the lid (2) by inserting the knob screw (4),
with the knob washer (3), up through the hole in the lid and
screwing on the knob.
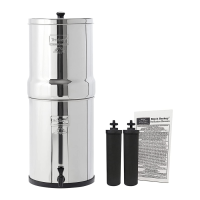
See the table on page 4 for the factory
issued spigots that are included with the stainless steel systems and the
Berkey® Light system. Upgraded spigots, like the Water View Spigot and the
Stainless Steel Spigot, will have their own assembly instructions.
A. Place the outer washer (13) onto the threaded stem of the spigot
(12). The beveled side of the washer should face the lower chamber.
B. Insert stem of the spigot (12) through the hole in the side of the
lower chamber (11).
C. Place the inner washer (14) onto the stem of the spigot within
the chamber.
D. Position the spigot upside down with the outlet facing up.
E. Thread the hex nut (15) onto the stem of the spigot and tighten
securely by hand. Do not use a wrench or other tool to tighten
the hex nut as this may damage the nut or chamber.
3
 Loading...