This document provides operating instructions for a 23" fireplace insert and its remote control, identified as Item #L9005583A (SP8123). It emphasizes reading the entire user manual before assembly and operation.
Function Description
This electric fireplace insert is designed to provide supplemental heat and aesthetic flame effects. It can be controlled via a panel located on the unit itself or a multifunctional remote control. The unit features a power function to turn it on/off, a heater with thermostat control, flame color and speed adjustments, and a timer function. A "Heater Lock" feature is included to prevent accidental changes to the heater settings. The unit also incorporates a memory function to retain most settings (except the timer) after the main power is turned off.
Important Technical Specifications
- Voltage: 120 VAC, 60 Hz
- Amps: 12.5 Amps
- Watts: 1500 Watts
- Plug Type: US-3Pin Polarized Plug (requires a properly grounded 120-volt outlet)
- Circuit Requirement: A 15 AMP dedicated circuit is recommended to prevent breaker trips.
- Heater Thermostat Range: 62°F (17°C) to 92°F (32°C) and OFF. The temperature display can be toggled between Fahrenheit and Celsius from the control panel.
- Timer Settings: 30 minutes, 1 hour, 2 hours, 3 hours, 4 hours, 5 hours, 6 hours, 7 hours, 8 hours, 9 hours, and OFF.
- Flame Speed Settings: 1, 2, 3, 4, 5 (adjustable via remote control).
- Flame Brightness Settings: F5, F4, F3, F2, F1 (adjustable via remote control).
- Flame Color Settings: C1 (Automatic color change, C2-C7 fades in and out per 10 seconds), C2 (Yellow+Orange+Blue), C3 (Yellow+Orange), C4 (Orange+Blue), C5 (Yellow), C6 (Blue), C7 (Orange). A default function allows resetting flame color settings by holding the flame color button for 10 seconds.
- Remote Control Batteries: 2 AAA batteries (not included for safety transportation).
Usage Features
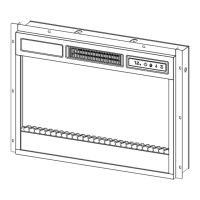
- Control Options: The fireplace functions can be accessed through the control panel on the upper right-hand corner of the electric insert or a multifunctional remote control.
- Power On/Off: Pressing the power button turns the unit ON or OFF. If the heater was active before powering off, the fan will run for an additional 20 seconds to dissipate residual heat.
- Heater Lock: To activate, hold the POWER button for 10 seconds when the unit is ON. "E3" will display, and a beep will sound three times. Only the heater function key is locked. Pressing the heater button while locked will display "E3." To inactivate, hold the POWER button for 10 seconds. This feature is only available via the control panel.
- Thermostat Control: The heater cycles ON and OFF to maintain the selected ambient temperature. The temperature can be adjusted using the "Heater Up" and "Heater Down" arrows on the remote control.
- Temperature Unit Toggle: Hold the Heater Function ICON on the control panel for 5 seconds to switch between Fahrenheit (°F) and Celsius (°C). This function is exclusive to the control panel.
- Flame Customization:
- Flame Color: The "Flame Color Button" allows selection from seven predefined color settings, including an automatic color change mode.
- Flame Speed: The "Flame Speed Function" (remote control only) allows cycling through five speed settings.
- Flame Brightness: The "Brightness Function" (remote control only) offers five brightness levels.
- Timer Function: The "Timer" icon allows setting a countdown for the unit's main power, ranging from 30 minutes to 9 hours.
- Memory Function: The unit retains all settings (except the timer) when the main power is turned off.
- Safety Features:
- Overheat Protection: A thermostat protective device is included. If the inner temperature overheats, the device will cut off power to prevent damage or fire risk. "E1" will be displayed on the control panel.
- Grounding: The unit uses a 3-pin polarized plug and must be connected to properly grounded outlets. An adapter (shown at C in the manual) can be used for two-slot receptacles, but the green grounding lug must be connected to a permanent ground.
- Installation Warning: The front panel is made of glass, requiring extreme caution during handling to prevent personal injury or property damage.
- Ventilation: Air intakes and exhaust must not be blocked to prevent overheating and fire.
- Combustible Materials: Keep combustible materials at least 3 feet (0.9m) from the front, sides, and rear of the heater.
Maintenance Features
- Cleaning: Ensure the unit is turned OFF, unplugged, and heating elements are cool before cleaning. Clean metal trim with a water-dampened soft, clean cloth. Avoid brass polish or household cleaners.
- Lubrication: The motors for the fan and flame generator assembly are pre-lubricated for extended bearing life and do not require further lubrication.
- Periodic Cleaning: Regular cleaning/vacuuming of the fan/heater and air intake/output vents is recommended.
- Servicing: Any repairs or servicing beyond basic cleaning should be performed by an authorized service representative or a qualified service person. Electrical repairs or rewiring must comply with national and local codes.
- Remote Control Battery Replacement:
- Locate the battery compartment on the back of the remote control.
- Press the small tab inward and slide the battery door open.
- Remove old batteries and insert two new AAA batteries, ensuring correct polarity.
- Replace the battery compartment door.
- Battery Handling Notes: Remove batteries if the product will be unused for a long time. Do not mix old and new batteries, or alkaline, standard (carbon-zinc), or rechargeable (nicad, nimh, etc.) batteries. Non-rechargeable batteries should not be recharged. Exhausted batteries must be removed and disposed of at a suitable recycling point.
- Storage: When not in use, store the heater in a dry location, away from possible damage. The power cord should be stored properly to avoid contact with hot or sharp objects.
Troubleshooting Guide
The manual includes a troubleshooting guide for common issues:
- No power/logs not glowing: Check if the unit is plugged into a standard 120-volt outlet and the power is "ON."
- "E1" displayed: Indicates overheat protection. Unplug the unit for 5-10 minutes to allow the sensor to reset.
- "E2" displayed: Indicates a broken or incorrectly working ambient temperature sensor. Unplug the unit for 5-10 minutes to allow the sensor to reset.
- "E3" displayed: Indicates the heater lock function is active. Hold the heater lock button for 10 seconds to deactivate.
- Fan motor continues to blow after power off: This is normal; the blower runs for 20 seconds to dissipate heat.
- Power cord gets warm: Normal for a heater appliance. Check connections and ensure the plug fits tightly. Discontinue use and consult an electrician if the plug/outlet becomes hot.
- PCB crashed: Frequent on/off button presses can trigger PCB protection. Unplug the unit for 5-10 minutes to allow the sensor to reset.
A one-year limited warranty covers manufacturing and material defects from the date of purchase, subject to specific conditions and limitations, including proper installation and operation, non-transferability, and exclusion of certain costs like installation or labor. The warranty is void if the fireplace is subjected to prolonged dampness, unauthorized alteration, willful abuse, accident, misuse, or if the original purchase receipt is not available.