USE
Start
/ Stop
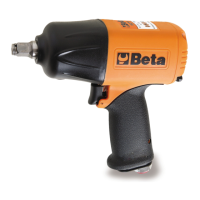
To start the pneumatic tool, press the start button (picture 3-b), and keep it pressed during the job to be performed. Releasing the
button will cause the pneumatic tool to stop quickly.
Check the position of the reverse lever (picture 4-d) before operating the pneumatic tool, so as to know the direction of rotation.
Setting direction of rotation
The pneumatic tool can rotate both clockwise and anticlockwise. Select the direction of rotation through the rev
erse lever (picture 4-e):
clockwise – seen from the operator’s side
anticlockwise - seen from the operator’s side
Use the reverse lever to select the direction of rotation and couple:
selection
•
minimum screwing torque (approximately 1/3 of max. screwing torque)
selection
•
•
medium
screwing torque (approximately 2/3 of max. screwing torque)
selection
•
•
•
maximum
screwing torque
selection
•
maxim
um unscrewing torque
Fit the required impact socket onto the male drive, and make sure that it is inserted correctly.
Always disconnect the air supply before fitting in tools or making adjustments; this precaution will prevent the pneumatic tool
from being accidentally started.
Lubrication/Greasing
The pneumatic tool must be connected to a filter-lubricator unit (we recommend Beta item 1919F1/4) provided with an air-oil microfog
mixer, set at two drops per minute. This will result in a high-performing tool and wear-resistant mechanica
l parts.
If lubrication is not provided to the line, oil ISO 32 must be periodically poured into the pneumatic tool, through the air supply hole
(picture 5-f).
MAINTENANCE
Maintenance and repair jobs must be carried out by trained personnel. For such jobs, you can contact Beta Utensili S.P.A.'s repair
centre.
DISPOSAL
The pneumatic tool, accessories and packaging should be sent to a waste disposal centre, in accordance with the laws in force in your
country.
Libretto
1927P.qxd:Libretto 1927CD.qxd 23-03-2017 15:21 Pagina 10
Discover other air tools & compressors on our website.