This document describes the Bezgar HQ051 Remote Control Drone, a precision equipment designed for users aged 14 and above. It integrates mechanics and electronics, requiring expertise in aerodynamics and high-frequency transmitting for proper assembly, debugging, and safe operation. The manufacturer emphasizes that they are not liable for accidents resulting in injury, damage, or property loss, urging users to handle the drone with care.
Function Description:
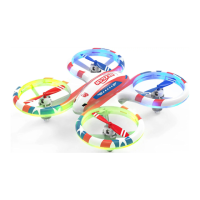
The Bezgar HQ051 is a remote-controlled drone capable of various flight maneuvers. It features a transmitter with multiple controls for precise operation. Key functions include:
- Ascending and Descending: Controlled by pushing the Up/Down lever on the transmitter.
- Forward and Backward Flight: Achieved by moving the Forward/Backward lever.
- Turning Left and Right: The Turn Left/Turn Right lever allows the drone to spin in either direction.
- Sideward Flight (Banking): The Bank Left/Bank Right lever enables the drone to move sideways.
- Speed Setting: The drone offers three speed levels (40%, 60%, 100%) adjustable via a speed button, indicated by beeps.
- Headless Mode: This mode simplifies control by allowing the drone to fly relative to the player's orientation, regardless of the drone's actual front. It is activated by holding the headless mode button for 3 seconds, and the indicator light will flicker repeatedly when active.
- 360° Stunt (Flip): A short press of the 360° Stunt button followed by flicking the right-hand lever in any direction will make the drone perform a flip.
- One Key Takeoff/Landing: A dedicated button allows for easy takeoff and a controlled landing.
- One Key Return: Holding the One Key Return button for 3 seconds makes the drone automatically fly backward towards the user, useful in case of loss of orientation. This mode can be exited by pushing the right control stick.
- Lights ON/OFF: A button to control the drone's lights.
- Trimming: Separate trim controls are available for Left Turning, Right Turning, Left Sideward, Right Sideward, Forward, and Backward flight to adjust for perfect hovering.
Important Technical Specifications:
- Age Recommendation: Suitable for users aged 14 and above.
- Battery Type (Transmitter): Requires 3 x 1.5V "AAA/R3" batteries (not included).
- Charging Time (Drone Battery): Approximately 70-90 minutes.
- Battery Indicator: The drone's indicator light will flash rapidly when its power is low.
- Battery Storage: Recommended room temperature of 18-25°C. For long-term storage, charge the battery to 50-60% capacity. If not used for over a month, check battery voltage monthly to ensure it's no less than 3V.
Usage Features:
- Registration: Users are encouraged to register their product online at www.bezgar.com within 15 days of purchase for customer service.
- Flying Environment: An open space legally viable for remote drone control is suggested. Indoor use is recommended to avoid losing control.
- Assembly and Debugging: The product requires correct assembly and debugging to prevent accidents.
- Controller Pairing: To connect the drone with the controller, ensure both are switched on. Push the left stick to the top and then to the bottom. All LEDs will flash and then stay on, indicating a successful connection.
- Flight Adjustment: If the drone drifts during hover, use the trim buttons to correct its movement. For example, if it banks left, press the bank right trim button until it stops banking.
- Landing Options:
- Option 1 (Manual): Control the drone to the ground and keep the throttle at the lowest position for 3-4 seconds until motors stop. Then switch off the transmitter and drone.
- Option 2 (One Key Landing): Press the one key landing button for a slow, controlled descent and motor shutdown.
- Resetting the Drone: To reset the gyro and improve balance, pull the left stick to the lower left quarter and the right stick to the lower right quarter simultaneously. A beeping sound will confirm the reset, and LED lights will flash and stay on. The drone should be on a flat surface during this process.
- 360° Flip Execution: Ensure the drone is flying at least 1.5 meters above the floor or 1.5 meters below a ceiling. Press the flip button (controller will beep), then flick the right-hand lever in the desired flip direction. If the battery is low, you may need to push the Up/Down lever after the flip to maintain altitude.
- Blade Replacement: The drone comes with replacement blades. It is crucial to use the correct blade type (A or B), indicated by markings on the blades, as incorrect blades will prevent control. To replace, clip the small cap, aim at the motor shaft, and press firmly.
Maintenance Features:
- Battery Handling:
- Do not mix new and old batteries.
- Do not mix alkaline, standard (carbon-zinc), or rechargeable (nickel-cadmium) batteries.
- Store batteries in a dry, well-ventilated area at 18-25°C.
- Avoid repeated charging or excessive discharging to prolong battery life.
- Charge the battery to 50-60% capacity for long-term storage.
- Check battery voltage monthly if unused for over a month, ensuring it's not below 3V.
- Charging Precautions:
- Always charge using the USB port from a computer, not a telephone or tablet wall charger, to prevent fire hazards.
- Charge in a dry, well-ventilated area, away from heat sources or explosive products.
- Remove batteries from the drone before charging.
- Charging should be supervised by an adult.
- Do not charge if the battery's surface temperature is still hot after flying, as this can cause swelling and fire.
- Use only the original USB charging cable. Replace swollen or old batteries.
- Remove the battery if the drone will not be used for an extended period.
- Customer Support: For any questions or issues, contact BEZGAR Customer Support at +1 (833) 325-1118 or via email at SUPPORT@BEZGAR.COM.
- Adult Supervision: Users aged 14 or below should operate the drone under adult supervision to ensure safety and prevent electric shock.