Do you have a question about the BHG BH17-092-097-23 and is the answer not in the manual?
| Brand | BHG |
|---|---|
| Model | BH17-092-097-23 |
| Category | Outdoor Furnishing |
| Language | English |
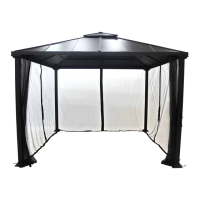
Identifies the product as BHG Sullivan Ridge 10' x 10' steel hard top gazebo with net.
Provides crucial warnings regarding placement, assembly, and use of the gazebo.
Outlines recommended procedures for cleaning and maintaining the gazebo.
Lists and describes parts A1 through I, including quantities for frame construction.
Lists and describes parts J through Q, including quantities for roof assembly.
Details all accessory parts, bolts, washers, nuts, and tools required for assembly.
Connects top beams (A1, A2) using bolts (Ra) and washers (Rg).
Assembles small canopy bars (F, G) using specified hardware.
Connects canopy frame bars (D, G) to the main structure.
Attaches long canopy frame bars (C) to the main structure using bolts (Rb, Re) and nuts (Rh).
Attaches canopy frame bars (B) to the main structure using bolts (Rb, Re) and nuts (Rh).
Connects various connect bars (E1-E4) to the frame using bolts (Re) and nuts (Rh).
Secures small upper roof covers (I, H) and cover slats (F) using bolts (Rc) and washers (Rg).
Installs the bowl-shaped cover (J) using a specific bolt (Rf).
Attaches large upper roof covers (K1, K6) using bolts (Ra) and washers (Rg, RI).
Attaches large upper roof covers (K2, K5) using bolts (Ra) and washers (Rg, RI).
Attaches large upper roof covers (K3, K4) using bolts (Ra) and washers (Rg).
Attaches long large canopy cover slats (L2) using bolts (Rd) and washers (Rg).
Attaches short large canopy cover slats (L1) using bolts (Rd) and washers (Rg).
Connects leg posts (M) to base plates (P, O) using bolts (Ri).
Secures leg posts (M) to frame parts (A1, A2) using bolts (Rb), washers (Rg), and lock washers (Rj).
Secures leg posts (M) to frame parts (A1, A2) using bolts (Ra) and washers (Rg).
Attaches L-shaped plates (Q) to leg posts (M) using bolts (Ra) and washers (Rg).
Secures the gazebo to the ground using lawn stakes (Rk).
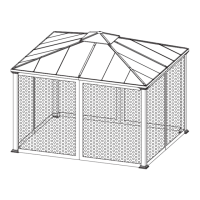
Installs the net (N) onto the gazebo frame.