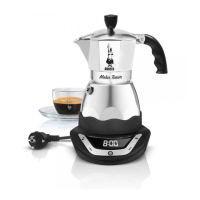
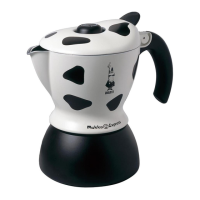
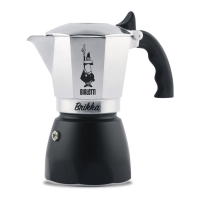
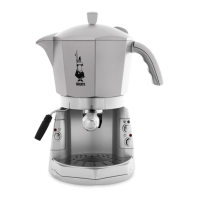
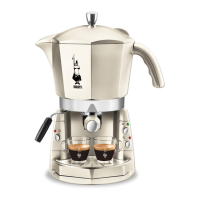
INSTRUCTIONS FOR USE
Coffee Maker
FILLING/PREPARATION PROCEDURE
• Unscrew the collection unit.
• Extract the funnel from the neater unit.
• Pour the water into the heater unit paying attention not to exceed the safety valve outlet.
• Insert the funnel into the heater unit.
• Add the coee as usual.
• Screw back the collection unit and place the coee maker on its power base.
Base Timer: Turn on the base manually or by using the timer.
Base No Timer: Press the ON button to switch on the base.
INSTRUCTIONS FOR USE
• When the coee is ready an acoustic warning signal is activated.
• The coee remains hot for 20 minutes from when the signal is activated.
• To serve the coee, lift the coee maker o the base and pour its content into the coee cups.
Timer Base
IMPORTANT
Before start using the coee maker, reset the timer: plug in the electrical base to an electri-
cal socket and press at the same time “s”, “+” and “-“ button.
When plugging in the electrical base, if the red led is lighting, reset the base, pressing at the
same time “s”, “+”, “-“.
In order to protect the electrical base, the base has to be charged for at least 8 hours, before
start using it.
• The power base must be plugged into the main power supply.
• When the plug is removed, the electronic system is powered for a week self-recharging inter-
nal batteries, which have the sole function of maintaining all the set programmes in memory.
• If the gures do not appear correctly on the display reset the system: reset the clock/timer by
simultaneously pressing the three base Keys: “S”, “+”, “-“ (with the device’s plug in).
INSTRUCTIONS FOR USE
Clock Functions
The rst time the appliance is used, when it is plugged in, the clock functions are activated and
“0:00” appears on the display. To set the correct time:
• Repeatedly press the “S” button, until the word TIME ashes on the bottom left of the di-
splay.
• Press the “+” or “-” buttons, until the correct time is set.
It is possible to advance or retract quickly by keeping the “+” or “-” buttons pressed for a couple
of seconds.
Setting the Alarm
To set the time to prepare the beverage:
• Repeatedly press the “S” button, until the word ALARM appears on the display.
• Press the “+” or “-” buttons until the alarm time is set.
It is possible to advance or retract quickly by keeping the “+” or “-” buttons pressed for a couple
of seconds.
EN
14
INSTRUCTIONS FOR USE
Coffee Maker
FILLING/PREPARATION PROCEDURE
• Unscrew the collection unit.
• Extract the funnel from the neater unit.
• Pour the water into the heater unit paying attention not to exceed the safety valve outlet.
• Insert the funnel into the heater unit.
• Add the coee as usual.
• Screw back the collection unit and place the coee maker on its power base.
Base Timer: Turn on the base manually or by using the timer.
Base No Timer: Press the ON button to switch on the base.
INSTRUCTIONS FOR USE
• When the coee is ready an acoustic warning signal is activated.
• The coee remains hot for 20 minutes from when the signal is activated.
• To serve the coee, lift the coee maker o the base and pour its content into the coee cups.
Timer Base
IMPORTANT
Before start using the coee maker, reset the timer: plug in the electrical base to an electri-
cal socket and press at the same time “s”, “+” and “-“ button.
When plugging in the electrical base, if the red led is lighting, reset the base, pressing at the
same time “s”, “+”, “-“.
In order to protect the electrical base, the base has to be charged for at least 8 hours, before
start using it.
• The power base must be plugged into the main power supply.
• When the plug is removed, the electronic system is powered for a week self-recharging inter-
nal batteries, which have the sole function of maintaining all the set programmes in memory.
• If the gures do not appear correctly on the display reset the system: reset the clock/timer by
simultaneously pressing the three base Keys: “S”, “+”, “-“ (with the device’s plug in).
INSTRUCTIONS FOR USE
Clock Functions
The rst time the appliance is used, when it is plugged in, the clock functions are activated and
“0:00” appears on the display. To set the correct time:
• Repeatedly press the “S” button, until the word TIME ashes on the bottom left of the di-
splay.
• Press the “+” or “-” buttons, until the correct time is set.
It is possible to advance or retract quickly by keeping the “+” or “-” buttons pressed for a couple
of seconds.
Setting the Alarm
To set the time to prepare the beverage:
• Repeatedly press the “S” button, until the word ALARM appears on the display.
• Press the “+” or “-” buttons until the alarm time is set.
It is possible to advance or retract quickly by keeping the “+” or “-” buttons pressed for a couple
of seconds.
EN
14

 Loading...