7
8
4 5 6
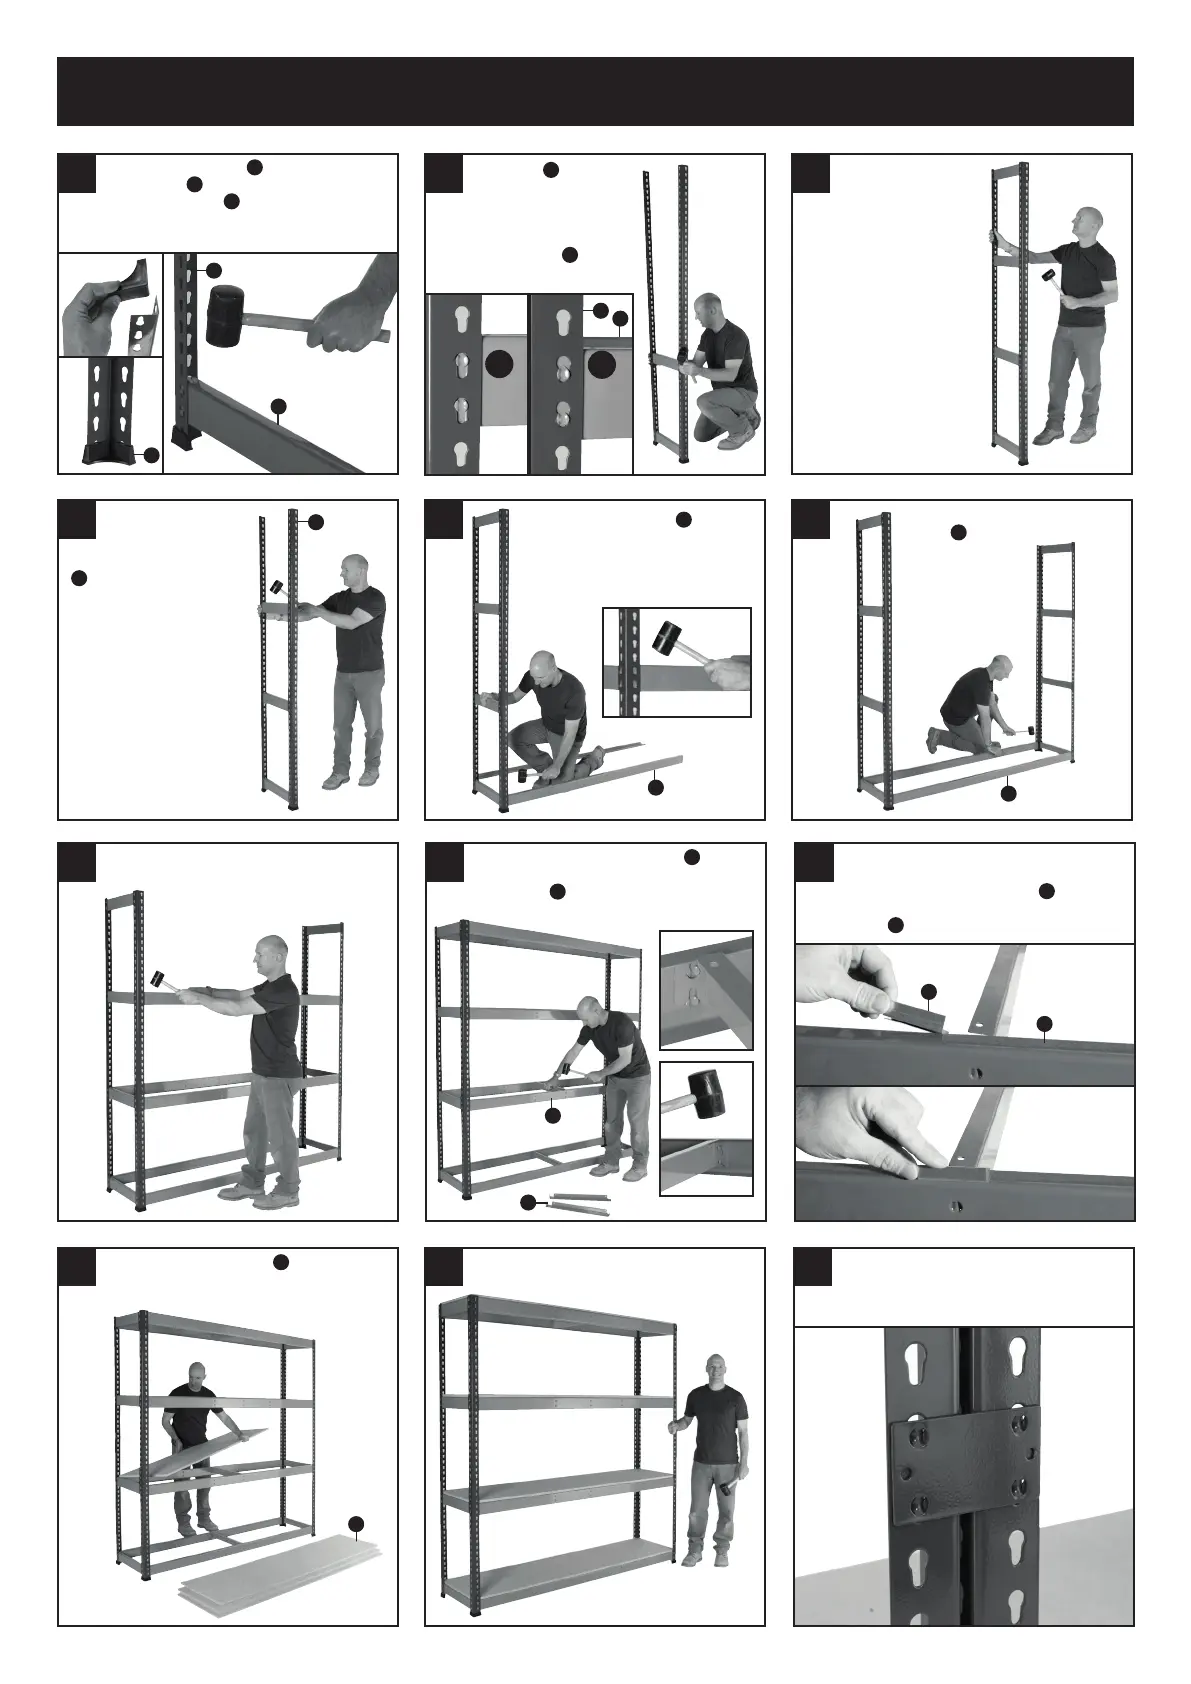
Assembly - BiG400/BiG800
1 2 3
Select two uprights
A
and push on
plastic feet
G
to the bases. Insert a
short side beam
C
into the keyholes at
the lowest shelf level required. Ensure
the beam is 90 degrees to the upright
Tap beam
C
with a
rubber mallet to ensure
the end studs are fully
located in the bottom of the
keyholes on both uprights.
Lean the uprights
A
against
a wall for support if needed
Repeat steps 1 and 2
until you have created a
“ladder style frame”
Select two more uprights
A
and repeat steps 1 to
3 until you have a second
“ladder style frame”
Locate a centre support beam
(D)
onto
the metal studs on the centre of each
long beam
(B)
. Tap into place and repeat
for all levels
12
Tip: Use the rst frame
as a template to get the
correct spacing
Take two long beams
B
and
insert them into the keyholes on
one frame at the same height as
the short beams. Tap into place
with a rubber mallet
Repeat steps 5 and 6 to add the
remaining long beams. Ensure that
each long beam is located at the
same height as the side beams
Tip: Now is a good
time to check the
space between beams
suits the items you
want to store on the
shelves and adjust as
required
O
P
Insert the other ends of the
beams
B
into the second
frame as in step 5
Tip: Ask another
person to hold the
frames in place
while you secure
them
Shelving bays can be joined together
with tie plates. Use 4 per join - 2 front
and back. Tap into place with a rubber
mallet
11
The bay is now complete and ready
to use
B
A
C
C
A
A
B
D
B
G
9
If you have wide shelving then the
chipboard may be in 2 pieces per level.
Slide the chipboard joiners
(F)
supplied
onto the centre of each front & back
beam
(B)
before adding the chipboard
F
B
F
B
10
Insert chipboard decks
(E)
into each
level - decks sit on the top of the beams
inside the posts
E
E
B
D
 Loading...