Do you have a question about the Bike USA Stabilizer Wheels and is the answer not in the manual?
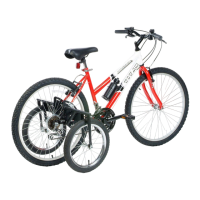
Place brackets on bike frame, ensuring BIKE USA logo faces forward and plate is against frame.
Apply short u-bolt to seat stay and slide thin plastic spacer over it against the frame.
Align bracket with u-bolt ends in the top groove, ensuring bottom holes are below chain stay.
Place steel spacer over u-bolt ends against bracket after bracket is positioned.
Loosely tighten nuts on u-bolt ends without fully securing, checking bracket position.
Attach short u-bolt to lower frame stay, then bracket, with thin plastic and steel spacers.
Use long u-bolt for lower frame stay, adding thick plastic and steel spacers to bracket.
Remove axle nuts and washers, place wheel between bracket fork ends with axle in forks.
Slide retaining washers, hook into fork end, and loosely tighten axle nuts.
Adjust bracket position so stabilizer wheel is 1.5 inches off the floor when bike is upright.
Securely tighten all six lock nuts on the u-bolts for stability.
Repeat steps for the other side, ensuring both wheels are 1.5 inches off the ground and parallel.
Inspect bicycle frequently for adjustments of brakes, bearings, and wheels.
Instructions for safely removing the rear wheel, including pivot derailleur and remove axle nuts.
Tips for riding in low light conditions, emphasizing visibility and caution.
Essential advice on testing, adjusting, and using bicycle brakes safely.
| Brand | Bike USA |
|---|---|
| Model | Stabilizer Wheels |
| Category | Bicycle Accessories |
| Language | English |