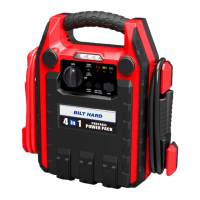
The BILT HARD® 4-in-1 Multi-use Jump Starter (Model: BR-JSAC1217) is a portable power pack designed for various applications, including jump-starting vehicles, powering DC appliances, charging USB devices, and inflating tires. It combines several functionalities into a single, robust unit, making it a versatile tool for automotive emergencies and outdoor activities.
Function Description:
The primary function of this device is to jump-start lead-acid batteries in vehicles. It provides 12V-400A cranking power with a 900A peak, suitable for emergency starting of cars, RVs, and marine vehicles. Beyond jump-starting, it features a 250PSI air compressor for inflating tires and other inflatables. The unit also serves as a portable power source with two 12V DC output ports for running compatible appliances (up to 10 amps or 120 watts) and one 5V USB output port for charging mobile devices. Additionally, it includes a super brightness work light with an SOS mode for illumination during emergencies or low-light conditions.
Important Technical Specifications:
- Jump Starter: 12V-400A Cranking, 900A peak. Designed for LEAD-ACID batteries only.
- Air Compressor: 250PSI maximum pressure.
- DC Output: 2 x 12V DC output ports (up to 10 amps / 120 watts total).
- USB Output: 1 x USB 5V output port.
- Battery Type: Non-spillable, sealed lead-acid battery.
- Charging Input: 120VAC Adapter.
- Safety Features: Ultra safety with reverse polarity protection.
- Warranty: 1 Year Warranty on the main unit for defects in materials or quality.
Usage Features:
The BILT HARD® Jump Starter is designed for ease of use with several integrated features:
- Power Switch: A main ON/OFF switch for controlling the unit's power.
- Work Light: A built-in super brightness work light with an SOS mode, activated by a dedicated button. Press once for steady light, again for flashing, and a third time to turn off.
- LED Status Indicator: Provides visual feedback on the battery's charge level (green for ready, yellow for needing charge, red for immediate charge).
- Battery Test Button: Allows users to check the battery power level of the unit.
- Heavy Duty Clamps: Equipped with robust clamps for secure connection to vehicle batteries.
- Air Hose Compartment: A dedicated compartment on the back of the unit for storing the air hose.
- Air Compressor Gauge: An integrated gauge to monitor tire pressure during inflation.
- Clamp Power Switch: A separate switch to control power to the battery clamps, ensuring safety during connection and disconnection.
- Reverse Polarity Protection: Enhances safety by preventing damage if clamps are connected incorrectly.
Operating Procedures:
- Charging the Power Pack: Always charge on a non-flammable surface. Plug the 120VAC Adapter into an outlet and then into the unit's charging input. The charging indicator lights cycle from red to yellow to green, with green indicating a full charge. The unit should be unplugged once fully charged. Recharge after each jump-start and at least once a month.
- Jump Starting a Vehicle:
- Verify the Power Pack is fully charged using the Battery Test button.
- Turn off the vehicle's ignition and all accessories.
- Set the Clamp Power Switch on the Power Pack to OFF.
- Connect the red Positive Battery Cable to the vehicle's positive battery terminal.
- Connect the black Negative Battery Cable to a non-moving metal part of the vehicle.
- Turn the Clamp Power Switch to ON.
- Wait five minutes, then attempt to start the vehicle. If it doesn't start, wait an additional three minutes before trying again.
- After starting, turn the Clamp Power Switch to OFF.
- Remove the black Negative Battery Cable first, then the red Positive Battery Cable.
- Important: Do not touch positive and negative battery clamps together. Unplug the Power Pack from its adapter before connecting cables.
- Using the Air Compressor:
- Verify the Power Pack is fully charged.
- Open the Air Hose Compartment and pull out the hose.
- Check the proper inflation level for the object.
- Position the Tire Inflator over the valve stem and push down firmly, then press the lever down.
- Press the Air Compressor Switch on.
- Running/Charging DC Appliances:
- Verify the Power Pack is fully charged.
- Ensure the appliance's wattage is within the unit's capacity (max 120 watts).
- Ensure the Clamp Power Switch and appliance are off.
- Plug the appliance into a 12VDC Outlet.
- Turn on the appliance. Turn off and unplug when finished.
- Charging USB Appliances:
- Verify the Power Pack is fully charged.
- Plug the device into the USB Port.
- Unplug the device when finished.
Maintenance Features:
To ensure longevity and safe operation, regular maintenance is recommended:
- Pre-Use Inspection: Before each use, inspect the unit for loose hardware, cracked or broken parts, damaged electrical wiring or cable insulation, or any other condition that might affect safe operation.
- Cleaning: Keep the unit clean, and ensure clamps are free of dirt, debris, or grease. Wipe external surfaces with a clean cloth after use.
- Storage: Protect the Power Pack from sunlight and moisture for a longer working life. Store idle equipment locked up and out of reach of children.
- Battery Replacement and Disposal: The unit contains a non-spillable, sealed lead-acid battery that must be recycled. Replace the battery when the red light comes on after recharging and pressing the Battery Test button. Replacement batteries must be identical to the original to prevent damage or injury. The manual provides instructions for battery replacement, emphasizing careful handling to avoid damaging the circuit board and ensuring correct polarity connections.
- Recharging Schedule: Recharge the Power Pack when the yellow light comes on while pressing the Battery Test Button, after each jump-start, and at least once a month to maintain battery health and prevent voiding the warranty. Failure to recharge will void the warranty.