11/16
• In the event of a breakdown or poor operation, turn the fan heater off and ask for
professionally qualified help.
Before each use, verify that the unit is in good condition, the electric cord is not damaged, if the
power cord is damaged, it must be replaced by the manufacturer or a competent qualified
electrician or a person with similar qualifications, in order to avoid any risk.
always unplug the appliance before you assemble.
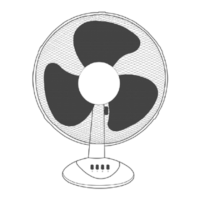
the fan can be used only when completely and correctly assembled, that is complete
with its base and protection grid.
If in doubt, have the appliance checked or assembled by a qualified professional person. For
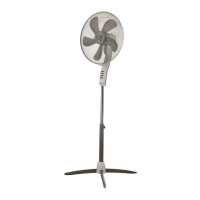
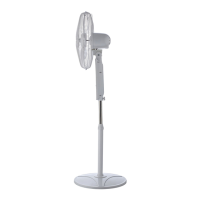
assembly, refer to figure.
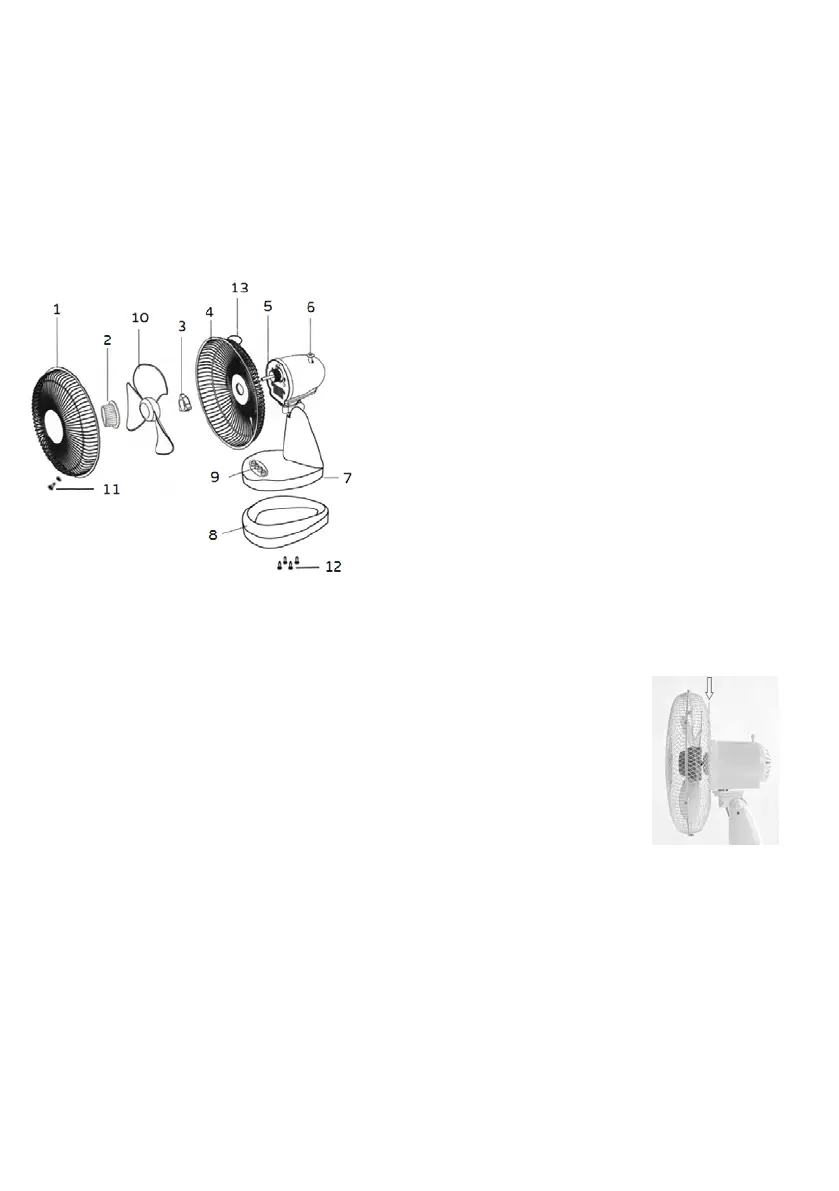
1) Front grille
2) Fan attachment ring nut
3) Grille attachment ring nut
4) Rear grille
5) Motor shaft
6) Oscillation button
7) Body
8) Base
9) Selector
10) Fan
11) Screws and nuts for fasten
the grille
12) Screws
13) Handle
1) Insert the lower part of the body (7) in the base (8) (see the figure to the right), fasten
the parts using the screws provided “3” (12) and lock them in a normal way.
2) Unscrew the nuts: fan attachment (2) and rear grille (3).
3) Insert the rear grille (4) in the motor housing, so that the handle (13)
appears at the top (as figure) and position. It so that the pins fit in their
corresponding holes and lock it with the ring nut provided (3).
4) Insert the fan (10) on the motor shaft (5), so that the slot matches the
spline. Lock using the ring nut (2), turning it counter clockwise to
tighten.
5) Couple the front grille (1) to the rear one (4) locking it with the closing
hooks. For safety reasons, you must make sure that it is attached by
using the screws and nuts provided (11), which are to be used in the holes in the edge of
the grilles (the holes for the screw must be in the lower part).
Insert the plug of the fan in the power supply.
select the desired speed with the selector (9).
1 – Minimum speed 2 – Medium speed 3 – Maximum speed 0- Off