Do you have a question about the Biohort NEO and is the answer not in the manual?
Manual describes assembly for NEO side canopy, applies to all sizes. Requires 1-2 helpers for some steps.
Assembly requires wearing work gloves and using a suitable underlay to prevent scratches.
Warning against assembling the product in windy conditions.
Indicates that some assembly steps depend on the product size.
Explains the use of a spirit level symbol for aligning components correctly.
Provides scale drawings (1:1) of all screws used in the assembly process.
Instruction to tighten screw connections only at the end of the assembly process.
Emphasizes the importance of anchoring against wind and recommends concrete or point foundations.
Explains the symbol for parts dismantled from the house and used for the side canopy.
Guidance on cleaning, avoiding chemicals, and maintaining parts like locks and hinges.
Instructions not to install damaged parts and to report damages with pictures.
Keep small parts and packaging materials away from children due to sharp edges.
Provides non-binding foundation suggestions and emphasizes customer responsibility for design.
Instructions on how to access specific assembly steps via QR code linked YouTube videos.
Identification of various profile packages (1, 1a) used in the assembly.
Identification of roof beam and profile packages (2, 3) for specific sizes.
Identification of roof wood packages (4, 4a, 4b) for specific sizes.
Identification of roof foil (5) and upright packages (6, D2) and small parts kits.
Instruction to disassemble parts colored orange in respective construction steps.
General guidance on dismantling components, including gas springs.
Instruction to disassemble screws.
Instruction to loosen screw connections.
Warning to pay attention to the slope during installation.
Caution that the roof strut is always quartz grey, regardless of shed color.
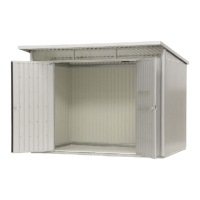
Indicates an interior view is provided.
Instruction to press down on the foil during installation.
Instruction to use a sealing washer during assembly.
Instruction on how to screw the roof strut to the frame.
Instruction to securely tighten all nuts and connections.
Guidance on adjusting components for a rectangular setup.
Instruction on how to tighten lock nuts securely.
Warning that the foil's possible welding seam must not be in the gully area.
| Snow load | 150 kg/m² |
|---|---|
| Lock Type | Cylinder lock |
| Color Options | Metallic Silver, Quartz Grey, Dark Grey |
| External dimensions | Multiple sizes available |
| Ridge height | Varies by model |
| Eaves height | Varies depending on the model size. Refer to specific model dimensions. |
| Wind resistance | 150 km/h |
| Gutter | Integrated gutter system |
| Locking system | Cylinder lock |
| Warranty | 20 years |