11
10.Replace air inlet grill back onto unit securely.
11.The filter service indicator must be reset once the
PERMAtech™ filters have been cleaned. Reset indicator by
inserting a small object (such as a pin or paper clip) into
the hole below the filter service light.
Filter Life – The filter has been designed to never need replace-
ment however, it does need servicing. We recommend that under
normal conditions of continuous use, the filters should be cleaned
at least every 3 months to help maintain optimal performance.
Should the filter become damaged during cleaning replacements
are available by calling 1-800-253-2764.
Air Cleaner
Model #
BAP2000-U/
BAP2001-U
Filter Quantity
Needed
2
Air Filter
Model #
323-069
Filter
Description
PERMAtech
TM
Filter
L
K
I
J
G
E
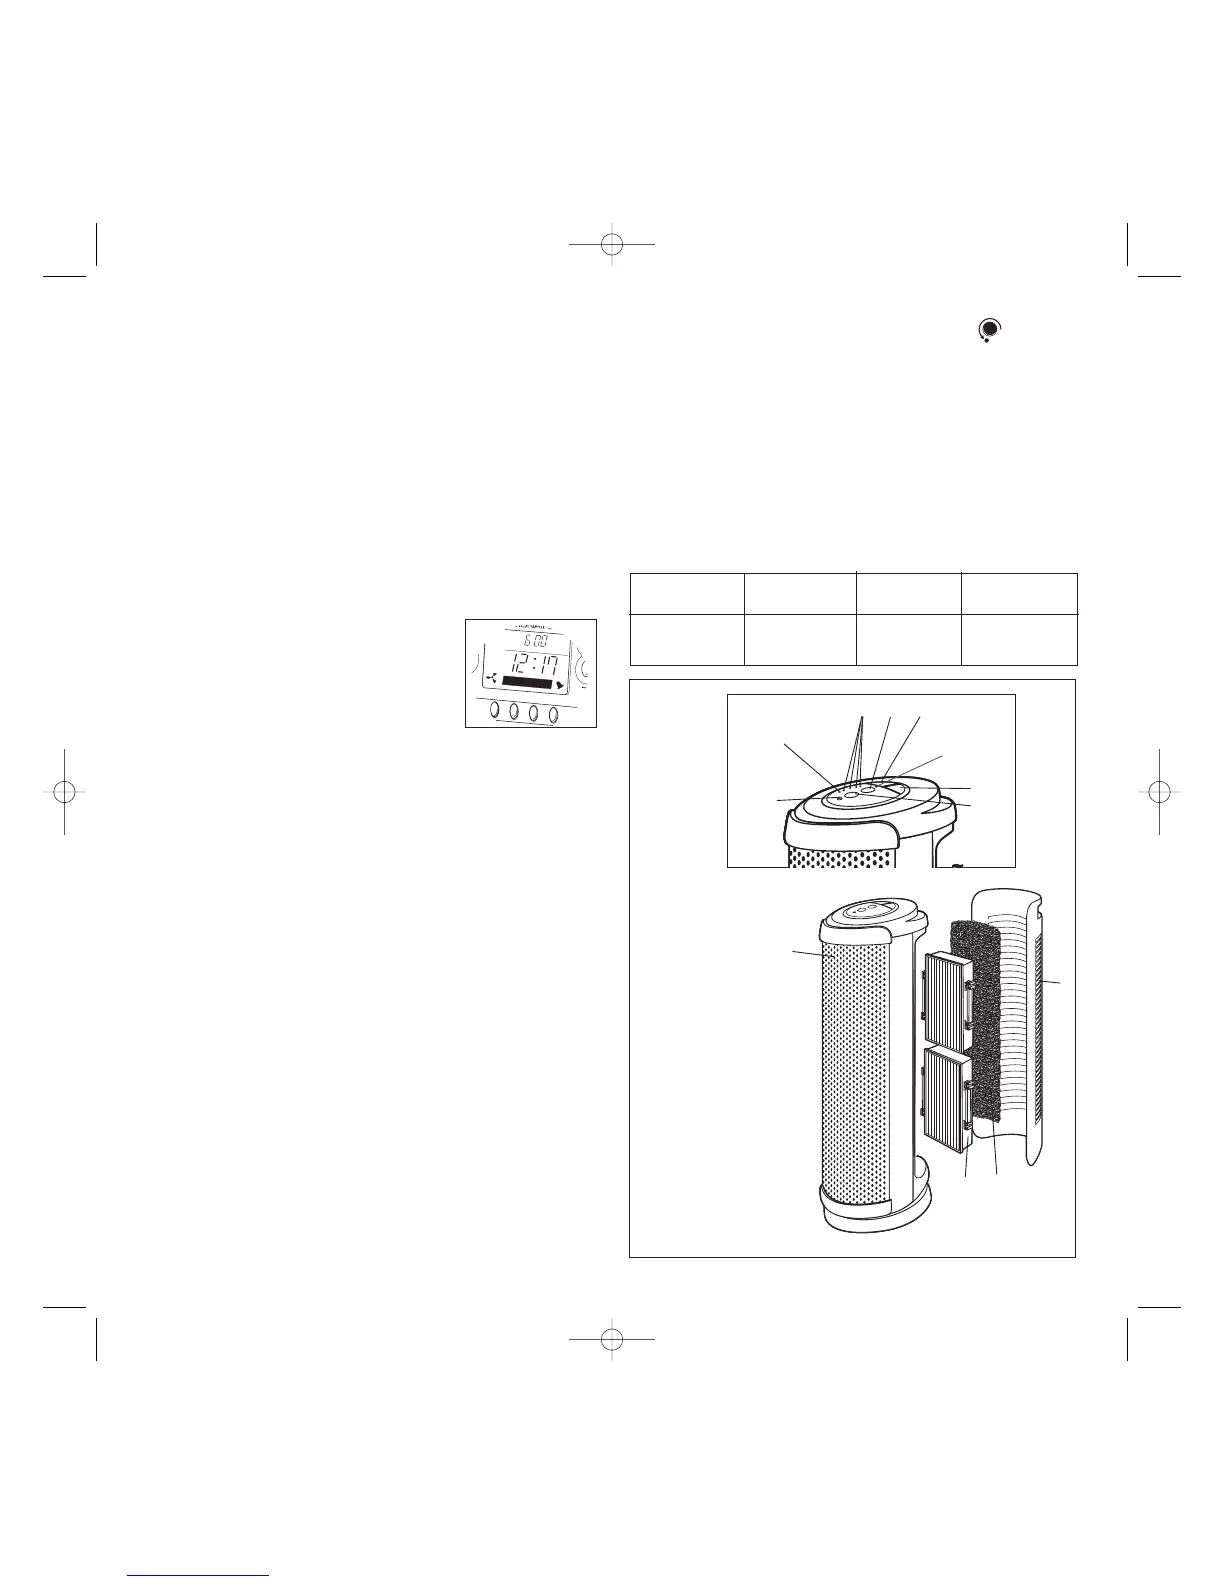
A. Inlet Grill
B. Washable Foam Pre-Filter
C. PERMAtech
TM
Filter
D. Filtered Air Outlet
E. Ionizer Control
F. Ionizer Light
G. Oscillation Button
H. Power Button
I. Speed Control
J. Speed Indicator Light
K. Auto Indicator Light
L. Filter Service Indicator Light
D
A
C
Figure 7
H
F
B
6
long as the appliance is plugged in.
1. To set the clock time, press the “CLOCK” and “SET” buttons
at the same time. The hour numbers will begin to flash.
2. Press “+” or “-” to set desired hour, then press “SET”.
3. When a button has not been pressed for a few seconds
OR when the “SET” button is pressed again, the minute
numbers will begin to flash.
4. Press the “+” and “-” button to adjust the minutes as indi-
cated above in step 2.
5. When a button has not been pressed for a few seconds
OR when the “SET” button is pushed again the clock will
begin operating.
Alarm
The Galileo
®
Wireless Air Quality Center is equipped with an
alarm clock option.
Setting Alarm
1. To set the alarm, press the “ALARM”
and “SET” buttons at the same time.
The hour numbers will begin to flash
and a small bell will appear in the
bottom right hand corner of the LCD screen.
2. Press “+” or “-” to set desired hour, then press “SET”.
3. When a button has not been pressed for a few seconds
OR when the “SET” button is pressed again, the minute
numbers will begin to flash.
4. Press the “+” and “-” buttons to adjust the minutes as
indicated above in step 2.
5. When a button has not been pressed for a few seconds
OR when the “SET” button is pushed again, the time will
appear on the LCD screen and the alarm is set. A small
bell will now appear in the bottom right hand corner
indicating the alarm is operational.
6. To check the alarm setting, press the “ALARM” button.
The alarm set time will appear. Press the “TIME” button to
return to clock mode.
Turning Alarm OFF
1. When the alarm goes off, a rapid beeping will be heard.
2. To deactivate the alarm press the “ALARM” and “SET”
button at the same time. The bell in the right hand corner
will disappear.
3. The longer the alarm sounds the louder it gets.
4. The alarm has a snooze feature. Press the “ALARM” button
only when the alarm is sounding and the alarm will turn off.
After 10 minutes, the alarm will sound again. The alarm will
continue to go off every 10 minutes until the alarm mode is
deactivated. See step 2 above.
 Loading...