Gently peel off the white cover
paper of the patch with the pull
tab in the center.
RIGHT
LEFT
QUICK START
GUIDE
Wash/shave
(if needed)
Clean skin
Scrub skin
If necessary shave chest area where
patch is to be applied. Clean area
with soap and water. Pat dry. Gently
scrub skin with abrasion pad.
STEP 1:
Skin preparation
Snap sensor into the patch. Press
all four sides to ensure sensor is
securely connected to the patch.
You will hear several clicks.
STEP 2:
Attach sensor to the patch
Remove the clear plastic backing
to expose the adhesive part of the
patch.
Do not touch the adhesive.
STEP 3:
Remove patch backing
Apply patch to chest on a slight
angle as shown in the illustration
above. Press all sides of the patch
so it will adhere to your skin.
STOP: Wait 1 minute before
proceeding to Step 5.
STEP 4:
Apply patch to your skin
STEP 5:
Remove cover paper
Copyright © 2019. All rights reserved
LEFT
RIGHT
®
®
®
®
Gently peel off the white cover
paper of the patch with the pull
tab in the center.
RIGHT
LEFT
QUICK START
GUIDE
Wash/shave
(if needed)
Clean skin
Scrub skin
If necessary shave chest area where
patch is to be applied. Clean area
with soap and water. Pat dry. Gently
scrub skin with abrasion pad.
STEP 1:
Skin preparation
Snap sensor into the patch. Press
all four sides to ensure sensor is
securely connected to the patch.
You will hear several clicks.
STEP 2:
Attach sensor to the patch
Remove the clear plastic backing
to expose the adhesive part of the
patch.
Do not touch the adhesive.
STEP 3:
Remove patch backing
Apply patch to chest on a slight
angle as shown in the illustration
above. Press all sides of the patch
so it will adhere to your skin.
STOP: Wait 1 minute before
proceeding to Step 5.
STEP 4:
Apply patch to your skin
STEP 5:
Remove cover paper
Copyright © 2019. All rights reserved
LEFT
RIGHT
®
®
™
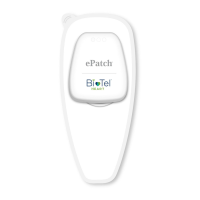
STEP 2: ATTACH SENSOR TO THE PATCH
Snap sensor into the patch. Press all four
sides to ensure sensor is securely connected
to the patch. You will hear several clicks.
STEP 4: APPLY PATCH TO YOUR SKIN
Apply patch to chest on a slight angle as
shown in the illustration above. Press all sides
of the patch so it will adhere to your skin.
STOP: Wait 1 minute before proceeding to
Step 5.
QUICK START GUIDE
STEP 1: SKIN PREPARATION
Shave:
(if needed)
Clean skin
Scrub skin
If needed, shave chest area so that it is clear
of any hair. Clean area with soap and water.
Pat dry. Gently scrub skin with abrasion pad.
STEP 3: REMOVE PATCH BACKING
Remove the clear plastic backing to expose
the adhesive part of the patch. Do not touch
the adhesive.
STEP 5: REMOVE COVER PAPER
Gently peel off the white cover paper of
the patch with the pull tab in the center.