Page 4 of 12 800504 - Birko Pie Warmer - April 2012 v1.02
Health and Safety at Work Legislation
• AS/NZS Codes of Practice
• Fire Precautions
• Wiring Regulations
• Building Regulations
Remove the Pie Warmer from the packaging. Make sure that all protective plastic film and coatings are thoroughly
removed from its surfaces. Please consult the Specification table on page 8 for important information before installing.
Location
• Before locating please check the weights table shown below, then use this information to make sure that the
location chosen can support the weight of the Pie Warmer. Ensure the table/bench is stable.
• Appliances placed on the table when use, it is forbidden to put to the floor.
Electrical Connection
• Supply the appropriate power—(See specifications on page 5). Pie Warmers are supplied with a 3 pin, molded,
with a 10amp plug and lead as standard. The plug is to be connected to a suitable mains socket.
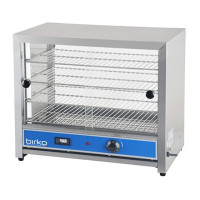
Assembly / Commissioning
• Ensure all packing pieces and protective plastic are removed from the Pie Warmer.
• Rear Glass Pane (glass model only 1040091\1040092). With assistance take the glass pane from the rear outside
of the unit. Angle the glass and slide the glass up and into the top track. One the glass is high enough, level the glass
evenly into the unit and slowly and carefully slides down into the bottom track.
• Wire Racks – Slide the wire racks into the bracket on the inner side of the pie warmer
• Doors. Angle the door and slide the glass up and into the top track. One the glass is high enough, level the glass
evenly into the unit and slowly and carefully slides down into the bottom track. Repeat for the second door.